Home Blog Page 2

Cream Cheese and Tomato Pasta: Easy, Creamy Italian Recipe

0

Learn how to make cream cheese and tomato pasta—creamy, tangy, quick! Step-by-step recipe, cherry tomato version, and expert cooking tips inside.

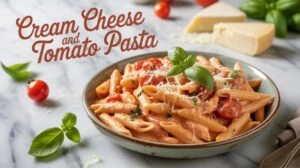
Cream cheese and tomato pasta is a simple, comforting dish that combines mild, creamy cheese with fresh, bright tomatoes. It’s quick to make, tastes fresh and indulgent at the same time, and works as a weeknight dinner or a relaxed weekend meal.

This dish gives you a creamy sauce without heavy cooking — ideal if you want great taste with minimal fuss. If you like a slightly fresher, brighter bite, try the cream cheese cherry tomato pasta variation covered below.

Now, in this article I’ll show you exactly what to buy, how much to use, every small step from chopping to serving, key production method notes for the sauce, how to control milk fat and higher fat content choices, and the most common mistakes I made (and fixed) so your dish turns out great every time.

Why cream cheese and tomato pasta works

Let’s begin with the idea behind the dish so you know what to expect. The pairing of soft, mild-tasting cream cheese and tomatoes creates a sauce with a gentle, creamy texture and a bright tomato taste. Because cream cheese is a fresh cheese with a mild profile, it doesn’t overpower the tomatoes — instead it softens acidity and gives a silky mouthfeel that clings to pasta.

Now that we know why the combo is appealing, let’s answer the most common beginner question directly: can you make a restaurant-style, smooth sauce at home with cream cheese? Yes — by controlling heat, warming the dairy, and using pasta water to bind the sauce, you get a glossy, well-emulsified finish. I’ve cooked this many times; the same three tricks (warm cheese, reserved pasta water, low heat) fixed nearly every problem I initially had.

Next, we’ll go through precise ingredients, explain why each matters (including decisions about milk and cream and milk fat), and then I’ll walk you step-by-step through the exact cooking process so nothing is left out.

Ingredients — what to buy and why (exact quantities for 4 people)

Here’s a simple shopping list and the reasoning behind each choice. Keep every ingredient on hand before you start.

  • Dry pasta: 350 g (12 oz) — penne, fusilli, rigatoni or farfalle (shapes that hold sauce). This amount serves 4 people comfortably.
  • Cream cheese: 200 g (7 oz) — full-fat for the creamiest result. If you prefer lighter, use low-fat but expect less silky texture.
  • Cherry tomatoes: 300 g for the cherry tomato version OR 400 g canned diced tomatoes for a cooked classic. Cherry tomatoes give bursts of sweetness and color.
  • Olive oil: 2 tbsp — for sautéing.
  • Butter (optional): 1 tbsp — adds richness and helps finish the sauce.
  • Garlic: 2 cloves, minced — aroma and depth.
  • Onion or shallot: 1 small, finely chopped (optional) — builds flavor base.
  • Fresh basil or parsley: a handful, chopped — finish and freshness.
  • Salt & freshly ground black pepper: to taste.
  • Parmesan (optional): 30–50 g grated for finishing.
  • Reserved pasta water: about 250 ml (1 cup) — keep this before draining.
  • Optional protein/vegetables: 150 g shredded cooked chicken, 100 g sautéed mushrooms, or a handful of spinach.

Why these quantities? 350 g pasta with 200 g cream cheese and 300 g tomatoes balances sauce and pasta so the dish is creamy but not overly heavy. Adjust slightly if you know your diners like saucier or drier plates.

Quick notes on cream cheese and tomato choices

  • Cream cheese is a soft, fresh cheese with a mild-tasting profile — it blends without masking the tomato flavor. Pre-flavored or whipped cream cheeses often contain stabilizers; block-style cream cheese melts more reliably.
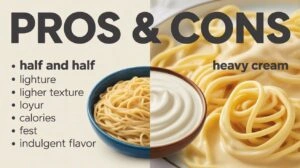
  • If you prefer richer mouthfeel, add 50–100 ml cream (this increases milk fat and higher fat content, making the sauce silkier). For a lighter option, use low-fat cream cheese and replace some of the cream with warm milk.
  • Cherry tomatoes vs canned: Cherry tomatoes burst and give freshness, color, and a sweet pop — perfect for the cream cheese cherry tomato pasta variant. Canned tomatoes yield a more uniform, saucy base and are great if tomatoes aren’t in season.

Step-by-step method to make cream cheese and tomato pasta

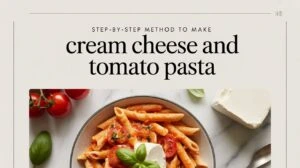
This is the heart of the guide. I’ll give explicit timing, temperatures, and small tips I learned from real cooking experience so your sauce never clumps or separates. Read it through before you start.

Prep (10 minutes)

  1. Remove cream cheese from the fridge and cut into 1–2 cm cubes — let it sit to reach room temperature (about 15 minutes recommended). Warming slightly helps it melt smoothly.
  2. Halve the cherry tomatoes (if using), or open your canned tomatoes and lightly mash them.
  3. Finely chop the onion/shallot and mince the garlic. Grate any finishing cheeses.
  4. Fill a large pot with water and bring to a rolling boil — we’ll salt it right before adding pasta.

Why: having ingredients ready prevents overcooking and keeps the sauce temperature controlled — critical when working with dairy.

Cook the pasta (timing)

  1. Add salt to boiling water (about 1 tbsp for a large pot). Add 350 g pasta.
  2. Cook to al dente — usually 1–2 minutes less than package time. For example, if the package says 9–11 minutes, aim for 8–9 minutes.
  3. Before draining, reserve 250 ml (1 cup) of pasta cooking water; set aside. Drain pasta and toss briefly with a tiny drizzle of olive oil to prevent sticking.

Why: al dente protects texture; reserved water is starchy and helps emulsify the sauce.

Make the tomato base (5–8 minutes)

  1. In a wide skillet, heat 2 tbsp olive oil over medium heat. Add chopped onion and cook 3–4 minutes until translucent.
  2. Add minced garlic and cook for 20–30 seconds — do not brown (browned garlic becomes bitter).
  3. Add halved cherry tomatoes and a pinch of salt. Cook, stirring occasionally, until they blister and begin to release juices (about 5–7 minutes). If using canned tomatoes, simmer for 6–8 minutes to reduce excess liquid.

My note: The first time I tried this I used high heat to speed up cooking and burnt the garlic — the whole sauce tasted off. Medium heat is patient but pays off.

Bring in the cream cheese (the crucial stage)

  1. Reduce heat to low. Add the cubed cream cheese a few pieces at a time, stirring gently after each addition. The goal is to melt the cream cheese slowly into the tomato juices.
  2. If the mixture feels too thick or clumpy, add 2–3 tablespoons of the reserved pasta water and stir; repeat until smooth. Use more water if needed — the sauce should be glossy and able to coat pasta.

Key concept: Never add cold cream cheese to a super-hot pan — it can clump. Warm the pan slightly and add in small batches. This is the single biggest mistake I made early on; the cure was simple: lower the heat and whisk in small amounts of liquid.

Adjust texture and seasoning (1–2 minutes)

  1. Taste and season with salt and fresh black pepper. Add a pinch of crushed chili flakes if you like a little heat.
  2. If you want extra richness, stir in 1 tbsp butter or 30–50 ml cream now (optional). This increases milk fat and gives a silkier finish.

Combine pasta and sauce (1–2 minutes)

  1. Add drained pasta directly to the skillet and toss gently so each piece is coated. Use tongs or a spatula — do not overwork the pasta.
  2. If the sauce seems too thick, add reserved pasta water a tablespoon at a time until the sauce clings to the pasta evenly.

My experience: tossing for 30–60 seconds off the direct heat helps the sauce settle and prevents overcooking.

Finish and serve (30 seconds)

  1. Remove from heat and stir in chopped fresh basil or parsley.
  2. Plate and top with grated Parmesan and an extra grind of pepper. Serve immediately.

Serving tip: garnish with whole basil leaves and a drizzle of extra virgin olive oil for shine.

The cherry tomato variant (cream cheese cherry tomato pasta) — what changes and why

If you want a brighter, fresher plate, go with cream cheese cherry tomato pasta. The differences are:

  • Use 300 g halved cherry tomatoes instead of canned. They cook quickly and burst, creating a fresh, colorful sauce with bits of tomato flesh and skin — visually appealing and lighter in taste.
  • Cook tomatoes just until they blister and begin to collapse (5–7 minutes). Do not overcook or they’ll lose texture.
  • Because cherry tomatoes are sweeter and less watery than some canned tomatoes, you may need slightly less pasta water to reach the desired consistency.

Variations and additions (ideas you can use right away)

These are tested by me and simple to add.

  • Protein boost: Add shredded rotisserie chicken (150 g) or sautéed shrimp (150 g). Warm them through in the sauce before adding pasta.
  • Vegetable mix: Add mushrooms, bell peppers or baby spinach. Sauté mushrooms first until browned, then set aside; add back before combining.
  • Garlic-butter finish: After tossing, stir in 1 tbsp butter for gloss and richness.
  • Lighter swap: Use 150 g cream cheese + 100 g plain Greek yogurt (add yogurt off heat) for tang and protein.
  • Herb twist: Stir in a spoon of pesto at the end for basil punch.
  • Spicy: Add a teaspoon of crushed red pepper or a fresh chopped chili with garlic.

These small changes transform the dish from weeknight comfort to a party-worthy main.

Common mistakes, causes and exact fixes 

I’ll list every problem you might meet and give the exact fix — these are the real issues I encountered and solved.

Problem A — Sauce clumps or becomes grainy

  • Cause: adding cold cream cheese to very hot sauce or overheating after dairy is added.
  • Fix: remove pan from heat, add 1–2 tbsp warm reserved pasta water or warmed milk, whisk slowly until smooth. Next time, cut cream cheese into small cubes, add gradually on low heat.

Problem B — Sauce separates, oily layer forms

  • Cause: too high heat or excessive fat without enough starch/water to bind.
  • Fix: whisk in hot pasta water slowly to re-emulsify. Lower heat and add a small knob of butter to bring back cohesiveness.

Problem C — Pasta is mushy

  • Cause: overcooking or letting pasta sit in sauce too long.
  • Fix: always cook al dente; if mushy already, serve immediately and avoid baking. Next time, reduce cooking time by 1–2 minutes.

Problem D — Sauce too watery

  • Cause: very juicy tomatoes or too much reserved water.
  • Fix: simmer for a few minutes to reduce, or add a small spoon of cream cheese or grated hard cheese to thicken. For immediate correction, lift the lid and increase heat briefly, stirring constantly.

Problem E — Sauce bland

  • Cause: under-salting pasta water or not seasoning sauce.
  • Fix: season sauce gradually and taste; a little grated Parmesan at the end raises umami.

These fixes are the quickest ways to rescue a dish during cooking. I learned each under pressure — once I accepted the need to taste and correct early, my results improved dramatically.

Nutritional Information — Cream Cheese and Tomato Pasta

We’ve covered all the common mistakes, causes, and exact fixes, so your pasta turns out perfect every time. Now, let’s take a closer look at the nutrition behind this comforting dish. Here’s a quick breakdown of what one serving of cream cheese and tomato pasta provides.

NutrientPer Serving (Approx.)Details / Source
Calories520 kcalFrom pasta, cream cheese, olive oil, and cherry tomatoes
Carbohydrates58 gMainly from pasta and tomatoes
Protein15 gFrom pasta, fresh cheese, and milk and cream content
Fat24 gMostly from milk fat in cream cheese and olive oil
Saturated Fat12 gFrom higher fat content cream cheese
Cholesterol50 mgFrom dairy ingredients
Fiber4 gFrom cherry tomatoes and herbs
Sugars7 gNatural sugars from tomatoes and milk
Calcium160 mgSupplied by milk-based food like cream cheese
Iron1.5 mgFrom pasta and tomatoes
Sodium420 mgFrom cheese, salt, and seasoning
Vitamin C18 mgFrom fresh cherry tomatoes
Vitamin A800 IUFrom tomatoes and herbs
Potassium480 mgFrom tomato base and pasta
Trans Fat0 gNone when using pure olive oil

Storage, reheating, and shelf-life (practical details)

Leftovers are normal — here’s how to keep them good.

  • Refrigerate leftovers in an airtight container for 2–3 days. Because of dairy, don’t keep it much longer.
  • Reheat on the stove over low heat with a splash of water or milk to loosen the sauce. Stir gently until just warm. Avoid high heat.
  • Freezing is not recommended (cream cheese texture can change). If you must freeze, freeze only the tomato base (without dairy) and add fresh cream cheese when reheating.

Serving suggestions and pairings

A few last pro tips from my kitchen experiments:

  • Fresh green salad with lemon vinaigrette brightens the meal.
  • Garlic bread or crusty baguette complements creaminess.
  • Wine pairing: a crisp white like Pinot Grigio or a light rosé; if you added pancetta or bacon, a light red (Beaujolais) works.
  • For a balanced plate, add a side of roasted vegetables or a simple sauté of greens.

FAQs (Cream Cheese and Tomato Pasta)

1. Can I make cream cheese and tomato pasta without olive oil?

Yes, you can replace olive oil with butter or even a light drizzle of neutral oil like sunflower oil. However, olive oil adds a distinct Mediterranean aroma and is traditional in most Italian food recipes. Butter makes the sauce richer and creamier but slightly heavier.

2. What’s the difference between cream cheese and mascarpone in pasta sauces?

Mascarpone has a higher fat content and a sweeter, silkier flavor, while cream cheese is more tangy and mild-tasting. If you substitute mascarpone, reduce other fats in the dish (like butter or cream) to keep balance.

3. Can I bake cream cheese and tomato pasta like a casserole?

Absolutely! After preparing the sauce and combining it with pasta, transfer to a baking dish, sprinkle with Parmesan or mozzarella, and bake for 15–20 minutes at 180°C (350°F) until golden. This gives a crisp top and deeper flavor — a fun twist on the traditional recipe.

4. How can I make this recipe vegan or dairy-free?

Use vegan cream cheese made from soy, almonds, or cashews. Replace milk and cream with oat milk or coconut cream. The sauce will still have a smooth texture, but the flavor becomes nuttier and lighter.

5. Why does my sauce taste too tangy or sour?

This happens if your tomatoes are very acidic. To balance, add ½ teaspoon of sugar or a splash of milk and cream to soften acidity. A little butter also helps round the taste and create smoother flavor harmony.

Final thoughts: Cream Cheese and Tomato Pasta

Cooking cream cheese and tomato pasta is truly about balance — between creamy richness and tomato freshness, between simplicity and satisfying flavor. You’ve learned the complete process step by step, from choosing fresh cheese and understanding its production method to selecting cherry tomatoes for natural sweetness and making small adjustments for perfect texture every time.

Robust Inspired Tomato Sauce: Homemade Flavorful Base

0

Robust inspired tomato sauce — a homemade, flavorful tomato base made with simple ingredients, perfect for spaghetti, pizza, salsas, and pasta dishes.

Robust inspired tomato sauce is a hearty, slow-simmered sauce that brings bold, concentrated tomato taste to any dish. It’s primarily from tomatoes but built to deliver a deeper, fuller rich flavor than a quick marinara. 

This recipe is the practical method to make a truly robust inspired sauce at home, using both fresh and canned / jarred options. Follow the step-by-step below and you’ll end up with a balanced sauce that works as spaghetti sauce, a pizza taste base, or a base for sauces in many cuisines and dishes.

In this article I’ll give you a clear ingredient list, explain why certain tomatoes work better (and when tomato season or canning season matters), walk through every prep and cooking step in detail (blanching, sautéing aromatics, simmering, finishing), show how to get the right sauce consistency, and explain storage, freezing, and smart variations.

What is Robust Inspired Tomato Sauce?

Let’s start by being specific. A Robust Inspired Tomato Sauce is an Italian recipe of tomato sauce that’s thicker, deeper, and more layered than a quick marinara. It is primarily from tomatoestomatoes as a main ingredient — but is built to be more concentrated, so it works well as bases for sauces and is easily served as a main component in many cuisines and dishes.

Compared to a thin canned tomato sauce, this version aims for a thick tart balance and a bold flavorful profile. It’s perfect for spaghetti sauce, as the base for pizza (giving that true pizza taste), and for making richer dishes like lasagna or meatballs. In short: it’s the kind of tomato sauce people reach for when they want depth, body, and character.

Ingredient list (serves 4–6)

Below is the ingredient list you’ll need. I give both fresh and canned options — use what’s best for your season and pantry.

Serves: 4–6 people (about 4 cups / 1 liter finished sauce)

Fresh-tomato option (use in tomato season):

  • Vine ripened tomatoes — 2.0–2.2 lb (900–1000 g) peeled and chopped (or 1.2–1.5 kg whole before prep). Or substitute with: two 28 oz cans diced tomatoes, if out of season.
  • Tomato purée — 1 cup (240 ml). (tomato purée helps the body without thinning.)
  • Tomato paste — 2 tablespoons (to deepen color and composition to thicken).
  • Extra virgin olive oil — 3 tbsp.
  • Large onion — 1 medium (about 150 g), finely diced.
  • Garlic — 3–4 cloves, minced. (aromatics)
  • Carrot — 1 small, finely grated (optional — natural sweetness).
  • Salt — 1.5 tsp (adjust).
  • Black pepper — ½ tsp.
  • Sugar — ½ tsp (optional; balances acidity).
  • Bay leaf — 1.
  • Dried oregano — 1 tsp.
  • Fresh basil — handful, torn (add near the end). (herbs, savory herbs)
  • Water or tomato juice, — ¼ cup if needed to adjust thinness.

Canned / pantry option (fast & consistent):

  • Two 28 oz cans diced tomatoes, (or one 28 oz crushed and one 15 oz diced tomatoes,)
  • 1 cup tomato purée
  • 6 oz tomato paste (or start with 2–3 tbsp and adjust).
  • Other aromatics and herbs as above.

Optional enhancers:

  • Red pepper flakes for heat.
  • Butter or cream for a richer finish (small knob of butter or 2 tbsp cream).
  • A splash of red wine or balsamic for complexity.
  • Use grape or cherry tomatoes, roasted for sweeter notes, or red hot house or Roma tomatoes for meatier flesh.

Note: If you use fresh tomatoes, choose those with low high water content and not overly watery; soft flesh is good, but too watery tomatoes need longer reduction or the help of tomato paste.

Tools and quick tips before we start

You’ll need:

  • Heavy-bottomed pot or sauté pan (for even heat).
  • Wooden spoon and ladle.
  • Hand blender (or regular blender) if you want smooth texture.
  • Airtight container or jars for storage.

A quick tip: if you plan to can or preserve for canning season, sanitize jars and lids and follow safe canning procedures. Otherwise, freezing is easy and reliable.

Step-by-step method — follow these carefully

We’ll go slowly — first we prep, then we build flavor, then we finish.

Step 1 — Prep the tomatoes (if using fresh)

  • Bring a large pot of water to a rolling boil and prepare a bowl of ice water.
  • Score the bottom of each vine ripened tomato with a shallow X.
  • Working in batches, drop tomatoes into boiling water for exactly 30–60 seconds or until skins start to split. Time carefully.
  • Remove and plunge into ice water to stop cooking. Peel the skins — they should come off easily.
  • Halve tomatoes, squeeze out the seeds if you want less pulp, and roughly chop. Save juices — they’re full of flavor.

Why: blanching makes peeling fast and removes loose skins; deseeding reduces excess liquid and bitterness from seeds. In tomato season, fresh tomatoes give the brightest flavor; out of season, use canned or roasted grape or cherry tomatoes, for intensity.

Step 2 — Build the flavor base (sauté aromatics)

  • Heat 3 tbsp olive oil over medium-low heat in your heavy pan. Low heat extracts sweetness.
  • Add the diced onion with a pinch of salt. Cook slowly, stirring every few minutes, until translucent and just turning golden — about 8–12 minutes. This is slow caramelization — don’t rush with high heat.
  • Add minced garlic and cook ~30–45 seconds until fragrant. Avoid browning the garlic — burnt garlic tastes bitter.
  • If using grated carrot, add it now and cook for 1–2 minutes to soften. This adds natural sugar and reduces the need for added sugar later. (aromatics)

From my experience: I rarely rush the onion step. That extra 5 minutes of care gives a noticeable depth.

Step 3 — Add tomatoes, tomato purée, and tomato paste

  • Add your chopped fresh tomatoes (or diced tomatoes, from a can), then stir in the tomato purée.
  • Add tomato paste — start with 2 tbsp; it deepens color and improves the body. Stir paste into the oil and aromatics for a minute before adding liquids — this “blooming” releases its sweet, cooked flavor.
  • Add bay leaf, dried oregano, ½ tsp black pepper, and 1 tsp salt (you’ll adjust later). If using a splash of red wine, add now so the alcohol cooks off.

Tip: When using canned tomatoes, check for extra salt or sweetness. Brands vary.

Step 4 — Bring to a simmer and reduce (this creates composition to thicken)

  • Bring the pot to a gentle simmer, then lower heat to maintain a bare simmer. If you cover totally the sauce will steam and stay thin — so cook partially covered or uncovered to evaporate water.
  • Simmer for 35–60 minutes. Start tasting at 25–30 minutes. Stir every 5–10 minutes to prevent sticking. The sauce should thicken and the pulp will break down.
  • If your tomatoes had high water content (very juicy), expect closer to 50–60 minutes of simmering. Add a splash of tomato juice, if it gets too thick before you’re ready.

Science note: slow evaporation concentrates sugars and flavors, turning watery tomatoes into a rich flavor sauce. Tomato paste accelerates body-building.

Step 5 — Check texture: chunks, crushed, or smooth

  • Chunky (rustic): leave the sauce as-is — you’ll have visible chunks of tomato. Great for a rustic pasta or stew.
  • Crushed: use a potato masher in the pot to break down large chunks, leaving small bits of pulp.
  • Smooth: use a hand blender directly in the pot and blend to desired sauce consistency. Alternatively, transfer to a blender in batches. For silky texture, pass through a fine sieve.

From my experience: I blend half and leave half chunky for the best mouthfeel in lasagna — you get body plus creaminess.

Step 6 — Final seasoning & finish

  • Taste carefully. Add salt, pepper, and up to ½ tsp sugar only if needed to tame milder citric acid or bright acidity.
  • Add torn fresh basil and a small knob of butter off the heat for sheen and rounded flavor. Fresh herbs should be added late so they keep their aroma.
  • If you want deeper pizza taste, simmer a bit longer and add extra tomato paste (1 tsp at a time).

Quantities & scaling (how much for how many people)

This batch (the ingredient measures above) yields about 4 cups of finished sauce — enough for:

  • 1 lb (450 g) dried pasta for spaghetti sauce (serves ~4).
  • Or 2 medium homemade pizzas (thin layer each).
  • Or 1 standard lasagna tray (as one layer of filling).

To feed more:

  • Double to serve 8–10 people — the flavors often improve after a day, so larger batches are practical.
  • For meal prep and freezing, quadruple and freeze in 1–2 cup portions.

Storage, canning season tips, and freezing

Now that you understand how much sauce this recipe yields and how to scale it, let’s move on to the next important part — how to keep it fresh for later use. After all, making a robust sauce in bigger batches only makes sense if you know how to store it properly.

  • Refrigeration: Cool completely, then transfer into an airtight container. It will stay fresh for up to 5 days.
  • Freezing: Divide into freezer-safe bags or jars in 1–2 cup portions. Flatten bags to save space, label with the date, and freeze for up to 3–4 months. Thaw overnight and reheat gently.
  • Canning Season: If you’re preparing large batches during peak tomato season, you can preserve sauce for months by canning. Use sterilized jars, follow safe water-bath canning methods for high-acid sauces, or pressure canning for sauces with added low-acid ingredients.

Quick reminder: jarred and canned store-bought sauces are convenient, but nothing beats fresh or properly home-canned sauce for depth and control.

How to Use Robust Inspired Tomato Sauce

This sauce is deliberately versatile and is used on many dishes:

  • As a spaghetti sauce over pasta.
  • As a pizza taste base — spread a thin layer, top, and bake.
  • As bases for sauces such as meat ragù or vegetable stews.
  • For Mexican salsas and Italian pasta dishes, tweak herbs and spice level: add cumin and chili for a Mexican twist or extra oregano and basil for Italian flair. (Mexican salsas and Italian pasta dishes)
  • As a dip for bread, garlic bread, or mozzarella sticks (served as a dipping sauce).
  • In soups and casseroles where you want a tomato backbone.

Want variations? Let’s explore.

Variations & Twists (variation)

  • Roasted Tomato Version: Roast grape or cherry tomatoes, or halved Vine ripened tomatoes at 400°F for 25–30 minutes until caramelized, then blend into sauce for a deep, sweet profile.
  • Spicy Version: Add red pepper flakes, fresh chilies, or a dash of hot sauce for heat.
  • Creamy Version: Stir in butter or cream for a richer finish — a nice contrast to thick tart acidity.
  • Vegetable-Loaded: Add mushrooms, zucchini, or bell peppers to make a heartier vegetable sauce.
  • Rustic Chunky vs Smooth Crushed: Leave chunks for texture or crushed for a smoother spreadable sauce. Both are valid — choose the sauce consistency you prefer.

Practical tips & pro techniques (so your sauce is consistent every time)

  • Use a heavy-bottomed pan to avoid hot spots and burning.
  • Add dried herbs early, fresh herbs at the end.
  • Taste frequently. Adjust heat and salt incrementally.
  • For the best flavorful results, try one small test batch in different styles (roasted vs. fresh) — you’ll notice differences.
  • Keep some tomato paste on hand: it’s the easiest way to control thickness.

From my experience: when I make a double batch and freeze portions, family dinners become simple and fast — the sauce improves after a day in the fridge, and the pulp softens in the reheated sauce.

Quick checklist (ready-to-use)

  • Prep tomatoes: fresh peeled or canned ready.
  • Sauté aromatics (onion + garlic).
  • Add tomatoes, tomato purée, tomato paste.
  • Add savory herbs and simmer for 35–50 min.
  • Adjust sauce consistency (blend or reduce), finish with fresh herbs.
  • Cool and store in an airtight container or freeze.

FAQs About Robust Inspired Tomato Sauce

Q: Can I use canned tomatoes instead of fresh?

Yes — two 28 oz cans diced tomatoes, plus tomato paste and tomato purée give a consistent result and are great out of tomato season.

Q: How do I naturally thicken the sauce?

Long, slow reduction and adding tomato paste are the simplest. Simmer uncovered to encourage evaporation and concentration.

Q: How can I make it less acidic?

A small pinch of sugar, a splash of cream, or a bit of butter at the end balances acidity. Choosing tomatoes with milder citric acid also helps.

Q: How long will it last?

Refrigerated in an airtight container for up to 5 days; freezing extends life to months.

Q: Is sugar necessary?

Not necessary — an optional tool for balance. Natural sweetness from carrots or grape or cherry tomatoes, can be used instead.

Conclusion

You now have everything to make an authentic, robust inspired tomato sauce that’s both flavorful and dependable. Whether you’re aiming for the perfect spaghetti sauce, the ideal pizza base with that familiar pizza taste, or a versatile tomato base for cuisines and dishes from Italy to Mexico, this method gives you control. Follow the step-by-step method, use the ingredient list as your guide, and adjust to taste — it’s easy to maintain and rewarding to make.

Try it once and you’ll see why home cooks prefer this over plain store-bought jars. Make a batch, store half in the fridge and freeze the rest — then come back and tell us which variation you loved most.

Pasta Alternatives for Diabetics | Healthy Low-Carb Swaps

0

Discover tasty pasta alternatives for diabetics — from zucchini noodles to shirataki and lentil pasta. Eat smart, control blood sugar, and enjoy flavor!

If you’ve been told to cut down on pasta because of high blood sugar, you’re definitely not alone. For many of us, pasta is more than a meal — it’s comfort in a bowl. But for diabetics, traditional pasta can cause unwanted blood sugar spikes because of its high carbohydrate content and refined flour base.

So, the big question is: can you still enjoy “pasta-like” meals without affecting your glucose levels? The short answer is yes — you absolutely can!

In this article, we’ll explore the best pasta alternatives for diabetics, including some of my personal favorites I’ve tested in my own kitchen. You’ll learn how each substitute affects your blood sugar, how to cook it perfectly, and what to expect in terms of texture and taste. We’ll also discuss practical cooking tips, portion control, and how these swaps can help manage diabetes effectively.

So, let’s dive right in and see which pasta alternatives are worth trying — and which might surprise you with how delicious they can be.

Why Diabetics Should Try Pasta Alternatives

Before we jump into the list, let’s understand why you need to look for pasta alternatives in the first place. Traditional pasta — whether made from white flour or even whole wheat — is rich in carbohydrates that quickly convert to glucose in your bloodstream. This can lead to sharp spikes in blood sugar levels, something diabetics have to manage carefully.

Most pasta alternatives, on the other hand, are made from low-glycemic ingredients such as vegetables, legumes, or konjac root. These ingredients not only help regulate blood sugar but also offer fiber, protein, and nutrients that make your meals more balanced and satisfying.

From my personal experience, switching to healthier pasta substitutes didn’t just help with sugar control — it also made me feel lighter after meals. And over time, I noticed fewer cravings and better digestion.

So, if you love pasta but want to stay healthy, these alternatives will let you have both comfort and control on your plate.

How to Make Top 6 Pasta Alternatives for Diabetics (Step-by-Step Guide)

Now that we’ve talked about why pasta alternatives matter, let’s move into the fun part — how to actually make them.
This section is where I’ll walk you through each type — how I personally prepare them, what ingredients I use, what to avoid, and little tricks that make them taste amazing.

You don’t need fancy equipment or complicated steps — just a bit of patience, the right texture, and the right sauce pairing.
Let’s get started.

1. Zucchini Noodles (Zoodles)

Zoodles are one of my absolute favorites. They’re quick, light, and fresh — and the best part is, you can make them in under 10 minutes.

What You’ll Need

  • 2 medium zucchinis (for 2 servings)
  • 1 tablespoon olive oil
  • 1 garlic clove, minced
  • Salt and black pepper to taste
  • Optional: a handful of cherry tomatoes, lemon zest, or grated parmesan

Step-by-Step Instructions

  1. Spiralize the zucchini:
    I use a handheld spiralizer — it’s affordable and easy to clean. If you don’t have one, a vegetable peeler works fine too (you’ll get flat ribbons instead of noodles).
    Spiralize from the top to the bottom of the zucchini until you reach the core (the seedy part). Don’t include that — it tends to get mushy.
  2. Remove excess moisture:
    After spiralizing, I always sprinkle a pinch of salt on the zoodles and let them rest in a colander for 10–15 minutes. This step is super important because zucchini releases a lot of water when cooked.
    Then I gently squeeze them with paper towels — not too hard, just enough to get rid of extra moisture.
  3. Quick sauté:
    In a non-stick skillet, heat olive oil over medium heat. Add minced garlic and sauté for 30 seconds until fragrant.
    Then, toss in the zoodles and cook for just 2–3 minutes. I never overcook them — they should still have a little bite (like al dente pasta).
  4. Season and serve:
    Add salt, pepper, and a squeeze of lemon juice. Sometimes I throw in halved cherry tomatoes for color and flavor.
    Top with a sprinkle of parmesan or nutritional yeast for a cheesy note.

My Tip:

When I first started making zoodles, I used to cook them longer, thinking it’d make them softer. Big mistake! They turned soggy and watery. Now I always keep the cooking time short — it keeps them firm and pasta-like.

2. Shirataki Noodles (Konjac Noodles)

These are what I call “magic noodles.” They’re made from the konjac root and contain almost zero carbs or calories — perfect for anyone managing diabetes.

What You’ll Need

  • 1 package shirataki noodles (7 oz or 200g)
  • 1 teaspoon olive oil
  • 1 garlic clove, minced
  • ½ teaspoon soy sauce or tamari (optional)
  • Salt and pepper to taste

Step-by-Step Instructions

  1. Rinse thoroughly:
    Shirataki noodles come packed in liquid that has a fishy smell — completely normal!
    I rinse them under cold water for at least 1–2 minutes while gently tossing with my hands.
  2. Boil to neutralize odor:
    Bring a pot of water to a boil and add the rinsed noodles. Boil for about 2–3 minutes.
    This helps remove any leftover smell and softens the texture slightly.
  3. Dry roast (the key step):
    Drain the noodles well and transfer them to a dry non-stick pan.
    Cook on medium heat (without oil) for about 5 minutes — this step is what changes their texture from rubbery to pasta-like.
  4. Add seasoning:
    Once dry, add a drizzle of olive oil, minced garlic, and a dash of soy sauce. Toss well.
    I like to add steamed veggies or a few drops of sesame oil if I’m making an Asian-style dish.

My Tip:

When I first used shirataki noodles, I skipped the dry roast step — and they felt slippery and strange. Now, roasting them dry is non-negotiable. It makes the biggest difference in flavor and mouthfeel.

3. Spaghetti Squash

If you want something that looks and twirls like spaghetti, this is the one. It’s warm, cozy, and naturally slightly sweet — I love it with marinara or garlic butter.

What You’ll Need

  • 1 medium spaghetti squash (serves 2–3 people)
  • 1 tablespoon olive oil
  • Salt and pepper to taste
  • Optional: ½ cup marinara sauce, grated cheese, or herbs

Step-by-Step Instructions

  1. Preheat and prep:
    Preheat your oven to 400°F (200°C). Slice the squash in half lengthwise — I usually microwave it for 3 minutes first to soften it (it’s hard to cut raw).
    Scoop out the seeds and stringy bits.
  2. Season and roast:
    Brush each half with olive oil, sprinkle with salt and pepper, and place them cut side down on a baking tray lined with parchment paper.
    Roast for 35–40 minutes until the flesh is tender when poked with a fork.
  3. Scrape into strands:
    Let it cool slightly, then use a fork to gently scrape out the flesh — it’ll naturally form spaghetti-like strands.
    I always find this part oddly satisfying!
  4. Add sauce and serve:
    Toss with marinara or pesto, or simply drizzle with olive oil and herbs.

My Tip:

Sometimes I roast an extra squash and keep the strands in an airtight container for up to 4 days. They reheat beautifully and make weekday dinners much faster.

4. Chickpea Pasta

This one’s for those who want a heartier, protein-rich pasta alternative that’s closer to the real thing in taste and texture.

What You’ll Need

  • 1 cup dried chickpea pasta
  • 1 tablespoon olive oil
  • 1 clove garlic
  • ½ cup vegetables (broccoli, spinach, or bell peppers)
  • Salt and pepper

Step-by-Step Instructions

  1. Boil the pasta:
    Bring a pot of water to a boil, add a pinch of salt, and cook the chickpea pasta according to the package instructions — usually 6–8 minutes.
    Stir occasionally to prevent sticking.
  2. Don’t overcook:
    I always taste-test around minute 6. Overcooked chickpea pasta can get mushy fast, and the texture is key to enjoying it.
  3. Prepare your sauce:
    In a skillet, heat olive oil and garlic. Add your favorite veggies and sauté until tender.
  4. Combine and serve:
    Add the drained pasta directly into the pan and toss everything together. Season well.

My Tip:

The first time I made chickpea pasta, I added too much sauce, which made it soggy. Now, I keep my sauce lighter — olive oil, lemon, and herbs work best to let its nutty flavor shine.

5. Lentil Pasta

Lentil pasta is filling, flavorful, and gives you a nice protein and fiber boost — perfect if you’re trying to stay full without raising your blood sugar.

What You’ll Need

  • 1 cup lentil pasta
  • 1 tablespoon olive oil
  • ½ onion, finely chopped
  • ½ cup tomato sauce or pesto
  • Salt and herbs to taste

Step-by-Step Instructions

  1. Boil the pasta:
    Add lentil pasta to salted boiling water and cook for 8–10 minutes until al dente.
    Drain and rinse lightly with warm water to prevent sticking.
  2. Cook your sauce:
    In a pan, sauté onions in olive oil until translucent. Add tomato sauce and herbs. Simmer for 5 minutes.
  3. Mix it up:
    Toss the lentil pasta into the sauce and stir gently. Add a splash of water if needed to loosen it up.

My Tip:

I sometimes add a spoon of Greek yogurt or cottage cheese to make it creamier without adding too much fat. It gives a nice balance between flavor and health.

6. Cauliflower Rice “Pasta” Bowl

This is my secret trick when I’m craving pasta flavors but don’t want any form of noodles. It’s a low-carb, low-calorie comfort meal that still satisfies.

What You’ll Need

  • 1 small cauliflower head
  • 1 tablespoon olive oil
  • 1 garlic clove, minced
  • Salt, pepper, and herbs
  • Optional: tomato sauce or sautéed mushrooms

Step-by-Step Instructions

  1. Rice the cauliflower:
    Cut the cauliflower into florets and pulse in a food processor until it resembles rice. Don’t over-blend — or it’ll turn mushy.
  2. Cook it:
    Heat olive oil in a skillet. Add garlic and cook for 30 seconds. Add the cauliflower rice and sauté for 5–7 minutes, stirring often.
  3. Flavor it up:
    Add salt, pepper, and herbs like oregano or thyme. If you’re in the mood for an Italian flavor, add a few spoons of tomato sauce and toss.

My Tip:

Sometimes I mix half cauliflower rice with a handful of shirataki noodles — it gives a great balance of texture and volume without carbs.

My Experience Testing These Pasta Alternatives

Over the past year, I’ve tested all these pasta alternatives for both taste and blood sugar response. The biggest lesson I’ve learned? There’s no single “perfect” alternative — it depends on your taste, texture preference, and how your body reacts.

For instance, shirataki noodles were a game-changer for days when I wanted to cut carbs entirely. On other days, chickpea or lentil pasta kept me full and energized. And when I wanted something light and fresh, zoodles were my go-to.

If I had to pick a favorite, I’d say spaghetti squash — because it balances texture, flavor, and satisfaction beautifully.

Cooking Tips for Each Substitute

Here are a few general tips to help you make the most of these pasta alternatives:

  • Avoid overcooking: Most plant-based substitutes get mushy if cooked too long.
  • Use strong sauces: Since many alternatives have mild flavors, sauces like garlic butter, marinara, or pesto add depth.
  • Mind your portions: Even low-carb pasta can raise blood sugar if eaten in excess.
  • Balance your plate: Add lean proteins (like chicken or tofu) and healthy fats (olive oil, nuts) for a complete diabetic-friendly meal.

I’ve shared everything you need to know about pasta alternatives for diabetics based on my own experience and research. But if you’d like to explore more user insights and real-life experiences, you can visit this Reddit thread where people managing diabetes discuss their favorite pasta substitutes and share what actually worked for them.

How Pasta Substitutes Help Manage Diabetes

So, how do these swaps actually help your body?
Pasta alternatives work by reducing the glycemic load of your meals, meaning your blood sugar rises more slowly after eating. They’re also rich in fiber, which supports digestion and helps control appetite — two key benefits for people with diabetes.

Many of these substitutes also provide plant-based protein, which helps maintain muscle mass while keeping carbs in check. In short, they allow you to enjoy the satisfaction of pasta without the blood sugar spikes.

FAQs About Pasta Alternatives for Diabetics 

Can diabetics eat shirataki noodles?

Yes! They’re one of the best options — virtually zero carbs and calories.

What’s the best pasta substitute for diabetics?

It depends on your taste. Zoodles and spaghetti squash are great for light meals, while chickpea and lentil pasta are ideal for higher protein needs.

Are vegetable-based pastas gluten-free?

Most of them are naturally gluten-free, making them perfect for both diabetics and those with gluten intolerance.

Can I mix regular pasta with alternatives?

Absolutely! Mixing small portions of whole-grain pasta with shirataki or zoodles can help you adjust to the change gradually.

Conclusion: Pasta Alternatives for Diabetics 

Managing diabetes doesn’t mean giving up your favorite foods — it’s about making smarter swaps. With these pasta alternatives for diabetics, you can still enjoy comforting, flavorful meals while supporting your health goals.

Whether you choose zucchini noodles for freshness, shirataki noodles for zero carbs, or chickpea pasta for protein power, there’s an option for every craving.

I’ve personally enjoyed experimenting with all these substitutes, and I can confidently say — once you start exploring, you’ll realize that diabetic-friendly meals can be just as delicious and satisfying as the originals.

So go ahead, pick your favorite alternative, try a new recipe tonight, and rediscover pasta in a healthier way!

Spaghetti Squash Carbs vs Pasta — Full Comparison Guide

0

Spaghetti squash carbs vs pasta — clear guide comparing calories, carbs, cooking, storage and recipes so you can choose the best low-carb pasta alternative.

Let’s start from the basics so you won’t be confused. Spaghetti squash carbs vs pasta is a common search when people want a lighter plate without losing the feel of noodles. In simple terms: spaghetti squash is a vegetable spaghetti alternative with far fewer carbs than regular pasta.

Short answer: if you want low-carb pasta alternatives or a gluten-free pasta alternative, spaghetti squash is a smart swap. If you need high energy for workouts or big family meals, traditional pasta still delivers more calories and sustained fuel. 

Now we’ll go step-by-step — what it is, spaghetti squash nutrition, exact carb numbers, how to cook it, storage tips, recipes, and my personal experience in the kitchen. I’ll also show servings and quantities for each recipe (I use amounts for 4 people by default).

What is Spaghetti Squash?

Let’s begin with what you’re actually putting on the plate. Spaghetti squash is a winter squash cultivar that, when cooked, breaks into long strands that look like thin noodles. Because of this, many call it vegetable spaghetti or an alternative to spaghetti and use it as a substitute for pasta.

A few quick facts:

  • It comes in different cultivars, colours, sizes and shapes and sizes — from small to very large squash.
  • Inside are large seeds (like pumpkin seeds) that you scoop out before cooking.
  • It can be found fresh in farmers’ markets and available in many supermarkets during fall and winter, but you can also find it year-round in some stores.

Can you grow it? 

Yes — it’s easy to grow in a home garden, and many people ask: Can I grow spaghetti squash in my garden? — the answer is yes, with warm soil and space for vines. Harvesting gives you a seasonal, homegrown option that’s satisfying and cost-effective.

Now that we know what it is, next we’ll look at the numbers that matter most: nutrition and carbs.

Spaghetti Squash Nutrition Facts

Here are practical nutrition figures to compare fairly. I give numbers per 1 cup cooked (scant) and per 100 g so you can compare with pasta labels.

Spaghetti squash nutrition (approx):

  • Per 100 g: ~31 kcal, carbs 6 g, fiber 1.5 g, protein 0.6 g, fat 0.1 g.
  • Per 1 cup cooked strands (about 155 g): ~48 kcal, carbs 10 g, fiber 2 g, protein 1 g.
  • It’s a source of carotene and vitamins — especially vitamin C and some B vitamins — so it adds micronutrients that plain white pasta often lacks.

Important terms: spaghetti squash glycemic index is low compared to refined pasta, meaning it generally raises blood sugar less. Because of its high water content, the calorie density is low, which helps with satiety per calorie.

What counts as one serving? 

A typical pasta serving is ~75–100 g dry (makes about 1.5 cups cooked). For spaghetti squash, use about 2 cups cooked strands (roughly one medium squash) to feel like a full plate — but carbs will still be much lower.

I came across this really insightful forum post about carbs in spaghetti squash vs. pasta! It’s full of great tips and personal experiences from people who, like me, have just discovered how versatile and delicious spaghetti squash can be.

What is Traditional Pasta?

Before we compare side-by-side, let’s remind ourselves what traditional spaghetti noodles are.

Traditional pasta is usually made from durum wheat semolina mixed with water (and sometimes eggs for fresh pasta). It is an unleavened dough — not yeast-raised — and can be made by hand or by simple machines and industrial extrusion. Pasta comes in dried (long shelf life) and fresh forms and in many shapes and varieties — Italy famously catalogs 310 specific forms historically.

Nutritionally, regular wheat pasta is higher in calories, carbs, and protein than squash. It is often fortified with vitamins and minerals, which reduces risk of low micronutrient intake if you eat pasta regularly. Pasta is a staple food in Italian cuisine, beloved in Italy, and sold as commercially sold pasta in local supermarkets across many countries.

Now let’s put the two side by side with clear numbers.

Nutritional Breakdown: Pasta vs Spaghetti Squash

Below is a simple table for quick reference (values approximate):

Component (per cup cooked)Spaghetti SquashRegular Wheat Pasta
Calories~48 kcal~200 kcal
Carbohydrates~10 g~40–45 g
Net carbs~8 g~38–42 g
Protein~1 g~7–8 g
Fiber~2 g~2–3 g
Vitamins/mineralsVitamin C, carotene, some BOften fortified with B vitamins, iron

Key highlight: spaghetti squash carbs vs pasta — squash typically has about one-sixth to one-fourth the carbs of the same volume of pasta. That makes it a powerful low-carb diet option or a keto-friendly pasta alternative when used thoughtfully.

But numbers aren’t everything: fullness and energy matter. Because pasta delivers more calories and protein, it may keep athletes or very active people feeling fuller and fueled longer. Squash is lighter, good for weight loss or to lower total meal calories.

Cooking Method: Spaghetti Squash vs Pasta

Now for the practical, step-by-step instructions and the mistakes I made (so you don’t repeat them). I explain cooking methods for both so you get the ideal texture and flavor.

A. Cooking Spaghetti Squash — best methods and tips

There are three common ways: roasting (oven), microwaving, and steaming. I prefer roasting for flavor and texture. Here’s a full, foolproof roast method I use for a medium squash that serves 4 people.

Roasted method (best texture and flavor):

  1. Preheat the oven to 200°C (400°F).
  2. Rinse the squash and pat dry. With a sharp knife, cut it lengthwise (longways). Tip: always cut lengthwise to produce long strands; cutting crosswise shortens them.
  3. Scoop out large seeds and membrane with a spoon. (Save seeds to roast like pumpkin seeds — lightly salted and toasted: delicious.)
  4. Drizzle each cut half with 1 tsp olive oil, season with salt and pepper. Place cut side down on a baking sheet lined with foil.
  5. Roast 35–45 minutes depending on size. Check at 30 minutes: if a fork slides in easily and the flesh separates into strands when scraped, it’s ready.
  6. Allow to cool a few minutes, then use a fork to rake out the strands into a bowl.

Common mistakes & what happened (from my tests):

  • Overroasting — I once roasted too long and the strands became watery and limp. Result: sauce pooled and the dish felt soggy. Fix: check early; remove when just tender.
  • Undercooking — scraping too early yields tight, crunchy flesh. Fix: return to the oven a few minutes.
  • Cutting wrong — cut across instead of lengthwise and you get short, messy pieces.

Microwave method (fast)

Pierce skin a couple of times, place in microwave-safe dish, microwave 10–12 minutes (depending on wattage). Rotate and test. Warning: microwaving can cook unevenly.

Steaming (gentle)

Steam halves 20–30 minutes until tender. This keeps moisture and is good if you don’t want caramelization.

Freezing & storage

Cool strands, portion into freezer bags, freeze for up to 3 months. Texture softens slightly on thawing but is fine for cooked dishes. Cooked squash lasts 3–5 days in the fridge.

B. Cooking Pasta — quick refresher (al dente matters)

Pasta is simple but a few rules matter for best results and to minimize unwanted effects on carbs.

Basic method (for 350 g dry to serve 4):

  1. Use a large pot and plenty of water — roughly 4–5 liters for 350 g pasta. Salt generously (it seasons the pasta).
  2. Bring to a rolling boil, add pasta, stir immediately to prevent sticking.
  3. Cook to al dente — firm to bite; follow package time minus 1 minute and taste. Overcooked pasta becomes mushy and releases more starch.
  4. Reserve ½ cup of pasta water before draining — it helps emulsify and thicken sauces.
  5. Drain and toss with sauce immediately.

Common mistakes & effects:

  • Not salting water — pasta tastes bland no matter how good the sauce is.
  • Overcooking — increases starch gelatinization; can raise glycemic response. It also leads to a sticky mouthfeel.
  • Not saving pasta water — sauce may not cling as well and can separate.

Storage: Spaghetti Squash vs Pasta

Spaghetti squash (raw): Whole squash stores well at room temp for weeks if kept cool and dry. Cooked strands last 3–5 days in the fridge; freeze up to 3 months.

Pasta: Dried pasta has a very long shelf life (months/years). Fresh pasta should be refrigerated and used within a couple of days, or frozen. Reheating cooked pasta in sauce is best; dry reheating can dry it out.

Tips: Reheat squash gently with sauce to avoid drying. For pasta, toss with a splash of water or sauce before reheating.

How to Use Spaghetti Squash as Pasta — practical swaps & recipes

If you want practical swaps, here are tested, tasty ways to serve spaghetti squash that feel like pasta meals.

A. Spaghetti Squash Served with Marinara Sauce (my favorite for weeknights)

  • Roast 1 medium squash (see steps above), scrape strands, toss with 2 cups warm marinara, fresh basil, and a sprinkle of grated Parmesan. The strands hold sauce lightly and the bowl feels substantial without heavy carbs.

Tip: Add 150–200 g cooked chicken or sautéed mushrooms for protein and satiety.

B. Half & Half Bowl (best compromise)

  • Cook 200 g dry pasta and roast half a medium squash. Mix equal parts pasta and strands and toss with pesto or tomato sauce. This cuts carbs roughly in half while preserving familiar texture.

C. Creamy Garlic Squash Bake (indulgent but lower carb)

  • Mix roasted strands with sautéed garlic, mushrooms, ½ cup cream or blended cashews, top with cheese, bake for 10–15 minutes. This feels rich but stays lower in carbs than a full pasta bake.

Serving guideline: I plan for 1 medium squash to feed 4 people with sauce and sides, or 350 g dry pasta for 4 servings (≈85 g dry per person).

Spaghetti Squash Carbs vs Pasta: Which Is Healthier?

This depends on goals:

  • For weight loss or low-carb diets (keto-friendly pasta alternatives): spaghetti squash wins due to low calories and carb count. Use it as part of low-carb diet options.
  • For athletes or high-energy needs: pasta provides more calories and carbs for performance and recovery.
  • For gluten-free needs: spaghetti squash is a natural gluten-free pasta alternative.
  • For micronutrients: squash adds carotene and vitamin C, while some pasta is fortified with B vitamins, so both have benefits.

Sauces matter a lot: a creamy Alfredo can add hundreds of calories to squash or pasta. Watch toppings — cheese, oils, and nuts (like roasted pumpkin seeds) change totals.

Personal Tests & Experience — what I tried and learned

I want to be practical and honest. I tested both options in my kitchen for family dinners (I cook for 4 often), and here are real observations.

Test A — Roasted Squash with Marinara (4 people):

  • Used 1 medium squash. Roasted perfectly and scraped out about 4 cups of strands. Tossed with 2 cups marinara and 150 g cooked shrimp. 
  • Result: the dish felt light, everyone liked the texture, and no one felt overly full after. My partner commented that it “didn’t taste like pasta but was tasty and fresher.” I felt energized later — perfect for a non-heavy dinner.

Test B — Classic Pasta with Tomato Sauce (350 g dry for 4):

  • Cooked al dente, tossed with tomato and meat sauce. The plate was filling and satisfying. Afterward, energy lasted longer but it felt heavier to digest. Good choice before a long day or exercise.

A common restaurant problem I noticed: restaurants sometimes serve squash too watery or under-seasoned. My trick: roast for flavor and sprinkle salt after scraping; toss with hot sauce so strands absorb flavor. That simple step fixed many disappointing experiences.

Pros and Cons (Spaghetti Squash Carbs vs Pasta)

CategorySpaghetti SquashRegular Pasta
Calories (per cup)~40~200
Carbs (per cup)7–10 g40–45 g
Protein~1 g~7 g
Fiber~2 g~2–3 g
TextureTender, stringyFirm, chewy
Best ForLow-carb, gluten-freeEnergy meals, classic recipes
Shelf LifeShort (cooked)Long (dried)
TasteMild, slightly sweetNeutral wheat flavor
Cost & AccessSeasonal, mid-costVery cheap, widely available

FAQs About Spaghetti Squash Carbs vs Pasta

Q1: What is spaghetti squash, and how is it different from traditional pasta?

Spaghetti squash is a vegetable that separates into strands when cooked. Pasta is made from grain (durum wheat) and has a different carb profile and texture.

Q2: How is pasta traditionally made?

With semolina or durum wheat flour mixed with water (and sometimes eggs). It is an unleavened dough formed into shapes and varieties and either dried or sold fresh.

Q3: Can I grow spaghetti squash in my garden?

Yes — it’s easy to grow, needs space for vines, full sun and warm weather.

Q4: How do the cooking methods differ?

Squash is roasted/steamed/microwaved and scraped into strands; pasta is boiled al dente in salted water. Both need proper timing for best texture.

Q5: Can I freeze cooked spaghetti squash?

Yes — cool strands, portion, and freeze up to 3 months (texture softens a bit).

Q6: Is spaghetti squash keto-friendly?

It can fit a low-carb or ketogenic approach if kept in reasonable portions and paired with low-carb sauces.

Q7: Does spaghetti squash really taste like pasta?

Not exactly — it is milder and slightly sweet, but with the right sauce it works as a convincing pasta substitute in many dishes.

Final Thoughts — Spaghetti Squash Carbs vs Pasta

Now that we’ve covered spaghetti squash carbs vs pasta from every useful angle, here’s the takeaway: choose spaghetti squash if you want a low-carb, vegetable-based meal, need a gluten-free pasta alternative, or want fewer calories. Choose pasta if you want a staple food that’s energy dense, popular, inexpensive, and perfect for hearty pasta dishes or athletic fueling.

Try the Half & Half Bowl if you’re unsure — mixing dried pasta and squash strands gives you the best of both worlds: texture and fewer carbs. Experiment with sauces — pasta with tomato sauce or a light marinara enhances both bases.

Best Pasta Sauce for Diabetics — The Complete Guide

0

Meta description:  Find the best pasta sauce for diabetics — low-sugar, high-fiber, step-by-step recipes, portion tips, and smart store-bought picks for balanced, tasty meals.

Best Pasta Sauce for Diabetics means a sauce that is low in added sugar, moderate in carbohydrates, higher in fiber, and paired with healthy fats and protein to reduce blood-glucose spikes. Choosing the right sauce helps you enjoy pasta without compromising blood sugar control.

That’s why the best options include simple tomato-based marinara made from no-sugar-added crushed tomatoes, vegetable-packed marinara, light olive oil & garlic sauces, and lean-protein tomato sauces. These give you flavor and satisfaction with minimal sugar and a nutrient profile that supports diabetic-friendly eating.

In this article I’ll show you exactly how to make three practical, tested sauces step-by-step (including ingredient amounts and timings), how to read labels when buying jars, portioning and pairing strategies, storage and reheating instructions, and common troubleshooting. You’ll also get small personal tips I use at home so the sauce tastes great without sugar or excess calories.

Why sauce choice matters for people with diabetes

Many people think only pasta matters; but sauces are often the hidden variable. A jar of commercial pasta sauce can contain several grams of added sugar per serving — enough to nudge blood glucose upward when paired with pasta. 

Reading labels is essential because manufacturers sometimes add sugar to balance acidity. A good rule is: prefer sauces that are sugar-free or clearly state “no added sugar.”

Also, carbohydrate portioning and the presence of fiber and protein strongly affect blood glucose response. The American Diabetes Association recommends choosing carbohydrate sources that are nutrient-dense (higher fiber, lower added sugars) and counting carbs or using the Plate Method to portion starchy foods. 

Finally, national health guidance (NHS, CDC) encourages wholegrain choices, vegetables, and watching portion sizes to keep blood sugar steady — advice that directly applies to how you choose and use Pasta sauces. 

Key characteristics of the best pasta sauce for diabetics

When evaluating sauces, look for these features — I’ll show how to check each in detail later:

  • No or minimal added sugar (check ingredient list and “added sugars” on the label).
  • Moderate total carbs and some fiber — vegetable content helps.
  • Healthy fats (olive oil) rather than saturated fats (butter, cream) — a healthier alternative to heavy cream.
  • Low to moderate sodium (unless your diet requires more sodium control).
  • Contains or pairs well with lean protein (chicken, turkey, beans) to slow carb absorption.

These elements turn pasta into a balanced meal that supports a balanced diet and stable dietary energy usage.

Before you cook — shopping, tools, and prep timeline

Shop list (for all recipes below)

  • Canned crushed tomatoes (no added sugar) — 2 × 28 oz cans
  • Tomato paste (no sugar) — 1 small tube or can
  • Fresh tomatoes (optional) — 4–6 ripe tomatoes
  • Extra virgin olive oil — 1 bottle
  • Garlic — 8 cloves
  • Yellow onion — 2 medium
  • Zucchini, bell pepper, spinach (for veg marinara)
  • Fresh basil, oregano, parsley
  • Lean ground turkey or chicken (optional) — 1 lb
  • Plain Greek yogurt (for creamy light option) — 1 cup
  • Whole wheat or legume pasta (your choice)

Tools

  • Large sauté pan + pot for pasta
  • Wooden spoon, chef’s knife, cutting board
  • Blender or immersion blender (for smooth sauces)
  • Measuring cups & spoons, small bowl for mise en place

Prep timeline (simple)

  1. 10–15 minutes: Chop vegetables and measure ingredients (mise en place).
  2. 20–45 minutes: Cook sauce (timing varies by recipe).
  3. 10–12 minutes: Cook pasta while sauce simmers or rests.
    (If you roast tomatoes first, add 15–20 minutes.)

Mise en place makes everything run smoothly — I always prep first; it stops me from overcooking garlic or rushing through steps.

How to read a pasta sauce label (step-by-step)

If you buy jarred sauce, do this before you place it in your cart:

  1. Check “added sugars” on the Nutrition Facts panel. Anything over 4 g per ½ cup is worth a second look. Many jars list 6–10 g per ½ cup. Eat This Not That+1
  2. Look at the Ingredient List. If sugar, corn syrup, fructose, dextrose, concentrated fruit juice, or cane sugar appear near the top, skip it.
  3. Scan the sodium. Many sauces have 300–400 mg per ½ cup; choose lower sodium options if you need blood pressure control.
  4. Check total carbohydrate and fiber. More fiber per serving is helpful (aim for 2 g+ per serving).
  5. Look for “no added sugar” or “unsweetened” claims and verify they’re true via the nutrition panel.

If a jar is borderline, you can always use half the jar and stretch flavor by adding fresh tomatoes, roasted vegetables, or herbs — a practical trick I use to lower the sugar per serving and add fiber.

Recipe 1: Simple No-Sugar Marinara (Diabetic-friendly) — step by step

This is my go-to sugar-free condiment when I want classic tomato flavor without added sugars.

Ingredients (4–6 servings)

  • 2 tbsp extra virgin olive oil
  • 1 medium onion, finely chopped (about 1 cup)
  • 4 garlic cloves, minced
  • 2 × 28 oz cans crushed tomatoes (no added sugar) or 2 lb fresh, peeled & chopped tomatoes
  • 1 tbsp tomato paste (no sugar)
  • 1 tsp dried oregano, 1 tsp dried basil (or handful fresh basil)
  • Salt & black pepper to taste
  • Optional: 1 small zucchini grated (adds fiber & sweetness)

Exact steps

  1. Heat oil: Warm 2 tbsp olive oil in a large skillet over medium heat (about 3–4 mins until shimmering).
  2. Sauté onion: Add onion and a pinch of salt; cook 6–8 minutes until translucent and slightly golden — this builds sweet aroma without sugar.
  3. Add garlic: Stir in minced garlic; cook 30–45 seconds until fragrant (don’t brown).
  4. Bloom the paste: Add 1 tbsp tomato paste; stir and fry for 1–2 minutes — this deepens tomato flavor.
  5. Add tomatoes: Pour crushed tomatoes (or cooked fresh tomatoes), add zucchini if using, stir.
  6. Season & simmer: Add herbs, salt, and pepper. Bring to a gentle simmer, then reduce heat to low and simmer uncovered for 20–30 minutes, stirring occasionally to prevent sticking.
  7. Finish & taste: If sauce tastes too acidic, add a teaspoon of balsamic vinegar (small amount), or a pinch of grated carrot for natural sweetness (no added sugar). Adjust salt. Remove from heat and stir in torn basil.

Why this works: The simmer time softens tomatoes and brings out natural sweetness without added sugar. The grated zucchini adds fiber and a mild, natural sweetness so you don’t miss sugar.

Personal note: I roast half the tomatoes under high heat for 20 minutes sometimes — the roasted flavor gives a caramelized note so I never have to add sugar.

Recipe 2: Vegetable-Packed Marinara (High-fiber option)

This sauce turns your plate into a healthier alternative by adding non-starchy vegetables for fiber and volume.

Ingredients (4–6 servings)

  • 2 tbsp olive oil
  • 1 large onion, 2 carrots, 2 celery stalks (finely diced) — classic soffritto base
  • 2 cloves garlic
  • 1 red bell pepper, diced
  • 2 cups chopped mushrooms (optional)
  • 2 cans (28 oz) crushed tomatoes (no added sugar)
  • 2 cups spinach (stir in at end)
  • Herbs: oregano, thyme, bay leaf
  • Salt & pepper

Steps

  1. Sauté veg base: Heat oil, add onion/carrot/celery, cook 8–10 minutes until soft.
  2. Add bell pepper & mushrooms: Cook for 4–5 minutes.
  3. Add garlic & tomatoes: Add garlic briefly, then add crushed tomatoes and herbs.
  4. Simmer 25–40 minutes: Let flavors meld. Add spinach last 2–3 minutes so it wilts but retains nutrients.
  5. Blend (optional): For a smooth sauce, blend half or all of the sauce. Leaving chunks increases texture and satiety.

This sauce is naturally higher in fiber and lower in net carbs per serving because vegetables displace some tomato volume. Fiber helps blunt blood sugar rises and increases fullness. (See ADA guidance on choosing fiber-rich carbs.) American Diabetes Association

Recipe 3 — Light Creamy “Greek-Style” Sauce (Diabetic-friendly creamy option)

If you miss creamy sauces, try this light version using Greek yogurt — a smart swap for heavy cream.

Ingredients (4 servings)

  • 1 tbsp olive oil
  • 1 small onion, chopped
  • 1 clove garlic, minced
  • 1 cup plain Greek yogurt (0% or 2% fat)
  • ¼ cup low-fat grated Parmesan
  • Zest of half a lemon
  • Salt & pepper to taste
  • Optional: 1 cup cooked, shredded chicken for protein

Steps (important: temperature control)

  1. Sauté aromatics: Heat oil, cook onion until soft, add garlic 30 seconds. Remove the pan from the heat.
  2. Cool slightly: Let the pan cool for 1–2 minutes (very important — high heat will curdle yogurt).
  3. Temper yogurt: Whisk yogurt with a few spoonfuls of warm cooking liquid (broth) to temper it. Slowly stir yogurt mixture into pan off the heat.
  4. Warm gently: Place on the lowest heat and stir until just warm (do not boil).
  5. Add cheese & lemon: Stir in Parmesan and lemon zest for bright flavor.

Why this works: Greek yogurt adds protein and creaminess with far fewer calories than cream. Tempering prevents curdling. Pairing with whole-grain pasta or zoodles keeps carb load lower.

Portion control & pasta pairing — exact guidance

The sauce choice is only half the picture. Portioning and pasta type matter.

  • Pasta serving: Aim for about 1 cup cooked pasta (~140–160 g cooked) as a starting portion. If you follow carbohydrate counting, that’s often ~30 g carbs depending on pasta type — check package. The CDC and ADA recommend portion control or using the Plate Method (1/4 plate starchy foods).
  • Better pasta choices: whole wheat, legume (chickpea, lentil) pasta, or spiralized zucchini (zoodles) lower glycemic impact.
  • Plate composition: 1/2 non-starchy veggies + 1/4 lean protein + 1/4 whole-grain pasta is a practical lifestyle choice that balances dietary energy needs and helps with blood sugar control.

Personal tip: I mix half whole-grain pasta and half zucchini ribbons when serving guests — they like the texture, and my plate has more fiber without a strong taste difference.

Store-bought sauce: pick, stretch, and fix

If you must buy sauce, here’s an action plan:

  1. Pick “no added sugar” jars and verify using nutrition facts. Many decent options have 0–2 g added sugar per serving.
  2. Stretch and improve: Dilute jarred sauce with canned crushed tomatoes (no sugar), add sautéed veg, or blend in fresh spinach. This lowers sugar per serving and boosts fiber.
  3. Use as condiment, not main filler: A shorter rule of thumb — treat sauce as a sugar-free condiment and build the meal around veggies and protein.

Storage, make-ahead, and reheating (step-by-step)

  • Cool quickly: After cooking, cool sauce 20–30 minutes at room temp, then refrigerate.
  • Fridge: Use within 4–5 days for tomato-based sauces.
  • Freezer: Freeze in portions for 2–3 months — label with date. Defrost in the fridge overnight.
  • Reheat: Warm slowly on medium-low, stirring, adding a splash of water or stock if too thick. For cream sauce, add a little extra yogurt/stock while warming to avoid separation.

Troubleshooting common problems (and fixes)

  • Too acidic: Stir in a teaspoon balsamic or a small grated carrot; cook 5–10 more minutes.
  • Too thin: Simmer uncovered for 10–20 minutes; or blend some vegetables in to thicken.
  • Too salty: Add cooked potato chunks while simmering for 10 minutes, then remove (they absorb salt), or dilute with unsalted crushed tomatoes.
  • Sauce bland: Add fresh herbs at the end, a squeeze of lemon, or a teaspoon of umami (mushrooms or a few drops of Worcestershire if acceptable).

Nutrition, blood-sugar impact & calorie ideas

A typical 1/2 cup serving of homemade no-sugar marinara: ~50–80 kcal, 6–10 g carbs, 2+ g fiber. Pair this with 1 cup cooked whole-grain pasta (~35–40 g carbs) and 3–4 oz lean protein to make a balanced meal.

Remember: “high in carbohydrates” foods like regular white pasta increase post-meal glucose more than whole-grain or legume pasta — choose wisely. Using legume pasta increases protein and fiber, lowering glycemic response in many people.

If your plan includes weight loss or calorie restriction, focus on portion size, pick lower-calorie bases (zoodles/pumpkin/pasta made from legumes), and load sauce with non-starchy vegetables to increase volume without excessive calories.

Final practical meal plan ideas (3 quick examples)

  1. Weeknight bowl (simple): 1 cup whole-grain spaghetti + ½ cup vegetable marinara + 3 oz grilled chicken + side salad (leafy greens).
  2. Light weekend: 1½ cups zoodles + ½ cup no-sugar marinara + 2 tbsp pesto + 2 tbsp grated Parmesan.
  3. Comfort swap: 1 cup chickpea pasta + ½ cup light creamy Greek yogurt sauce + roasted mushrooms + spinach.

FAQs About Best Pasta Sauce for Diabetics

Can diabetics eat pasta sauce? 

Yes — if it’s low in added sugar and paired with balanced portions. 

Is marinara better than creamy sauces? 

Marinara typically has fewer calories; creamy sauces can be adapted (Greek yogurt swap).
How to sweeten without sugar? 

Roast tomatoes, simmer carrots, or add a splash of balsamic for perceived sweetness.
Are jarred sauces always bad? 

No — read labels and choose no added sugar options or stretch them with veggies.

Closing thoughts — making it real and enjoyable

Choosing the Best Pasta Sauce for Diabetics is not about deprivation; it’s a practical way to enjoy pasta as Not guilty food — food you can love without compromising health. Small cooking techniques (roasting tomatoes, adding grated vegetables, tempering yogurt) give you a healthier alternative to sugary jars or heavy cream, turning your plate into a balanced meal that supports stable blood sugar and sustainable eating.

From my experience, the two biggest wins are: (1) make a large batch of vegetable-rich marinara to use all week (freezer portions are lifesavers), and (2) pair every pasta portion with protein and extra vegetables. These simple habits make pasta compatible with a diabetic meal plan and help with weight loss, satiety, and long-term control of dietary energy.

Creamy Goat Cheese Pasta Sauce Recipe (Easy & Tasty)

0

Goat cheese pasta sauce is a creamy, tangy pasta topping that brings bright flavor with less heaviness than traditional cream sauces. It combines the unique “goat” flavor of the cheese with simple aromatics and a little pasta water to make a silky coating. This sauce is perfect when you want something quick, elegant, and different.

You can make a restaurant-quality pasta sauce goat cheese at home by cooking gently and using reserved pasta water to emulsify. With the right steps you avoid curdling and get a smooth, creamy result.

In this article I’ll show exact ingredient lists and timings for recipes that serve 4 people, plus how to scale up or down. We’ll cover the classic creamy version, a tomato-goat cheese “pink” sauce, vegetable and protein add-ins, plating, storage, troubleshooting, and the nutritional value so you know what you’re eating.

Quick note on servings & quantities 

All recipes below are written for 4 servings (standard dinner portions). If you want to make it for 2 people, halve every ingredient. For 6 people, multiply by 1.5. I’ll show exact ingredient amounts in each recipe and include short scaling notes at the end of each recipe section.

Why goat cheese makes a great pasta sauce base

Before we cook, understand the reason behind the technique — this helps when you adapt or troubleshoot.

  • Goat cheese (a cheese made from the milk of domestic goats) has a bright, tangy profile and a creamy texture when warmed gently. That tang balances fat and adds freshness.
  • Soft chèvre (fresh and mild) is easiest to melt; aged goat cheeses are firmer and richer. There are different styles of cheeses from goat’s milk — Traditional varieties of goat cheese range from fresh and soft to aged and hard.
  • Goat cheese is part of cultured dairy products family and is made by adding a curdling starter agent to milk, draining the whey, and sometimes aging or molding the curds. These variations in this process can change the texture and flavor dramatically.
  • Nutritionally, goats produce nutrient-rich milk that yields goat cheeses with useful proteins, antioxidants, lipids, and some anti-inflammatory enzymes. Many people find goat cheese easily digestible, which is why some cooks prefer it in lighter sauces.

Now that we know why it works, let’s gather ingredients and tools and begin.

Tools, prep and mise en place (do this first)

Do these steps before you heat any pan. It prevents mistakes.

Tools:

  • Large pot for pasta (6–8 quart)
  • Large skillet (12 in / 30 cm) or sauté pan with lid
  • Wooden spoon, tongs, whisk
  • Knife & board, grater, measuring cups & spoons
  • Small bowl for reserved pasta water

Prep (10–15 minutes for 4 servings):

  • Grate 8 oz (225 g) goat cheese (if soft, break into chunks). We use 8 oz goat cheese for 4 servings in the base recipe.
  • Peel & mince 2 garlic cloves and 1 small shallot.
  • Zest ½ lemon (optional) and chop a handful of fresh herbs (basil, parsley).
  • Choose pasta: 12 oz (340 g) dried pasta (penne, fusilli, or linguine — see pairing section).
  • Fill the pasta pot with water, place on heat so it’s coming to a boil while you make the sauce.

Recipe 1 — Classic creamy goat cheese pasta sauce (serves 4)

Ingredients (serves 4)

  • 12 oz (340 g) pasta of your choice (penne or fettuccine recommended)
  • 2 tbsp extra-virgin olive oil
  • 1 small shallot, finely chopped (about ¼ cup)
  • 2 garlic cloves, minced
  • 8 oz (225 g) soft goat cheese (chopped into small pieces)
  • ½ cup (120 ml) whole milk or light cream (use milk for lighter sauce)
  • ½ cup (120 ml) reserved pasta water (plus extra if needed)
  • Salt and freshly ground black pepper, to taste
  • Zest of ½ lemon (optional)
  • 2 tbsp chopped fresh parsley or basil for garnish

Full step-by-step method — do not skip or rush

  1. Bring pasta water to a vigorous boil and salt it. Add about 1 tbsp kosher salt per 4–5 liters of water. This seasons the pasta from the inside — an important step many miss.
  2. Cook the pasta al dente. Add 12 oz pasta and follow the package but subtract 1 minute from the listed time (it finishes in the sauce). Before draining, reserve ½ cup of the starchy pasta water in a bowl. Drain the pasta in a colander and set aside.
  3. Warm your skillet and oil. Place your large skillet on medium heat. Add 2 tbsp olive oil and let it shimmer — about 1 minute.
  4. Sauté shallot and garlic gently. Add the chopped shallot and a pinch of salt. Cook 3–4 minutes until softened and slightly translucent. Add minced garlic and cook for 30–45 seconds until fragrant. Don’t let garlic brown or it becomes bitter.
  5. Lower heat and add milk. Reduce heat to low-medium. Pour in ½ cup milk or light cream and gently warm — do not bring to a boil. You want steam and small bubbles at the edge, not rolling boil.
  6. Add goat cheese gradually. Turn off (or lower) the heat to low. Add the goat cheese in small handfuls, stirring continuously with a whisk or wooden spoon. Let each handful melt before adding the next. This slow addition prevents clumping or graininess.
  7. Emulsify with pasta water. After the cheese is incorporated, add 2–3 tbsp of reserved pasta water and whisk. If the sauce is too thick, add more pasta water a tablespoon at a time until you reach a creamy, sauce-coating consistency. The starch in the water binds fats and dairy into a smooth emulsion.
  8. Toss pasta into the sauce. Add the drained pasta directly to the skillet and toss with tongs for 45–60 seconds so each piece is coated. If it absorbs too much, add another splash (1–2 tbsp) of pasta water.
  9. Finish and season to taste. Add lemon zest if using, season with salt and pepper, and sprinkle chopped parsley or basil. Serve immediately with extra goat cheese crumbled on top.

Timing: From start to finish expect about 20–25 minutes including pasta cooking.

Scaling: For 2 people, use 6 oz pasta and 4 oz goat cheese; for 6 people, use 18 oz pasta and 12 oz goat cheese.

Personal note (balanced & natural): The first time I tried this recipe I heated the milk too much and the goat cheese separated. Since then I always melt cheese off heat and rely on pasta water to finish — that small trick changed everything.

Why we use pasta water — the science, briefly

Reserve and use pasta water because it contains starch released from pasta during cooking. That starch helps emulsify the oil/dairy and produce a glossy, clingy sauce. Without it, the sauce can feel oily or grainy. This technique is standard in many Italian pasta dishes.

Recipe 2 — Tomato-Goat Cheese “Pink” Sauce (serves 4)

This is a half-tomato, half-cheese sauce that tastes bright and creamy.

Ingredients (serves 4)

  • 12 oz pasta
  • 1 tbsp olive oil
  • 1 small onion, finely chopped
  • 2 garlic cloves, minced
  • 1 can (14 oz / 400 g) crushed tomatoes (no added sugar)
  • 3 oz (85 g) goat cheese, crumbled
  • ¼ cup (60 ml) reserved pasta water
  • Fresh basil, salt & pepper, 1 tsp tomato paste (optional for depth)

Steps

  1. Cook pasta and reserve water as with Recipe 1.
  2. Sauté onion & garlic. Heat oil over medium, cook onion 4–5 min until soft, add garlic 30s.
  3. Add tomatoes & simmer. Stir in crushed tomatoes (and tomato paste if using). Bring to a gentle simmer and cook for 10–12 minutes to reduce and concentrate flavor. Season lightly.
  4. Stir in goat cheese off the heat. Remove the pan from direct heat and add crumbled goat cheese a little at a time, stirring gently. Add 2–4 tbsp reserved pasta water to loosen.
  5. Combine & finish. Toss pasta into sauce, add fresh basil, season to taste, and serve.

Note: The key is adding goat cheese off heat — it melts and blends into the tomato without breaking.

Vegetable & protein add-ins (how and when to add)

If you want a fuller dish with meat and vegetables, do this:

  • Sauté vegetables first (mushrooms, bell peppers, zucchini, spinach). Cook until softened before adding dairy or tomatoes. Add them to the sauce after step 3 above.
  • For protein (shrimp, chicken, or pancetta): Cook separately, season lightly, and fold in at the end to keep textures correct. If using raw chicken or shrimp, cook until just done and then add to sauce in the final 1–2 minutes.

Personal tip: I like to sauté sliced mushrooms until they’re golden and add a splash of white wine to deglaze before adding goat cheese; it gives savory depth without heavy cream.

Troubleshooting: common problems and exact fixes

  • Sauce grainy or separated: Heat was too high when adding cheese. Fix: Remove from heat, whisk in 1–2 tbsp cold milk or a spoon of yogurt to bring it together slowly. Add small amounts of pasta water while whisking.
  • Sauce too thin: Simmer gently uncovered to reduce, or add more cheese in small amounts.
  • Sauce too thick: Add reserved pasta water 1 tbsp at a time until desired consistency.
  • Too tangy: Add a small knob (1 tsp) of butter or 1–2 tbsp cream to mellow tang. Lemon zest can then be reduced.

Pairing — what pasta and sides to use

  • Short shapes (penne, fusilli, shells) are great because they catch little bits of cheese and veg.
  • Long shapes (linguine, fettuccine) give an elegant, silky mouthful with the sauce clinging to strands.
  • Serve with a fresh green salad, roasted vegetables, or a crusty bread. For a lighter option serve with zoodles (zucchini noodles).

Make-ahead, storage & reheating — exact steps

  • Make-ahead: Keep sauce base separate from pasta. Store sauce in an airtight container for up to 3 days in the refrigerator.
  • Freezing: Goat cheese sauces can be frozen, but texture may change. Freeze in portioned jars for up to 2 months.
  • Reheat: Warm slowly on low in a skillet; add a splash of milk or pasta water and whisk to restore creaminess. Do not microwave on high; it can separate.

Nutrition & health notes (brief)

Goat cheese offers distinct nutritional value: it has proteins, antioxidants, and lipids and is often easier to digest compared to some cow’s cheeses. While it is rich, when used in moderate amounts it fits into a balanced diet more easily than heavy cream-based sauces. If you aim for calorie restriction or weight loss, reduce cheese quantity and load the sauce with vegetables.

Creative variations (quick ideas)

  • Spinach & goat cheese: Stir in wilted spinach at the end.
  • Mushroom & thyme: Sauté mushrooms until brown, finish with thyme.
  • Sun-dried tomato & olive: Add chopped sun-dried tomatoes and olives for umami.
  • Lemon-herb: Add lemon juice & fresh dill or thyme for brightness.

FAQs About Goat Cheese Pasta Sauce

Q1. Can I use aged goat cheese instead of soft fresh chèvre for pasta sauce?

Yes, you can, but expect a stronger, earthier flavor and a firmer texture. Aged goat cheese doesn’t melt as smoothly as soft chèvre, so grate it finely and whisk it into warm milk or cream with pasta water to help emulsify. If you want a milder, creamier sauce, stick with soft goat cheese.

Q2. Is goat cheese pasta sauce suitable for people who are lactose intolerant?

Goat cheese contains less lactose than most cow’s milk cheeses, making it easier to digest for many people. However, it’s not completely lactose-free. Those with severe intolerance should use lactose-free milk for thinning the sauce or consider pairing with a lactose-free pasta alternative.

Q3. Can I make goat cheese pasta sauce without using cream or milk?

Yes. One popular method is to use only reserved pasta water and olive oil. Add goat cheese to the warm pasta directly with ½ cup pasta water, then stir vigorously until it forms a creamy coating. This produces a lighter sauce without dairy beyond the cheese itself.

Q4. What herbs and spices pair best with goat cheese pasta sauce?

Goat cheese pairs beautifully with fresh herbs like basil, parsley, dill, thyme, and chives. For spices, a pinch of nutmeg or red pepper flakes can enhance flavor without overpowering the cheese. Avoid too many strong dried spices — they can mask the delicate tang of the cheese.

Q5. How do I prevent goat cheese from clumping when melting into pasta sauce?

The trick is to add goat cheese gradually on low heat or off the heat while stirring constantly. Never dump all the cheese in at once or over high heat, as it may clump and separate. Pasta water with starch is essential — it helps emulsify the sauce into a silky consistency.

Conclusion

Making a delicious goat cheese pasta sauce at home is much simpler than it seems. By cooking pasta al dente, saving some pasta water, and melting the cheese gently, you can create a creamy, tangy sauce that feels gourmet. From classic creamy versions to tomato blends or veggie add-ins, goat cheese adapts to many flavors and styles.

Beyond taste, goat cheese adds nutrition — it’s packed with proteins, lipids, and antioxidants, and is often easier to digest than cow’s milk cheese. Whether it’s a quick dinner for two or a meal for the whole family, this sauce is an easy way to enjoy a fresh, satisfying, and memorable pasta dish.

Mayo Pasta Sauce Recipe | Easy Creamy Pasta in 20 Mins

0

Meta description: Mayo pasta sauce is a thick, cold, and creamy sauce made with mayonnaise, seasonings, and simple ingredients to create a quick, rich pasta recipe at home.

Mayo pasta sauce is a fast, creamy pasta sauce made with mayonnaise and simple seasonings that clings to pasta for a silky bite. It’s perfect when you want a rich, comforting meal without long cooking. In many kitchens it becomes a go-to on busy days.

In this article I’ll walk you through exactly how to make it (step-by-step), show recipes for mayo sauce for different tastes, explain why it’s so popular, cover nutritional information and storage, and give serving quantities so you can cook for 1, 2, 4 or more people. I’ll also share a few personal tips from my own kitchen (short, natural notes so it feels like a friend helping you). Let’s start.

What Is Mayo Pasta Sauce?

A quick definition: mayo pasta sauce uses Mayonnaise as the central ingredient. Mayonnaise itself is an emulsion of oil, egg yolk, and an acid (vinegar or lemon) — a basic technique that forms the base of many cold sauces. Because mayo is already an emulsion, it gives pasta a smooth texture that is hard to get from plain cream alone.

This sauce is part of a larger family — in fact you can think of it as a modern take on sauces that are used commonly with cold pasta and salads. 

In French cuisine, mayonnaise has long been a cornerstone, and modern cooks have adapted it into Modern mayo sauce styles that mix in herbs, cheese, chiles, and more. There are many variants, and the color varies from pale white to light yellow depending on egg content and added spices.

How Is Mayo Pasta Sauce Made?

At its simplest: mix Mayonnaise with acid (lemon or vinegar), salt, pepper, and additional flavorings such as garlic, herbs, or cheese — then toss with pasta. The most common method is to combine everything off-heat and finish by tossing the sauce with hot pasta or chilled pasta water to reach the right consistency.

Now we’ll go deeply into the step-by-step version so nothing is left out.

Ingredients — exactly what you need (for 2–3 people)

This ingredient list is built to be simple, pantry friendly, and adaptable. Quantities below are written for 2–3 servings (about 250 g pasta). I also added notes for scaling.

Core ingredients (must have):

  • 250 g dry pasta (penne, fusilli, or macaroni recommended)
  • Mayonnaise — ½ cup (120 ml) — use regular or eggless versions as preferred
  • Lemon juice or white wine vinegar — 1 tsp (5–7 ml)
  • Salt — ½ to 1 tsp (adjust to taste)
  • Freshly ground black pepper — ½ tsp

Liquid/texture adjusters:

  • Warm pasta cooking water — reserve ½ cup (120 ml)
  • Milk or yogurt — up to 3 tbsp (45 ml) if you want a lighter texture (optional)

Flavor boosters (choose 2–3):

  • Garlic — 1–2 small cloves, minced or pressed
  • Grated Parmesan (or other cheese) — 2 tbsp
  • Olive oil — 1 tbsp (helps silkiness)
  • Chili flakes — ¼–½ tsp (for spice)
  • Dried oregano or mixed herbs — ½ tsp
  • Fresh herbs (parsley, basil) — 1–2 tbsp chopped

Optional add-ins (for bulk and interest):

  • Cooked chicken strips, tuna, grilled vegetables, sweetcorn, peas — ½ to 1 cup total

Notes on scaling: For 4–6 people double the pasta to 500 g and increase mayo to 1 cup, lemon to 2 tsp, and reserve at least 1 cup pasta water to adjust.

Tools You’ll Need (and why they matter)

  • Large pot for boiling pasta.
  • Strainer.
  • Mixing bowl.
  • Spoon or whisk (or an electric mixer if you make homemade mayo).
  • Frying pan/skillet (if you add sautéed veggies or warm the sauce slightly).

I often use an electric mixer when I prepare homemade mayo — it’s consistent and fast. If you prefer store-bought mayo, you’ll skip the mixer step.

Step-by-Step Recipe (nothing missed — the full method)

Yield: Serves 2 (use the scaling above for other yields).
Prep time: 6–10 minutes.
Cook time: 10–12 minutes.

Step 0 — Prep & technique notes (don’t skip)

  1. Bring all your ingredients to room temperature. Cold mayo straight from the fridge can tighten up the sauce; room-temp ingredients combine more smoothly.
  2. If you plan to add cheese, grate it fresh for best melt and flavor.
  3. Reserve ½ to 1 cup of pasta cooking water before draining — that starchy water is your secret for silky emulsion. I learned this trick after many trial runs: the water saves a sauce that’s too thick and helps the mayo bind to pasta.

Step 1 — Cook the pasta perfectly

  1. Use a large pot of heavily salted water (about 1 tbsp salt per 4–5 liters). This seasons the pasta from within.
  2. Add the pasta and cook to al dente (check the package and taste 1–2 minutes before the time listed). For penne/fusilli, aim for slightly firm. Overcooked pasta will not hold the sauce as well.
  3. Scoop out and reserve ½–1 cup pasta water, then quickly drain pasta in a colander.

Step 2 — Build the base sauce (cold method)

This is the most common method for mayo pasta sauce and the safest to avoid splitting.

  1. In a bowl, combine: ½ cup Mayonnaise (for 2 servings), 1–2 tbsp milk or olive oil, 1 tsp lemon juice or white wine vinegar, 1 clove minced garlic, ½ tsp salt, ¼ tsp black pepper. Add ½ tsp dried oregano or 1 tsp chopped fresh herbs.
  2. Whisk until smooth. If it’s too thick, whisk in 1 tbsp milk or 1–2 tbsp reserved pasta water at a time until you reach a sauce that lightly coats the back of a spoon.

Tip from experience: I often add a pinch of mustard (Dijon) for stability — it helps the emulsion and gives a subtle tang. Mustard also acts as an emulsifier like egg yolk, making the sauce silkier.

Step 3 — Warm option (if you prefer warm sauce)

You can gently warm the sauce to serve on hot pasta, but be careful:

  1. Put the mayo mixture in a skillet over very low heat. Stir constantly — do not let it simmer. High heat will break the emulsion and make a greasy separation.
  2. Add 2–4 tbsp pasta water while stirring. The starch and moisture help the sauce loosen and spread.

My note: I tend to warm the sauce only slightly — just enough to take the chill off so it blends better with hot pasta. Full heating often risks curdling.

Step 4 — Combine pasta and sauce (emulsify like a pro)

  1. Place drained pasta into a warmed pan or large mixing bowl.
  2. Add the mayo sauce and toss vigorously. If tossing in a pan over low heat, add 2–3 tbsp pasta water to emulsify. The starchy water binds the mayo to the pasta pieces — that’s how you get that clingy, restaurant-style coating.
  3. Taste and adjust salt, pepper, and lemon. Add 1–2 tbsp grated cheese if you want a richer finish.

Pro tip: Toss for 1–2 minutes until the sauce slicks on each pasta piece. If the sauce is too thick, add more reserved pasta water, 1 tbsp at a time.

Step 5 — Add finishing touches & serve (serving)

  1. Plate the pasta and finish with a drizzle of extra virgin olive oil, chopped fresh herbs (parsley/basil), and a light sprinkle of chili flakes if desired.
  2. Serve immediately — mayo-based pasta tastes best fresh or slightly warm. If making a pasta salad variant, chill after mixing for at least 30 minutes.

How to Make Homemade Mayo

If you want total control and a fresher result, try homemade mayo. This also lets you avoid less expensive imitation products and create higher quality flavor.

Basic recipe (yields ~1 cup):

  • Egg yolk: 1 large (room temperature)
  • Dijon mustard: ½ tsp
  • Lemon juice or white vinegar: 1 tsp
  • Salt: ¼ tsp
  • Neutral oil (sunflower/canola): ¾ to 1 cup (slowly added)
  • Optional: 1 tsp warm water

Method (using whisk or an electric mixer):

  • In a bowl, whisk together egg yolk, mustard, lemon/vinegar, and salt.
  • Start adding oil very slowly — literally drop by drop for the first minute — while whisking vigorously. As the mixture thickens, you can add oil in a thin steady stream. If using an electric mixer, keep it on low and pour the oil slowly — it’s easier but still needs patience.
  • Once you have a thick mayo, taste and adjust acid/salt. If too thick, whisk in a teaspoon of warm water.

If the mayo breaks (separates): rescue it by whisking one fresh egg yolk in a clean bowl, then slowly whisk in the broken mayo mixture. The fresh yolk re-emulsifies the mix.

Note: For eggless versions (vegans or egg allergies) use aquafaba, silken tofu, or commercial vegan mayo as substitutes. These are often called Egg-free imitations or vegan mayos and are great for eggless versions of the pasta sauce.

Your homemade mayo pasta sauce is ready to coat your favorite pasta perfectly. Now, let’s explore some exciting variations you can try.

Variations — many ways to change the flavor

  • Garlic Mayo Pasta Sauce — Roast garlic for a mellow taste or use raw minced garlic for punch. I prefer roasting because it’s gentler and kids like it more.
  • Spicy Chili Mayo — Add chili flakes, sriracha, or smoked paprika. Start small and taste.
  • Cheesy Mayo — Mix in 2–3 tbsp grated Parmesan for an umami boost.
  • Herb-Infused — Mix basil, parsley, or dill for a fresh profile.
  • Vegan/Eggless Version — Use vegan mayo or make a cashew/silken tofu base. These egg-free imitations are good for sensitive diets.
  • Hybrid Sauces — Combine mayo with tomato sauce or pesto for a fusion — try ¾ mayo + ¼ tomato for a creamy marinara twist.

Remember: Adding ingredients like citrus, mustard, or yogurt changes the acidity and texture — always taste and adjust.

For your ease, here’s a forum link where you can find more details and discover extra recipes that use mayonnaise pasta sauce.

Why People Love It — Popularity & Use Cases (used commonly, chilled sauces)

  • Speed: Ready in under 20 minutes. Great for busy evenings.
  • Texture: The thick, cold, and creamy sauce gives a satisfying mouthfeel.
  • Versatility: It’s used for hot pasta mains, picnic-friendly pasta salad, and as a salad dressing or sandwich spread.
  • Accessibility: Most kitchens already have Mayonnaise and basic spices. No specialty ingredients needed.

From personal experience: when I hosted a last-minute potluck, my mayo pasta salad disappeared first — people like the comfort and creaminess it delivers.

Nutrition & Health — Nutritional information and choices (nutrient content, calorically dense food)

Be honest: mayo pasta sauce is often a calorically dense food because mayonnaise is mostly oil. Here’s how to think about it:

  • Nutrient content: High in fats (mostly unsaturated if using olive oil mayo), moderate protein (from eggs if present), and carbohydrates from pasta.
  • Calories: One tablespoon of mayo ~ 90–100 kcal. If you use ½ cup mayo for 2 people, that’s a significant amount of calories per serving.
  • Healthier moves: Use low-fat mayo, use Greek yogurt to replace part of the mayo, reduce portion sizes, add lots of vegetables, and choose whole grain pasta for fiber.

If you want precise macro numbers for your recipe, use a nutrition calculator with your exact ingredient brands — but the general rule is moderation and balance.

Storage & Food Safety (storage, chilled sauces)

  • Store leftover mayo pasta in an airtight container in the fridge for 3–4 days.
  • Do not keep at room temperature for prolonged periods (mayo with egg can be sensitive).
  • Freezing is not recommended — mayo texture changes and separates, making it unpleasant.
  • Signs of spoilage: sour or off smell, discoloration, or excessive liquid separation. Discard if unsure.

Imitations like commercial shelf-stable salad dressings may last longer unopened, but once mixed with pasta, follow the same 3–4 day fridge rule.

Serving & Pairing Tips (serving)

  • Best pasta shapes: penne, fusilli, rotini, and macaroni — shapes with grooves hold the sauce.
  • Protein pairings: grilled chicken, canned tuna, or sautéed mushrooms.
  • Veg add-ins: peas, corn, blanched broccoli, roasted red peppers.
  • Finishing: fresh herbs, cracked black pepper, a light olive oil drizzle, or a squeeze of lemon.
  • Temperature: Serve slightly warm for mains or chilled for salads.

From my kitchen: pairing with a crisp green salad balances the richness and makes the meal feel lighter.

Can You Use It as Salad Dressing or Other Dishes? 

Yes. The same base works beautifully as a salad dressing, sandwich spread, or dip. Mix in more acid and thin with water or milk for a pourable dressing.

Note on imitations: many supermarkets sell less expensive imitation mayo and Egg-free imitations labeled as spreads or dressings — they work fine but read labels for sodium and oil type.

Troubleshooting — Common Problems & How to Fix Them

  • Sauce too thick: Add reserved pasta water, milk, or lemon juice 1 tbsp at a time.
  • Sauce split or greasy: If overheated, it may separate. Try whisking in a small amount of warm water or a fresh yolk (if making homemade mayo) to re-emulsify.
  • Flavor too flat: Add acid (lemon/vinegar), salt, mustard, or grated cheese.
  • Too tangy: Balance with a tiny bit of sugar or extra oil/milk.

From my experience: I once over-salted a mayo sauce. A quick fix was to mash in a tablespoon of plain potato to absorb salt (remove before serving), or add unsalted yogurt to dilute without losing creaminess. Small, unexpected fixes are kitchen realities — keep calm and adjust slowly.

FAQs About Mayo Pasta Sauce

1. Can I make mayo pasta sauce without eggs?

Yes — use vegan mayo or make a base from aquafaba, silken tofu, or a store-bought eggless spread. These eggless versions work well and are widely available.

2. How can I make mayo pasta sauce spicier?

Add chili flakes, hot sauce, fresh chopped chilies, smoked paprika, or a dash of cayenne. Start small and taste.

3. How long can I store mayo pasta sauce?

Mixed with pasta: 3–4 days in the refrigerator. Keep it chilled and sealed.

4. Can I use mayo pasta sauce for salad dressings?

Absolutely — thin it with milk, water, or lemon juice and use as a creamy dressing for greens or potato/pasta salads.

5. Can I use mayo pasta sauce with other dishes?

Yes: as a sandwich spread, dip for fries or veggies, or blended into hybrid sauces (mayo + tomato or mayo + pesto).

Conclusion

Mayo pasta sauce is a simple, flexible solution for creamy pasta dishes: a thick, cold, and creamy sauce that you can adapt into many variants and use as salad dressing or sandwich spread. You can make it in under 20 minutes, keep control of the nutrient content, and rescue most texture problems with pasta water or a whisk.

If you follow the step-by-step method above — from perfect pasta to cautious warming and mindful seasoning — you’ll consistently get a silky, well-balanced result. Try the basic version, then experiment: roasted garlic, spice, cheese, or a vegan twist — the canvas is wide.

Best Diabetic Friendly Pasta Options for Better Blood Sugar

0

Discover the best diabetic friendly pasta choices, from lentil to chickpea, with tips for balance, portion control, and stable blood sugar levels.

Pasta doesn’t have to be off-limits if you have diabetes. With the right choices and portioning, you can enjoy a comforting bowl without a big blood-sugar spike. Diabetic friendly pasta is about picking lower-GI, higher-fiber options and balancing the meal with protein, fat and vegetables.

Diabetics can eat pasta safely, but only when you choose the right type, control portions, and pair it with protein and fiber. A few small changes make a big difference.

In this article I’ll show you — step by step — what makes a pasta diabetic-friendly, which pasta types and brands to try, exactly how to cook and portion pasta to lower its glycemic impact, and what I learned testing several options in my own kitchen. I’ll also give recipes, sample plate ideas and quantities for 4 people (you can scale up/down). Read on and you’ll be able to make pasta a regular, controlled part of a diabetes meal plan.

What Makes Pasta “Diabetic Friendly”?

Before we jump into brands or recipes, it’s important to understand what actually makes pasta suitable for someone managing blood sugar levels. In short, it’s about the Glycemic Index (GI), fiber content, and portion size.

1. Understanding the Glycemic Index (GI)

The Glycemic Index measures how quickly carbohydrates in food raise your blood sugar. Foods with a low GI (below 55) are digested more slowly, leading to a gradual increase in blood glucose rather than a sharp spike.

Regular white pasta made from refined wheat flour tends to have a moderate to high GI, while whole grain pasta or legume-based pasta (like lentil or chickpea) usually ranks lower on the GI scale.

2. Fiber Content and Complex Carbs

Another key element is fiber. Fiber slows down digestion and helps maintain steady blood sugar levels. Whole wheat pasta or lentil pasta contains significantly more fiber than traditional pasta made from durum wheat semolina. That’s why these are considered diabetic pasta options.

3. Portion Control and Balance

Even the best pasta can cause issues if you eat too much of it. Portion size matters — about 1 cup (cooked) per meal is generally ideal for most diabetics, paired with a source of lean protein (like grilled chicken or tofu) and healthy fats (like olive oil).

(From my experience, I once overestimated my serving size — thinking one extra ladle wouldn’t matter — and noticed my energy dip afterward. Since then, I’ve learned to measure my portions properly.)

Now that we know what makes pasta diabetic-friendly, let’s look at which types actually work best.

Best Types of Pasta for Diabetics

Choosing the right pasta can make all the difference. Let’s explore some of the most reliable options:

1. Whole Wheat Pasta

Whole wheat pasta retains the bran and germ, which adds fiber and nutrients like magnesium and B vitamins. This helps slow down carbohydrate absorption.
However, not all whole wheat pasta brands are equal — some are coarsely ground and may cook unevenly. Look for those labeled 100% whole grain and check the fiber per serving (at least 4g or more is great).

2. Lentil Pasta

Made entirely from lentil flour, this pasta is high in protein and fiber and naturally gluten-free. It’s one of the best diabetic pasta options because it keeps you full longer and minimizes blood sugar spikes.
I’ve personally found that red lentil pasta holds up well in creamy sauces and keeps a nice firm texture — just don’t overcook it, as it can become mushy.

3. Chickpea Pasta

Another great option, chickpea pasta offers a slightly nutty flavor and is packed with plant-based protein. It’s perfect for those following a vegan diet or Plant-based diet, and it has a lower GI compared to regular pasta.

4. Brown Rice Pasta

Brown rice pasta is a good alternative for people who want something mild and gluten-free. It’s less fibrous than lentil or chickpea varieties, but still better than traditional white pasta.

5. Shirataki Noodles

If you’re looking for a super low-carb option, shirataki noodles (made from konjac yam fiber) are practically carb-free. They can be a bit slippery in texture, but with the right sauce and preparation, they make a solid choice for those needing tight blood sugar control.

Is Whole Wheat Pasta Really Better?

This is one of the most common questions — is whole wheat pasta good for diabetes?
In short, yes, but it’s not a magic fix. Whole wheat pasta has more fiber, nutrients, and a lower GI than refined pasta, but the overall effect still depends on portion size and meal composition.

For example, pairing your whole wheat spaghetti with grilled vegetables and olive oil will have a very different impact than pairing it with a creamy, high-fat sauce.
(When I first switched to whole wheat pasta, I didn’t love the taste — but once I combined it with tomato-based sauces and herbs, it grew on me.)

So, yes — whole wheat pasta is a good choice for diabetics, but moderation and balance are key.

Portion Control and Glycemic Index Tips

We’ve already mentioned portion size briefly, but it deserves its own spotlight because it’s one of the biggest mistakes people make.

1. Measure the dry pasta

For a main course for one adult, aim for 45–60 g dry pasta (about 1/2 to 2/3 cup dry, which cooks to ~1 cup). For 4 people, use 350 g (12 oz) dry pasta total. This yields roughly 4 main-course portions. (I keep a small digital scale in my kitchen — it changed my portioning game.)

2. Cook al dente

Cook to firm-to-bite — al dente pasta has a lower GI than overcooked pasta because the more intact starches digest more slowly. Cook 1–2 minutes less than the longest time stated on the packet to keep the texture right.

3. Add protein on the plate

Aim for 20–30 g protein per meal (chicken, fish, tofu, beans). Protein slows digestion and balances blood sugar.

4. Add fiber-rich vegetables

Fill half the plate with non-starchy veggies (spinach, broccoli, zucchini, mushrooms). This reduces total carb density.

5. Use healthy fats

A drizzle of olive oil, a sprinkle of nuts, or avocado helps further blunt post-meal glucose response.

6. Watch the sauce

Tomato-based or herb-olive oil sauces are safer than heavy cream or sugar-sweetened jarred sauces.

  • Practical plate example (for 1 person): 1 cup cooked chickpea pasta + 1 cup sautéed vegetables + 90–120 g grilled chicken (or 1/2 cup white beans) + 1 tsp olive oil + lemon/herbs. That meal balances carbs, protein and fats.

How to Cook Diabetic Friendly Pasta Lower Its GI

Cooking technique changes digestion and GI. Follow these steps exactly to make pasta friendlier for blood sugar control.

Step 1 — Choose the right pasta

Pick a legume or whole-grain pasta (e.g., lentil or chickpea). Check label: aim for ≥6–8 g fiber and >8–12 g protein per serving for legume pastas.

Step 2 — Measure and portion

For 4 people use 350 g dry pasta (about 3½–4 cups dry depending on shape). Measure with a scale or use 3 cups dry if you don’t have a scale.

Step 3 — Boil with plenty of water

Use a large pot and plenty of water. Salt the water lightly. Bring to a full rolling boil.

Step 4 — Cook al dente

Set a timer for 1–2 minutes less than package directions. Test early. Remove when there’s a slight resistance in the center. Drain quickly.

Step 5 — Shock or cool (optional, for resistant starch)

If you’re planning a pasta salad or want to increase resistant starch, rinse the pasta under cold water or chill it — then reheat or serve cold. Studies show cooking, cooling and reheating can increase resistant starch and lower glycemic response in legume pasta. This is a practical trick if you make pasta salads for meal prep.

Step 6 — Emulsify with sauce and pasta water

Use the reserved starchy pasta water (a few tablespoons) to emulsify your sauce and help it cling — this reduces the need for extra oils or cream and improves mouthfeel.

Step 7 — Serve with protein and veggies

Plate as described above to keep the meal balanced.

Cooking notes & small technique tips (I learned these by trial)

  • Don’t overcrowd the pan when sautéing mushrooms or vegetables — browning adds flavor without extra sugar.
  • Finish pasta in the pan with the sauce for a minute so flavors marry and the sauce adheres — this also reduces the need to add more sauce later.
  • Use lemon or vinegar to brighten flavors — acid can make smaller portions feel more satisfying.
  • If reheating, add a splash of water or plant milk to restore the creamy texture rather than adding extra fat.

From my experience, the “cook-cool-reheat” trick made chickpea pasta salads noticeably more filling and gentler on my glucose logs.

Compare nutrition: regular vs whole grain vs legume pastas (what the labels show)

Here’s a quick comparison of typical per-serving numbers (approximate; check labels for exact):

  • Regular semolina pasta (56 g dry / 1 cup cooked): ~200 kcal, 40 g carbs, 2–3 g fiber, 7 g protein.
  • Whole wheat pasta: ~200 kcal, 38 g carbs, 6–7 g fiber, 8 g protein.
  • Chickpea/lentil pasta: ~200–220 kcal, 30–35 g carbs, 6–11 g fiber, 12–15 g protein.

You can see legume pasta reduce net carbs while boosting fiber and protein — that’s why many dietitians recommend them for blood-sugar control. EatingWell+1

Best Brands for Diabetic Friendly Pasta in the US

Let’s talk about real products that you can find in stores or online. These brands are widely available and dietitian-approved for diabetic meal plans:

  • Banza Chickpea Pasta – High in protein and fiber; great texture.
  • Tolerant Organic Lentil Pasta – Made from 100% lentil flour.
  • Barilla Protein+ – Blended with lentil, chickpea, and pea protein; good for those who want a traditional feel.
  • Explore Cuisine Black Bean Spaghetti – Unique flavor, very high in fiber.
  • Dreamfields Pasta – Designed specifically for people managing insulin resistance and blood sugar levels.

(Personally, I’ve tested most of these — and Banza and Barilla Protein+ have been the easiest to cook without texture issues.)

What Are the Health Benefits of Choosing Diabetic Friendly Pasta?

Now that we’ve covered the practical side, let’s look at the health side.

1. Better Blood Sugar Management

Low-GI pastas made from whole grains, chickpeas, or lentils release glucose slowly, helping prevent spikes.

2. More Nutrients

These options are richer in fiber, iron, and plant-based protein — supporting overall energy and metabolism.

3. Supports a Balanced Diet

Including diabetic-friendly pasta occasionally allows variety in a balanced diet without giving up favorite dishes. It’s especially suitable for people following a Plant-based diet.

Evidence & why this approach works (brief science notes)

  • A review of GI values for pasta shows wide variability, but overall pasta can be a medium–low-GI food — meaning it often raises blood sugar more slowly than many starchy foods, especially when cooked al dente and paired correctly. PubMed Central+1 
  • Practical guidance from diabetes organizations emphasizes carbohydrate awareness and meal patterns rather than one-size-fits-all rules — measuring, balancing macronutrients and choosing higher-fiber carbs is recommended. American Diabetes Association+1 
  • Recent research shows cooking, cooling and reheating some pastas (including legume pastas) can increase resistant starch, which reduces the postprandial glycemic response — a useful strategy for meal prep and pasta salads. PubMed Central

Mistakes people make (and how to avoid them)

  1. Assuming “gluten-free” = low GI. Many gluten-free pastas are rice-based and can spike blood sugar. Always check fiber and protein.
  2. Overcooking pasta. Overcooked pasta digests faster and raises blood sugar quicker — aim al dente.
  3. Huge portions. A big bowl negates the benefits of low-GI pasta. Measure portions.
  4. Sauce pitfalls. Creamy, sugary, or extra-oily sauces add calories and sometimes hidden carbs — prefer tomato, olive oil, herbs, or light nut/plant bases.
  5. Skipping protein/fat/veg. Pairing is essential; protein and healthy fats slow glucose rise.

Storage, reheating and meal prep tips

  • Cook smaller batches and cool rapidly for meal prep; refrigerated pasta dishes can be eaten within 2–3 days.
  • Reheat gently with a splash of plant milk or water to restore texture.
  • For pasta salads, cook, cool, and refrigerate — resistant starch may increase and the GI can be lower on reheating/serving cold. 

My Experience Testing Diabetic Friendly Pasta

From my own kitchen experiments, I learned that not all gluten-free pastas are ideal for diabetics — some raise blood sugar quickly. Lentil and chickpea pastas worked best for me, keeping energy steady and flavor satisfying. The secret is balance: pair your pasta with veggies, olive oil, and lean proteins. Be patient — it takes a few tries to find what truly fits you.

FAQs About Diabetic Friendly Pasta

Can diabetics eat pasta safely?

Yes, as long as you choose low-GI, high-fiber varieties and keep portions moderate.

What pasta is good for diabetics?

Options like lentil pasta, chickpea pasta, and whole grain pasta are best.

Is whole wheat pasta good for diabetes?

Yes, it has a lower Glycemic Index than white pasta and contains more fiber and nutrients.

What are the best pasta brands for diabetics?

Banza, Tolerant, Explore Cuisine, and Dreamfields are reliable picks.

Can gluten-free pasta help diabetics?

Some gluten-free pastas (like those made from legumes) are great, but others (made from rice or corn) can still spike blood sugar.

Conclusion: Diabetic Friendly Pasta

To wrap it up — pasta doesn’t have to be off the table if you have diabetes. The key is smart selection, proper portioning, and balanced meals.

Whether you prefer whole grain, lentil, or chickpea varieties, you can enjoy pasta as part of your diabetic meal plan — just remember: moderation is everything.
Cooking al dente, adding protein and fiber, and keeping portions in check are small steps that make a big difference.

So next time you crave comfort food, reach for diabetic friendly pasta — because it’s possible to have both flavor and control on your plate.

Is Red Lentil Pasta Healthy? A Practical, step-by-step Guide

0

Meta description: Is red lentil pasta healthy — a plain, practical guide on nutrition, taste, cooking tips, pros/cons and when to choose red lentil pasta vs regular pasta.


Red lentil pasta has become a popular swap for wheat noodles, especially for people who want more plant protein or follow a gluten-free pasta plan. Many home cooks ask: is red lentil pasta healthy?

Yes — for many people red lentil pasta is a healthy pasta alternative, because it offers more protein and fiber and a lower glycemic response than refined wheat pasta. However, the benefit depends on the brand, how you cook it, and how it fits your overall diet.

Now what I’ll walk you through in this article (so you won’t get lost): first we’ll start from the basics (what it is, what’s in it), then examine the nutrition in detail, list the health benefits and possible drawbacks, give step-by-step cooking tips and exact serving quantities, compare it to regular pasta, answer common questions, and close with practical buying and recipe ideas. 

What is Red Lentil Pasta? (The Simple Basics)

Let’s start simple. Red lentil pasta is pasta made from ground red lentils, which are lens-shaped edible seeds that grow in pods. Lentils have long been a staple in many cuisines worldwide — especially in hearty stews and soups — thanks to their rich nutrition and versatility.

By milling lentils into fine flour and forming it into dough, food makers have created one of the most popular alternatives to regular pasta. Instead of relying on wheat flour (which contains gluten), red lentil pasta uses lentil flour and water, making it naturally gluten-free and rich in plant-based nutrients.

When I first tried it, I expected it to behave exactly like wheat pasta — that was my mistake. I boiled it too long, and it turned mushy. Over time, I learned the technique (which I’ll share later), and since then, it has become one of my go-to healthy dinner options.

Ingredients and How It Differs from Regular Pasta

If you read the label on a box of red lentil pasta, you’ll find it refreshingly short. The red lentil pasta ingredients are usually:

  • Red lentil (or red lentil flour)
  • Water
  • Sometimes a pinch of salt or a little oil
  • Some brands may add a small amount of binder or stabilizer (but many high-quality brands avoid gums)

By contrast, regular pasta usually lists durum or semolina (wheat flour) and relies on gluten-containing proteins to create that springy, elastic structure. So what do you gain and lose by switching?

  • Gain: more plant protein, more fiber, more iron and folate; it’s often a healthy pasta alternative if you want higher satiety.
  • Lose / change: different red lentil pasta texture and flavor — more legume-like, sometimes slightly grainy; it’s not a one-to-one copy of wheat pasta in mouthfeel or taste of gluten-free pasta. People comparing red lentil vs regular pasta should know this upfront. 

If you want to dig deeper into ingredient comparisons, here’s a helpful Healthline article that breaks down lentil-based products and how they compare to wheat options.

Nutrition Profile of Red Lentil Pasta

Now, let’s go step-by-step through what makes this pasta nutritionally interesting.

Here’s the practical nutrition breakdown you need to judge if red lentil pasta is right for your goals. Numbers vary by brand, but these ranges reflect typical labelling for popular red lentil pasta products:

Per ~100 g dry red lentil pasta (typical ranges):

  • Calories: ~320 kcal.
  • Protein: ~18–25 g (often around 20–25 g) — much higher than refined wheat pasta.
  • Fiber: ~7–11 g — again, much higher than refined wheat pasta. 
  • Total carbohydrates: ~50–60 g (but a larger share is fiber and complex starch).
  • Iron & folate: lentils are naturally richer in iron and folate than refined wheat; red lentil pasta retains a meaningful share of these micronutrients.

Why these numbers matter:

  • Protein helps with fullness and muscle repair — valuable for vegetarians and people seeking a higher-protein meal.
  • Fiber supports digestion and slows glucose absorption, contributing to better blood-sugar control.
  • Iron & folate are especially important in plant-based diets where animal sources are limited.

Glycemic response: Several studies and product data show legume-based pastas, including red lentil pasta, tend to have a lower glycaemic index (GI) than refined wheat pasta, often in the approximate 30–40 range depending on processing — meaning you get a steadier blood sugar response. This is an important reason nutritionists recommend legume pastas for people wanting stable glucose. PubMed+1

Load-bearing citations (for these core claims): nutrition comparisons and protein/fiber advantages — EatingWell, NutritionValue product data and PubMed glycaemic studies. EatingWell+2Nutrition Value+2

Health Benefits Of Red Lentil Pasta

Let’s break down the actual red lentil nutritional benefits and how they help you in daily life.

1. Keeps You Fuller for Longer

Because it’s rich in protein and fiber, red lentil pasta digests slowly. I personally noticed that after switching from wheat pasta, I stopped feeling hungry within two hours of dinner. The legume content keeps you full, which helps reduce overeating — ideal for weight management.

2. Better Blood Sugar Control

Unlike refined wheat, legume-based pastas release glucose gradually. That’s because lentils are high in resistant and digestible starch that slows sugar absorption. This makes red lentil pasta a smart choice for anyone looking to manage energy levels or prevent mid-afternoon sugar crashes.

3. Gluten-Free for Medical or Lifestyle Needs

If you have celiac disease or gluten sensitivity, red lentil pasta offers the joy of pasta without discomfort. It’s a safe and naturally gluten-free pasta option.

4. Plant-Based Micronutrients

Lentils naturally provide iron, folate, magnesium, and potassium. These are key nutrients many people miss when cutting out wheat or meat products.

5. Easier to Digest for Some

Although legumes can cause gas in large quantities, I’ve found red lentil pasta gentler on digestion than eating whole lentils — likely because it’s milled and cooked differently.

For a real-world take, I’m sharing a helpful Reddit discussion from r/nutrition where people compare red lentil pasta with whole wheat pasta. Many users highlight its higher protein and fiber but note the texture feels different. You can check out that thread here for honest community opinions.

Potential Drawbacks and Considerations

Every food has trade-offs, and it’s important to know them.

1. Texture and Taste

The taste of red lentil pasta is slightly earthy and nutty. The red lentil pasta texture is firmer or grainier compared to traditional pasta. It’s delicious when paired with flavorful sauces but may not satisfy if you expect identical Italian cuisine texture.

2. Price

Lentil pasta can cost double the price of basic durum pasta. It’s becoming more affordable, but cost can still matter for families.

3. Nutrient Fortification

Unlike many wheat pastas that are fortified with iron or folic acid, lentil pastas depend solely on their natural nutrients. For most people that’s fine, but if your diet lacks variety, check labels.

4. Overcooking Issues

Because it’s gluten-free, red lentil pasta turns soft quickly. A few extra minutes can ruin the texture — trust me, I’ve done it. Now, I always set a timer and taste it early.

5. Digestive Sensitivity

If you’re new to legumes, start with small portions. Legume starches can cause gas, but your gut adapts quickly.

Cooking Red Lentil Pasta (Step-by-Step Method)

Cooking changes everything. Here I’ll give you a careful, tested method plus the mistakes I made (so you don’t repeat them).

Serving size to use (practical): for 4 people use 350 g dry red lentil pasta (this gives a filling main course when paired with sauce + veg). If you want lighter portions, use 300 g; for hungry eaters increase to 400 g.

Step-by-step cooking (best method):

  1. Bring a large pot of water to a rolling boil. Use at least 4–6 quarts for 350 g of pasta. Add a tablespoon of salt.
  2. Add pasta and stir immediately. This prevents sticking.
  3. Start tasting early. Many red lentil pastas list 8–10 minutes on the packet — begin tasting at 6 minutes and check every minute until firm but not hard (al dente). Aim for slightly under the advertised time if you plan to finish in the pan or bake.
  4. Reserve 1 cup of cooking water before draining — this starchy water helps emulsify sauces and smooth texture.
  5. Drain quickly (don’t over-rinse unless making a pasta salad — then rinse under cold water to stop cooking).
  6. Finish in the pan. Add drained pasta back to a warm pan with sauce and 1/4 cup of reserved pasta water; toss for 1–2 minutes to combine. This step integrates starch into the sauce and improves mouthfeel.
  7. Serve immediately.

Common mistakes & what happened (from my experience):

  • Mistake: I once boiled the pasta the full packet time then baked it in a casserole. Outcome: the bake turned mushy. Fix: undercook by 1–2 minutes before baking.
  • Mistake: Stirring aggressively and trying to strain and toss led to pasta breaking. Fix: stir gently and mix in the pan after draining.
  • Mistake: Using a very delicate, light sauce (like a thin oil & lemon) that didn’t match the legume flavor, leaving the dish tasting flat. Fix: pair red lentil pasta with robust pasta sauces, vegetables, or a bit of cheese to balance the legume taste.

Best Sauce Matches:

  • Tomato-basil ragù
  • Veggie-loaded marinara
  • Lemon-garlic olive oil
  • Creamy nut or pesto-based sauces

Red Lentil Pasta Recipes (for 4 people)

I’ll keep these straightforward and show where red lentil pasta helps.

A. Rustic tomato & basil penne (quick):

  • Cook 350 g red lentil penne until 1–2 minutes under packet time. Sauté 1 small onion + 2 garlic cloves in olive oil, add 400 g canned tomatoes, simmer 8–10 minutes. Toss pasta in sauce with 1/2 cup reserved water, finish with basil and a sprinkle of parmesan.

B. One-pot veggie pasta (easier):

  • Sauté onion + garlic, add 1 L vegetable stock, 1 cup mixed veg (zucchini, bell pepper, peas), then add 350 g pasta and simmer until pasta absorbs most liquid. Finish with lemon zest and grated cheese.

C. Cold pasta salad:

  • Cook al dente, rinse cold, toss with cherry tomatoes, cucumber, olives, feta, and vinaigrette. The firm texture holds up well.

(Each uses 350 g dry pasta for 4 people. If you’re serving 2, use 175 g; for 6, use 525 g.)

Red Lentil Pasta vs Regular Pasta vs Other Legume Pastas

FeatureRed Lentil PastaRegular PastaChickpea / Other Legume Pasta
Protein (per 100g)20–25g12–14g18–22g
Fiber7–11g3–4g7–9g
Gluten-FreeYesNoYes
TextureGrainier, firmerSmooth, elasticSimilar to lentil
TasteNutty, earthyNeutralNutty
CostHigherLowerSimilar
Cooking Time6–9 min8–11 min7–10 min

FAQs About Is Red Lentil Pasta Healthy

Is red lentil pasta good for weight loss?

Yes, it can help because its high protein and fiber content keeps you full for longer — but weight loss depends on total calorie control.

Does it taste like lentils?

A little. The red lentil pasta taste comparison shows a mild legume flavor, which pairs best with bold sauces.

Is it safe for gluten-free diets?

Yes, it’s naturally gluten-free — just check the packaging for certification.

Can I use it in any recipe?

Absolutely, but shorten the cooking time slightly and avoid overbaking.

Does it lack nutrients compared to wheat pasta?

No — it’s naturally rich in iron, folate, and fiber. It might not be fortified like some wheat brands, but its red lentil nutritional benefits make up for it.

Final Verdict: Is Red Lentil Pasta Healthy

So — is red lentil pasta healthy? Yes, it’s one of the best alternatives to regular pasta if you want a nutrient-dense, gluten-free, and plant-based option. It’s rich in fiber, packed with protein, and offers a steady energy release — making it ideal for most people.

That said, it’s not for everyone. If you’re after the classic Italian cuisine texture or are on a tight budget, regular whole-grain pasta still holds its place. But if you enjoy exploring new types of pasta, red lentil pasta deserves a try. Once you learn how to cook it right, it becomes a satisfying, wholesome addition to your meals.

Half and Half vs Heavy Cream Pasta Sauce: A Complete Guide

0

When you’re making a creamy pasta dish, one of the most common questions home cooks ask is:  what’s the difference between Half and Half vs Heavy Cream Pasta Sauce? The answer isn’t always simple, but understanding it can make or break your creamy pasta sauce options.

For most rich Italian-style pasta sauces, heavy cream pasta sauce gives you a thicker, richer texture. On the other hand, half and half cream sauce is a lighter version that works well if you know how to adjust it. The choice really depends on your taste, health goals, and the type of pasta dish you’re preparing.

In this guide, I’ll explain everything you need to know — the Half and Half vs Heavy Cream Pasta Sauce: A Complete Guide, how they behave in sauces, step-by-step cooking methods, substitutions, and even my own kitchen-tested tips. You’ll learn exactly which one fits your pasta, your budget, and your lifestyle — all without confusion.

What is Half and Half?

Let’s start simple before diving into the differences. Half and half is a dairy product made by blending an equal-parts mixture of milk and cream. It usually contains between 10.5 and 18 percent milkfat, which gives it a light, smooth texture. It’s pasteurized (and sometimes ultra-pasteurized) to increase its long shelf life, making it one of the most common beverages and foods used in coffee, breakfast cereals, and light sauces.

In a half and half cream sauce, this blend gives a silky base but not as much thickness as heavy cream. It’s less dense and can separate if overheated. When I first used half and half for a pasta sauce, I made the mistake of pouring it straight into the pan while the sauce was boiling — it curdled instantly! Now I always warm it gently before mixing, and the sauce stays smooth every time.

Most half and half you’ll find in stores today is made through industrial production, and it may include stabilizers, nutritive sweeteners, or flavoring ingredients (both natural and artificial) to maintain texture and taste. It’s a convenient liquid product that balances flavor and creaminess — ideal for low-fat pasta sauce options when you don’t want something too heavy.

What is Heavy Cream?

Now that you know what half and half is, let’s compare it with heavy cream, the richer, more luxurious alternative for creamy pasta lovers. Sometimes labeled as sweet cream or whipping cream, this cream is composed of milkfat levels of 36% or higher. That high butterfat content gives it a thick, velvety texture, making it perfect for a classic heavy cream pasta sauce.

Unlike half and half, heavy cream doesn’t curdle easily and can handle higher heat. It’s what gives restaurant dishes like Fettuccine Alfredo, creamy garlic pasta, and cheese sauce their luxurious, melt-in-the-mouth texture.

The best part? It coats the pasta beautifully, clinging to every strand, especially when mixed with butter and Parmesan cheese. The result is a richer variant of standard Italian recipes — the kind you’d expect in high-end dining.

However, since it contains high levels of saturated fat, it’s definitely an indulgence. I always tell home cooks — don’t avoid it completely; just use it smartly. When you make heavy cream pasta sauce for 3–4 people, about 1 cup of cream and 2 tablespoons of butter are enough for a balanced, rich result without going overboard.

Half and Half vs Heavy Cream Pasta Sauce — Key Differences

Now that we’ve covered both ingredients, let’s see exactly how they differ side by side:

FeatureHalf and HalfHeavy Cream
Fat Content10.5–18%36%+
TextureLight and smoothThick and rich
Heat StabilityProne to curdlingHighly stable
CaloriesLowerHigher
TasteMildDeep, buttery
Ideal ForLight sauces, soupsAlfredo, vodka sauce, baked pasta

The differences between half and half and heavy cream come down to fat and stability. The more fat a sauce has, the more it resists heat and curdling. That’s why heavy cream is your best bet when you want a perfectly smooth pasta sauce consistency.

If you’re after a lighter taste or cutting calories, half and half works well — but only with care. For instance, lower the heat while simmering and use less liquid to prevent a watery finish.

Nutritional Comparison: Half and Half vs Heavy Cream Pasta Sauce

Nutrition often drives people to ask about half and half vs heavy cream calories. Here’s a basic comparison (per 100ml):

Half and HalfHeavy Cream
Calories120350
Fat12g36g
Saturated Fat8g23g
Protein3g2g
Carbs3g2g

If you’re following a low-fat or balanced diet, half and half is lighter and less caloric. But for keto or high-fat diets, heavy cream actually fits better because of its butterfat content.

I personally switch between them depending on my week — if it’s a “comfort meal” night, I reach for heavy cream; on weekdays, half and half keeps my pasta light yet creamy.

Cooking Behavior: How Each Reacts in Pasta Sauce

When it comes to cooking, the difference between the two becomes very clear.

This is where things get interesting. When cooking, heavy cream behaves like a loyal friend — stable, forgiving, and thickens easily. You can boil it gently, reduce it, and still end up with a perfect creamy sauce texture.

Half and half, on the other hand, needs extra care. It’s more delicate and can split or curdle if exposed to high heat. That’s why it’s important to temper it first — by adding a few spoons of hot sauce to the cold half and half before mixing.

When you’re cooking with half and half, reduce the heat to low and let it thicken slowly. If the sauce feels thin, here’s how to make pasta sauce thicker:

  • Simmer longer to let water evaporate
  • Add a small roux (1 tbsp butter + 1 tbsp flour)
  • Mix in Parmesan cheese or a bit of cornstarch slurry

Once, I skipped the roux step, and my sauce turned watery. Now, I always add that tiny roux for perfect consistency every time.

When to Use Each: Half and Half vs Heavy Cream Pasta Sauce

Now that you understand their behavior, let’s discuss when to use each for the best results.

Best Scenarios for Heavy Cream

  • Rich, indulgent sauces like Alfredo, four-cheese, or pesto cream pasta
  • When you’re cooking for guests or a main course where texture matters
  • Perfect for baked pasta or shelf-stable Alfredo sauces, as it reheats smoothly

Best Scenarios for Half and Half

  • Everyday pasta dishes for 2–3 people
  • Lighter Italian recipes that still need a creamy base
  • When combined with cheese-making elements like mozzarella or feta — it balances the fat nicely.

So, think of it this way: use heavy cream when you want a restaurant-quality sauce; use half and half when you want something homestyle and light.

How to Make Pasta Sauce with Each

Let’s make both versions — heavy cream pasta sauce and half and half pasta sauce — step by step. You’ll see how they differ in richness, texture, and thickness. These recipes serve 3–4 people and use simple ingredients you likely already have at home.

A. Heavy Cream Pasta Sauce (Serves 3–4)

This version is rich, silky, and restaurant-style — perfect for Alfredo or creamy mushroom pasta.

Ingredients:

  • 1 cup heavy cream
  • 2 tablespoons butter
  • ½ cup Parmesan cheese (grated)
  • 2 cloves garlic, minced
  • Salt and pepper to taste
  • A pinch of nutmeg (optional but adds depth)

Step-by-Step Method:

Step 1: Melt Butter and Sauté Garlic

Place a medium-sized pan on low heat. Add 2 tbsp butter and let it melt gently — you don’t want it to brown.
Once melted, add minced garlic. Stir for about 30–40 seconds, just until you smell that wonderful aroma. Don’t let the garlic turn brown — that makes it bitter.

My tip: I used to rush this step and ended up with burnt garlic. Now, I always keep the flame low and stir continuously — that’s the secret to a perfect base.

Step 2: Add the Heavy Cream Slowly

Lower the heat even more, then pour in 1 cup heavy cream. Stir continuously as you pour — it helps the butter and cream blend smoothly. You’ll notice small bubbles forming around the edges — that’s the sign it’s gently heating.

Important: Never boil heavy cream. Boiling breaks it and makes the sauce oily. A light simmer is enough.

Step 3: Simmer Until Slightly Thick

Let it simmer gently for 5–7 minutes while stirring occasionally. You’ll see the sauce thickening slowly — it should lightly coat the back of your spoon.
If it gets too thick, add a splash of milk or pasta water to loosen it up.

From my experience: I once got distracted and reduced it too long — the sauce turned almost solid! Since then, I’ve learned to keep a close eye and stir every minute. The texture should stay smooth and creamy, not sticky.

Step 4: Add Parmesan and Seasoning

When the sauce is slightly thickened, turn off the heat and add ½ cup Parmesan cheese. Stir gently until the cheese melts completely into the cream.
Season with salt, pepper, and a pinch of nutmeg. The nutmeg enhances that creamy flavor beautifully.

Step 5: Toss with Pasta

Add freshly cooked pasta (like fettuccine or penne) straight into the sauce. Toss until each piece is coated evenly.
If it feels too thick, add 1–2 tablespoons of hot pasta water to balance it.

Your heavy cream pasta sauce is now ready — rich, smooth, and velvety. Serve immediately while hot and top with extra Parmesan or parsley for that restaurant look.

My Pro Tip:

To keep the sauce silky, always simmer gently — never rush the process. That soft simmer helps the cream and cheese merge perfectly.

Perfect Pairings:

  • Fettuccine Alfredo
  • Creamy Pesto Pasta
  • Mushroom Chicken Pasta

This sauce holds its texture beautifully and reheats well — just add a splash of milk when warming it up later.

B. Half and Half Pasta Sauce (Serves 3–4)

This version is lighter, less fatty, and ideal for everyday cooking. It gives a creamy texture without feeling too heavy.

Ingredients:

  • 1 cup half and half
  • 1 tablespoon butter
  • 1 tablespoon flour (for thickening)
  • ¼ cup grated cheese (Parmesan or mild cheddar)
  • Salt, pepper, and herbs (like oregano or parsley)

Step-by-Step Method:

Step 1: Make the Roux Base

In a medium pan, melt 1 tbsp butter on low heat. Once melted, add 1 tbsp flour and whisk quickly.
You’ll see a smooth paste forming — that’s your roux. Keep whisking for about 30–45 seconds to remove the raw flour taste.

Personal note: The first time I made this, I didn’t whisk enough and ended up with a grainy sauce. Now, I always whisk continuously until the roux turns pale and smooth.

Step 2: Add Half and Half Gradually

Keep the heat low and slowly pour in 1 cup half and half while whisking continuously.
This helps the mixture stay lump-free and smooth. Pouring it too fast or not whisking will cause clumps.

Tip: I hold the jug in one hand and the whisk in the other — pouring a thin stream while whisking nonstop. It’s a small trick, but it makes a big difference!

Step 3: Simmer to Thicken

Once combined, let the sauce cook gently for 4–5 minutes. You’ll see it start to thicken — it should feel creamy, not watery.
If it gets too thick, you can always add a tablespoon of milk to loosen it up.

My experience: Once I got impatient and turned the heat high — the sauce split and looked grainy. The secret is low and slow. Always use a gentle simmer for that smooth texture.

Step 4: Add Cheese and Seasonings

Turn the heat to low, add ¼ cup grated cheese, and stir until melted.
Then season with salt, black pepper, and herbs. Oregano adds a nice Italian touch, while parsley gives freshness.

Step 5: Mix with Pasta

Toss your cooked pasta (spaghetti, penne, or fusilli) right into the sauce. Stir for a minute until evenly coated.
If you want extra creaminess, add a tablespoon of reserved pasta water.

Serve immediately — it should look glossy and smooth, not heavy or greasy.

My Pro Tip:

If you prefer a lighter sauce, reduce cheese slightly and add more herbs. It gives a fresher flavor without losing creaminess.

Perfect Pairings:

  • Creamy Spinach Pasta
  • Garlic Herb Penne
  • Chicken or Shrimp Pasta

This version is perfect for those who want a balanced creamy sauce — not too rich, but still comforting.

I’ve added a few helpful resources for you. I read Quora threads and watched YouTube videos about using half and half in pasta sauces. They taught me some great tips that I’m excited to share with you.

Substitution Guide: Can You Swap Them?

Yes, you can — with a few rules.
If you’re substituting half and half for heavy cream, add fat to make up for the difference. Mix ¾ cup half and half + 1 tbsp butter for every 1 cup of heavy cream.

However, this doesn’t work for whipped cream or extremely thick sauces. For those, you need the real thing.

For the reverse — using heavy cream instead of half and half — you can dilute with ¼ cup milk per 1 cup cream to create a lighter texture.

This substitution trick saved me many times when I ran out of one or the other!

Pros & Cons (Half and Half vs Heavy Cream Pasta Sauce)

Half and HalfHeavy Cream
ProsLighter, cheaper, fewer caloriesThicker, more stable, richer taste
ConsMay curdle, needs careHigher calories, more saturated fat
Best ForLight sauces, weekday mealsClassic Italian cream sauces
Cooking TipKeep heat lowSimmer gently, don’t boil

Bottom line: both have their place. The key is understanding your pasta sauce texture comparison and your health goals.

Tips & Best Practices for Creamy Pasta Sauces

  • Always bring dairy products to room temperature before adding to hot sauce.
  • Add dairy last to avoid curdling.
  • Use fresh Alfredo sauces when possible; shelf-stable Alfredo sauces or Alfredo sauce powder can be handy backups.
  • For richer texture, add a bit of butter or cheese just before serving.
  • Choose pasta types wisely:
    • Heavy cream → fettuccine, rigatoni, penne.
    • Half and half → linguine, spaghetti, shells.

Choosing the Right Cream for Your Pasta

Here’s a simple flow:

  • Want a lighter sauce? → Use half and half.
  • Want a richer flavor and perfect pasta sauce consistency? → Go with heavy cream.
  • Watching calories? → Choose low-fat pasta sauce options using dairy alternatives in pasta sauce, like milkette, soy cream, or oat cream.

Your final decision depends on your taste and purpose — no one-size-fits-all rule. The beauty of creamy sauce variations is that you can customize endlessly.

FAQs About Half and Half vs Heavy Cream Pasta Sauce

Q1: What’s the difference between pasteurized and ultra-pasteurized cream?

Ultra-pasteurized cream lasts longer but may not whip as well; both are fine for sauces.

Q2: Can I use milkette or coffee creamer in pasta sauces?

Only in emergencies. They’re sweetened liquid products, not true dairy products.

Q3: Do natural or artificial ingredients affect sauce quality?

Yes, artificial stabilizers can alter taste. Always choose brands with minimal additives.

Q4: Are shelf-stable Alfredo sauces as good as fresh?

Not quite — they’re convenient but lack the depth of fresh, fermented cream flavors.

Q5: Which pasta shapes hold creamy sauces best?

Short, ridged pasta like penne or rigatoni hold cheese sauce and cream better than smooth ones.

Conclusion: Half and Half vs Heavy Cream Pasta Sauce

Both sauces have their charm — it just depends on what kind of meal you want.

If you’re craving something indulgent and restaurant-like, go for heavy cream. It gives that smooth, buttery richness everyone loves.

But if you prefer something lighter and healthier for weeknights, half and half is your best friend — easy to digest and still beautifully creamy.

From my kitchen experience: I use heavy cream for weekend dinners or guests, and half and half when I want something quick and light. Both have earned a permanent place in my pasta rotation.