Home Blog

Is Red Lentil Pasta Healthier Than Regular Pasta? A Complete Guide

0

Pasta is one of the most popular comfort foods in the world. People love it because it is easy to cook, filling, and can be prepared in many different ways. However, as more people focus on healthier eating, many are now exploring alternatives to traditional wheat pasta.

Is Red Lentil Pasta Healthier Than Regular Pasta? In many cases, yes. Red lentil pasta usually contains more protein and fiber than regular wheat pasta, which can make it more nutritious and more filling for many people.

In this detailed guide, we will explore everything you need to know about red lentil pasta. We will discuss Is Red Lentil Pasta Healthier Than Regular Pasta, its nutritional benefits, protein content, fiber content, calories, weight-loss benefits, gluten-free suitability, and possible downsides. I will also explain step-by-step how to cook red lentil pasta properly, including the exact ingredients and quantities for 4 servings, so you can easily prepare it at home.

Understanding What Red Lentil Pasta Is

Before we compare both types of pasta, it is important to understand what red lentil pasta actually is.

Red lentil pasta is made from ground red lentils, sometimes mixed with a small amount of other legumes. Unlike traditional pasta made from refined wheat flour, red lentil pasta keeps most of the natural nutrients found in lentils.

Lentils themselves are a well-known source of plant protein and fiber. Because the pasta is made directly from lentils, it naturally contains more nutrients than many refined grain products.

When I first tried cooking red lentil pasta at home, I noticed something interesting. Even though the portion looked similar to regular pasta, it felt more filling after eating. This happens mainly because of the higher fiber and protein levels.

Now that we understand what red lentil pasta is, the next logical step is to answer the most important question people usually ask.

Is Red Lentil Pasta Healthier Than Regular Pasta?

Many people ask this question when they are trying to improve their diet. Is Red Lentil Pasta Healthier Than Regular Pasta? The answer depends on what nutritional factors you are looking for.

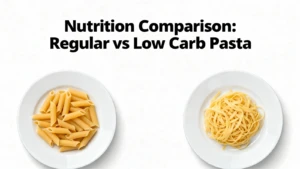
Regular pasta made from wheat mainly provides carbohydrates. While it can still be part of a balanced diet, it usually contains less protein and fiber compared to pasta made from legumes.

Red lentil pasta, on the other hand, contains more plant protein, more fiber, and several important minerals such as iron and potassium. Because of these nutrients, it often supports better digestion and longer-lasting fullness.

Another reason people say Red Lentil Pasta Healthier Than Regular Pasta is because red lentils are less processed than refined wheat flour. This means more natural nutrients remain in the final product.

We clearly understand the main comparison, the next thing we should explore is the nutritional benefits that make red lentil pasta stand out.

What Are the Nutritional Benefits of Red Lentil Pasta?

Since we now know that red lentil pasta is often considered healthier, the next important question is why it is beneficial for the body.

Red lentil pasta provides a balanced combination of nutrients that support overall health.

Some of the most important nutrients include:

  • Plant-based protein
  • Dietary fiber
  • Iron
  • Folate
  • Potassium
  • Complex carbohydrates

Protein helps repair body tissues and build muscles. Fiber improves digestion and keeps the digestive system healthy. Iron supports oxygen transport in the blood, while potassium helps regulate muscle and nerve function.

Another advantage is that foods rich in fiber often digest more slowly. This means red lentil pasta may help maintain steady energy levels instead of causing sudden spikes in blood sugar.

Let us look more closely at one of its biggest advantages: protein content.

Does Red Lentil Pasta Have More Protein Than Wheat Pasta?

Yes, red lentil pasta has significantly more protein than regular wheat pasta, and this is one of its biggest advantages.

The reason is simple: red lentil pasta is made from ground lentils, which are naturally rich in plant-based protein. Wheat pasta, especially refined wheat pasta, contains mainly carbohydrates and only a small amount of protein. In contrast, lentils are a legume, and legumes are naturally packed with protein to support plant growth — which translates into higher protein content when eaten.

On average:

  • Red lentil pasta: 13–15 grams of protein per 56-gram serving (dry pasta)
  • Regular wheat pasta: 7–8 grams of protein per 56-gram serving (dry pasta)

This means that red lentil pasta can provide almost double the protein of regular pasta. This higher protein content helps:

  • Keep you full for longer
  • Support muscle repair and growth
  • Make meals more balanced

From my personal experience, when I cook red lentil pasta, I don’t feel the need to add extra protein like chicken or eggs every time. Just the pasta itself gives a solid protein boost, which is very convenient for quick, healthy meals.

Is Red Lentil Pasta Good for Weight Loss?

Yes, red lentil pasta can support weight loss because it is high in protein and fiber, which help you feel full for longer.

  • High Protein (13–15 g/serving): Keeps you full and supports muscle maintenance.
  • Rich Fiber (5–7 g/serving): Slows digestion, stabilizes blood sugar, and promotes satiety.
  • Balanced Energy Release: Prevents sugar spikes and reduces cravings.
  • Calorie Control: Even though calories are similar to wheat pasta, it’s more filling, so you often eat less.
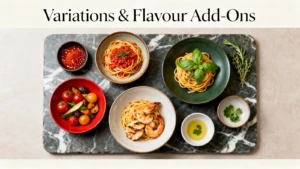
  • Versatile: Works well with vegetables and light sauces for a healthy, satisfying meal.

From my experience, a plate of red lentil pasta with vegetables feels light yet filling, making it perfect for weight management.

Next, let’s discuss whether red lentil pasta is suitable for people with gluten intolerance.

Can People With Gluten Intolerance Eat Red Lentil Pasta?

Many people avoid wheat products because they contain gluten.

Traditional pasta is made from wheat flour, which naturally contains gluten. For people with gluten intolerance or celiac disease, eating gluten can cause digestive discomfort.

Red lentil pasta is naturally gluten-free because lentils do not contain gluten. This makes it a suitable alternative for individuals who need to avoid wheat products.

However, it is still important to check packaging labels. Some brands process different foods in the same factory, which can lead to cross-contamination.

How Many Calories Are in a Serving of Red Lentil Pasta?

A standard serving of red lentil pasta (56 grams dry) contains approximately 180–200 calories, similar to regular wheat pasta.

The major advantage lies in its nutrient density. Unlike regular pasta, these calories come with higher protein (13–15 g) and more fiber (5–7 g), which help keep you full and provide sustained energy.

Simply put, red lentil pasta offers more nutritional value per calorie, making it a smarter choice for a healthy, satisfying meal.

Is Red Lentil Pasta a Good Source of Fiber?

Yes, red lentil pasta is generally a very good source of fiber.

Regular wheat pasta typically contains around 2 grams of fiber per serving, while red lentil pasta often contains 5–7 grams of fiber.

Fiber plays an important role in digestion. It supports healthy bowel movements and helps maintain gut health.

Foods rich in fiber also help regulate cholesterol levels and support stable blood sugar levels.

When I cook red lentil pasta, I usually add vegetables like spinach, tomatoes, or mushrooms. This increases the fiber content even more and creates a balanced meal.

Now that we have discussed many advantages, it is also important to examine possible disadvantages.

Are There Any Downsides to Eating Red Lentil Pasta?

Even though many people ask Is Red Lentil Pasta Healthy, it’s important to note that no food is perfect.

  1. Taste Difference: Red lentil pasta has a mild, earthy flavor, which may taste different from regular wheat pasta.
  2. Texture Sensitivity: It can become soft or mushy if overcooked, so cooking time needs careful attention.
  3. Digestive Sensitivity: High fiber content may cause mild bloating or gas in some people if eaten in large portions.

From my experience, cooking it al dente and pairing it with light sauces or vegetables preserves the best texture and flavor while minimizing bloating.

Now that we know the drawbacks, let’s see if red lentil pasta is suitable for low-carb diets.

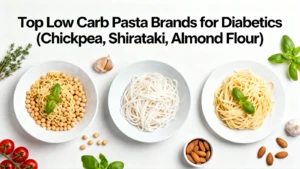
Is Red Lentil Pasta Suitable for a Low-Carb Diet?

If you are following a low-carb diet, it’s important to know how red lentil pasta fits in.

Red lentil pasta does contain carbohydrates, because lentils naturally have carbs. So by itself, it is not extremely low-carb.

Important Considerations:

  1. Portion Control: Eating smaller servings (e.g., 40–50 g dry pasta instead of 56 g) reduces total carb intake.
  2. Combine with Low-Carb Foods: Pair it with vegetables, lean protein, or healthy fats to create a balanced, lower-carb meal. For example, mix cooked red lentil pasta with spinach, grilled chicken, or olive oil.
  3. Fiber Slows Carb Absorption: The fiber in red lentil pasta (5–7 g per serving) helps slow digestion and prevent rapid blood sugar spikes.
  4. Timing Matters: Eating red lentil pasta earlier in the day or around workouts can help use the carbs as energy, making it easier to stay within low-carb goals.

So, while it is not a strict low-carb food, with the right portion and pairing, red lentil pasta can be part of a low-carb-friendly meal plan.

Next, we’ll explore how red lentil pasta supports muscle building.

Does Red Lentil Pasta Help With Muscle Building?

Protein plays an important role in muscle repair and growth.

Since red lentil pasta contains significantly more protein than regular pasta, it can support muscle recovery when included in a balanced diet.

Athletes and active individuals often combine carbohydrate foods with protein to support post-workout recovery.

Red lentil pasta can be paired with foods like grilled chicken, tofu, or vegetables to create a balanced meal.

This higher protein content is another reason why many people consider Red Lentil Pasta than Regular Pasta when planning healthier meals.

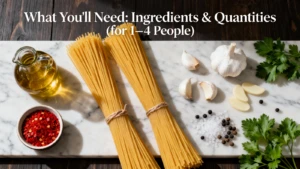
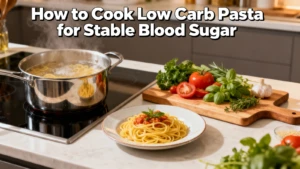
Step-by-Step Guide to Cooking Red Lentil Pasta (For 4 People)

Now that we have discussed nutrition in detail, let us move to a practical section. Many readers also want to know how to cook it properly.

Ingredients (For 4 Servings)

  • Red lentil pasta – 400 grams
  • Water – 3–4 liters
  • Salt – 1 tablespoon
  • Olive oil – 1 tablespoon (optional)

Cooking Steps

Step 1: Boil the Water

Fill a large pot with about 3–4 liters of water and bring it to a boil. Using enough water helps the pasta cook evenly.

Step 2: Add Salt

Add 1 tablespoon of salt to the boiling water. This step enhances the flavor of the pasta while it cooks.

Step 3: Add the Pasta

Add 400 grams of red lentil pasta to the pot. Stir gently to prevent the pasta from sticking together.

Step 4: Cook for 6–8 Minutes

Red lentil pasta cooks faster than regular pasta. Usually 6–8 minutes is enough.

I learned from experience that cooking it longer can make it too soft, so I always check it after 6 minutes.

Step 5: Test the Texture

Taste a small piece to check if it is al dente (soft but slightly firm).

Step 6: Drain the Pasta

Once cooked, drain the pasta using a colander.

Step 7: Add Sauce or Seasoning

Now the pasta is ready to mix with your favorite sauce, vegetables, or protein.

Final Thoughts

Red lentil pasta is becoming more popular because it offers a healthier alternative to traditional wheat pasta.

When people ask Is Red Lentil Pasta Healthier Than Regular Pasta, the answer is often yes, especially when considering protein, fiber, and overall nutrient content.

It provides more plant-based protein, better fiber levels, and is naturally gluten-free, making it suitable for many diets.

While it still contains calories and carbohydrates, its nutrient profile makes it a strong option for people who want healthier pasta choices.

By understanding how it works nutritionally and learning how to cook it properly, you can easily include red lentil pasta in a balanced and satisfying diet.

What Goes Good with Pasta Salad? The Ultimate Guide

0
What Goes Good with Pasta Salad

When you think about summer gatherings, family dinners, or potluck parties, pasta salad often shows up as a colorful and refreshing dish. But here’s the question that brings you here: What Goes Good with Pasta Salad?

The answer is simple but exciting—pasta salad pairs beautifully with proteins, breads, vegetables, and even drinks, depending on the occasion. Choosing the right side can make your pasta salad shine, balancing its creamy, tangy, or zesty flavors.

In this article, we’ll walk step by step through all the best pairings—from grilled chicken to garlic bread to iced lemonade. Along the way, I’ll share some personal tips and experiences so you can make your next meal both delicious and memorable.

1. Grilled & Protein Options (Main Pairings)

Let’s start with the classics. Pasta salad is hearty but still needs a protein partner to complete the plate.

Grilled Chicken

Grilled chicken is one of my personal favorites with pasta salad. Its smoky flavor and juicy texture balance the cool freshness of pasta salad perfectly. Sometimes I marinate it with lemon and herbs, which gives the whole meal a Mediterranean vibe.

Grilled Steak or Beef Kebabs

If you’re hosting a BBQ, steak or beef kebabs are a winning combo. The richness of beef complements the lighter, tangy dressing of pasta salad. I’ve noticed guests always go for this pairing first—it feels filling without being too heavy.

Grilled Fish or Shrimp

Seafood lovers, this one’s for you. Grilled fish or shrimp with pasta salad feels light and refreshing, especially when the salad includes Italian dressing. Personally, I love shrimp skewers with a hint of garlic and lemon alongside a chilled pasta salad bowl.

Meatballs, Sausages & Hot Dogs

These options are perfect for picnics and family gatherings. Kids especially enjoy hot dogs with pasta salad, while adults lean toward sausages or Italian meatballs. The mix of savory protein with chilled pasta is always a hit.

Plant-Based Proteins

For vegetarian guests, grilled tofu, tempeh, or chickpeas are wonderful alternatives. I’ve tried chickpeas tossed directly into pasta salad—it adds a nutty taste and makes it extra filling.

2. Sandwiches & Burgers (Perfect Combos)

After proteins, sandwiches and burgers are the next big companions of pasta salad. Let’s see why.

Classic Hamburgers & Cheeseburgers

What’s a BBQ without burgers? Pasta salad on the side adds freshness to the smoky, cheesy taste of burgers. I personally think this is the most American pairing you can have at a summer cookout.

Pulled Pork or BBQ Sandwiches

Pulled pork sandwiches are saucy, rich, and sometimes a bit heavy. That’s why pasta salad works beautifully as a cool, zesty counterbalance. It cuts through the richness and keeps the meal from feeling too heavy.

Turkey or Chicken Club Sandwiches

A lighter sandwich like a turkey or chicken club pairs nicely for lunch or dinner. When I don’t want a greasy option, this is my go-to.

Veggie Burgers & Wraps

Vegetarian? No problem. Veggie burgers or wraps filled with roasted vegetables taste amazing next to pasta salad. The textures work well, especially when the wrap has crunchy greens.

3. Bread & Bakery Sides

Bread is a universal favorite, and it makes a comforting partner to pasta salad.

Garlic Bread or Garlic Knots

This is my personal guilty pleasure. Garlic bread with pasta salad is simple yet addictive. The crunch of toasted bread with buttery garlic pairs so well with a chilled salad bowl.

Focaccia, Ciabatta, or Baguette Slices

For a more Italian feel, try focaccia or ciabatta. They’re soft but flavorful, and dipping them into leftover dressing from the pasta salad is a small joy.

Dinner Rolls or Cornbread

Dinner rolls are perfect for family meals, while cornbread is a fantastic southern-inspired addition. I tried this pairing at a picnic—it was surprisingly satisfying.

Breadsticks with Dips

Breadsticks with hummus or marinara sauce pair nicely with pasta salad for parties. They’re easy to grab and eat, which makes them great for potlucks.

4. Vegetable-Based Side Dishes

For those who love balance and freshness, veggie sides are a must.

Grilled Vegetables

Zucchini, bell peppers, and asparagus bring smoky, earthy flavors to the table. I often grill them alongside chicken, and they complement pasta salad beautifully.

Roasted Potatoes or Wedges

Potatoes are hearty, crispy, and filling. Pasta salad keeps them from feeling too heavy by adding freshness to the plate.

Fresh Green Salads

If you want an all-salad meal, pairing pasta salad with Caesar or garden salad works wonders. It’s crunchy, refreshing, and balanced.

Coleslaw or Cabbage Salad

Coleslaw adds creaminess and crunch, while cabbage salad adds tang. Both are great for BBQs.

5. Light & Fresh Pairings

Sometimes, you want lighter sides that don’t overpower pasta salad.

Fresh Fruit Salad

Melons, grapes, or berries are sweet and refreshing. I love this combo for summer picnics—it feels cooling and healthy.

Deviled Eggs or Egg Salad

These are perfect picnic foods. Deviled eggs add richness, while egg salad sandwiches pair with pasta salad for a filling lunch.

Cheese Boards

A mix of cheddar, gouda, or mozzarella goes well with pasta salad. Guests enjoy snacking between bites, and the flavors complement each other nicely.

Pickles, Olives, and Antipasto Platters

These tangy, salty bites are a great way to balance pasta salad’s creaminess or zest. I often put a small antipasto platter next to my pasta salad at parties.

Here’s a helpful forum thread with more ideas on what goes good with pasta salad. It includes suggestions from different people, giving you extra inspiration to try alongside your pasta salad.

6. Party & Potluck Pairings

Pasta salad is a star at gatherings, so let’s talk about party pairings.

BBQ Ribs, Brisket, or Chicken Wings

Hearty BBQ dishes love the freshness of pasta salad. I personally think nothing beats this combo at summer cookouts.

Hot Dogs & Sliders

Perfect for kids’ parties or casual get-togethers. They’re quick to serve and always popular.

Finger Foods

Mini quiches, spring rolls, or nuggets are fun with pasta salad. They add variety without stealing the spotlight.

Chips & Dips

Guacamole, salsa, or hummus with chips give crunch and flavor, pairing effortlessly with pasta salad.

7. Drinks that Go Well with Pasta Salad

Food is only half the story—let’s not forget drinks.

Iced Tea & Lemonade

This is my go-to summer pairing. The freshness of lemonade and the chill of iced tea match the vibe of pasta salad perfectly.

Sparkling Water with Citrus

If you want something light, sparkling water with lemon or lime is refreshing. It doesn’t overpower the food, which I love.

Wine Pairings

A light white wine or rosé pairs perfectly with pasta salad. I usually recommend this when serving pasta salad at a formal dinner.

Beer Options

Light beers like lagers or pilsners are great with pasta salad at BBQs or casual hangouts.

8. International-Inspired Pairings

If someone wants to give their pasta salad an international twist, they can pair it with:

  • Mexican Tacos or Quesadillas – spicy flavors balance the creamy or tangy pasta salad.
  • Greek Gyros or Falafel Wraps – Mediterranean taste pairs perfectly with pasta salad made with olives and feta.
  • Italian Antipasto Platters – salami, prosciutto, marinated veggies, and cheese slices.
  • Asian Spring Rolls or Dumplings – light, fresh, and a unique combo for gatherings.

9. Comfort Food Pairings

Sometimes people love to enjoy pasta salad with cozy, homestyle dishes:

  • Fried Chicken – crispy texture + creamy pasta salad = perfect balance.
  • Mac & Cheese – double pasta but with a creamy twist.
  • Mashed Potatoes with Gravy – a hearty side for bigger meals.
  • Soup Pairings (Tomato Soup, Chicken Noodle, or Minestrone) – pasta salad with soup makes a balanced lunch.

10. Serving Ideas & Occasions

Now that we’ve gone through the best pairings, let’s talk about the occasions where pasta salad truly shines.

  • With BBQs: Pasta salad and grilled meats are the ultimate BBQ duo.
  • With Picnics: Sandwiches, chips, and pasta salad in a basket—perfect.
  • Holiday Sides: Turkey, ham, or roasts with pasta salad balance festive spreads.
  • Weeknight Dinners: Pair with simple grilled chicken or bread for a quick meal.

FAQs About What Goes Good with Pasta Salad

Q1: Can pasta salad be served as a main dish?

Yes, especially if you add protein like chicken or chickpeas.

Q2: What protein goes best with pasta salad?

Grilled chicken and shrimp are my personal favorites, but steak and tofu also work well.

Q3: Should pasta salad be eaten cold or warm?

Cold is traditional, but I’ve had warm versions with melted cheese that were delicious too.

Q4: What drinks pair best with pasta salad?

Lemonade, iced tea, light wines, or beer—depending on the occasion.

Q5: Is pasta salad good with bread?

Absolutely! Garlic bread, rolls, or focaccia make great sides.

Conclusion

So, what goes good with pasta salad? The short answer: almost everything! From grilled meats and sandwiches to fresh fruits, veggies, and even drinks, pasta salad is one of the most versatile dishes you can serve.

The key is balance—pair heavier foods like BBQ or burgers with pasta salad’s freshness, or enjoy lighter sides like fruit and bread when you want a simple meal. I encourage you to try different combinations and find what you enjoy most.

Next time you make pasta salad, pair it with one of these ideas—you’ll see how much it elevates the entire meal.

Pasta Recipes with Pesto and Tomato | Fresh, Creamy & Baked Variations

0

Few dishes show the heart of Italian cooking like pasta recipes with pesto and tomato, where fresh basil pesto meets the sweetness of ripe tomatoes. I’ve cooked it many times—traditional, with roasted cherry tomatoes, or creamy mozzarella—and every version turns out simple, nourishing, and always a crowd-pleaser.

In this article, I’ll share a collection of pasta recipes with pesto and tomato, ranging from the classic to creative variations. Together we’ll go step by step, so you’ll know exactly how to prepare each dish. Along the way, I’ll include tips I’ve learned in my own kitchen and small adjustments you can try depending on your taste.

Why Pasta with Pesto and Tomato Works So Well

Let me first tell you a little about why this pairing works so well, and then we’ll move ahead to our recipes. At first glance, it seems like a simple pairing, but the balance of flavors is what makes this dish shine:

  • Herbaceous pesto – Fresh basil, Parmesan, garlic, and nuts create a rich, green sauce.
  • Sweet and tangy tomatoes – Roasted, sautéed, or fresh, tomatoes cut through the richness with brightness.
  • Perfect texture – Pasta acts like a canvas, holding all these flavors together.

Personally, I love the contrast: the freshness of basil against the slight acidity of tomatoes makes every bite lively and comforting at the same time.

Now, let’s dive into the recipes.

Recipe 1: Classic Pesto Pasta with Tomatoes (with variations)

Classic Pesto Pasta with Tomatoes

This is the base recipe most people search for — pasta, pesto, and tomatoes. But there are a few different ways to prepare it, and I’ll show you how to do each one without repeating everything from scratch.

Ingredients

  • 250g pasta (spaghetti, penne, or fusilli work well)
  • ½ cup pesto (store-bought or homemade)
  • 1–2 cups cherry tomatoes (fresh or roasted)
  • Olive oil, salt, and pepper
  • Optional: mozzarella balls or grated Parmesan

Step-by-Step Method

Boil the pasta: Fill a large pot with water, add a good pinch of salt (about 1 tbsp), and bring it to a boil. Cook your pasta until al dente (slightly firm but not hard). Save about ½ cup pasta water before draining.

Prepare the tomatoes: Now, this is where the recipe splits into variations:

  • Fresh tomato version: Simply cut cherry tomatoes in halves or quarters. Drizzle with olive oil and a pinch of salt. They’ll stay juicy and slightly crisp.
  • Roasted tomato version: Place cherry tomatoes on a tray, drizzle olive oil, sprinkle salt and pepper, then roast at 200°C (400°F) for about 15–20 minutes. They’ll soften, caramelize, and give a sweeter, richer flavor.
  • Quick spaghetti style: Instead of short pasta, boil spaghetti. The sauce clings beautifully to thin pasta, making every bite light but flavorful.

Mix pasta with pesto: Drain pasta, put it back into the pot (off the heat), and add pesto. Stir gently. If it feels too thick, splash in the reserved pasta water a spoon at a time until creamy.

Add tomatoes: Fold in your fresh or roasted tomatoes.

Finish: Top with mozzarella balls or Parmesan, and a few basil leaves if you have them.

  • My Note

Personally, I love the roasted version the most. Fresh tomatoes are nice for a quick summer dinner, but roasting adds that caramelized edge which makes the pasta taste like a restaurant dish.

Variations

  • With Mozzarella: Add small mozzarella balls (bocconcini) right before serving. They soften slightly and give a creamy bite.
  • Spaghetti Style: Use spaghetti instead of penne/fusilli for a lighter feel. I personally enjoy this on warm evenings — it feels closer to classic Italian trattoria style.
  • Quick 15-Minute Meal: Skip roasting and use fresh cherry tomatoes for a speedy dinner.

Recipe 2. Creamy Pesto Tomato Pasta

Now let’s make the creamy version. This combines the rich flavor of pesto with a simple tomato-based cream sauce. Personally, I find this recipe very comforting — I make it when I want something filling yet not too heavy.

Ingredients

  • 250g penne (spaghetti also works)
  • 1 tbsp olive oil
  • 2 garlic cloves, minced
  • 1 cup tomato passata or crushed tomatoes
  • ½ cup heavy cream (or half-and-half for lighter texture)
  • ½ cup pesto
  • Salt, pepper, and grated Parmesan

Step-by-Step Method

  1. Boil pasta in salted water, same as above. Save ½ cup water before draining.
  2. In a skillet, heat olive oil on medium. Add garlic and sauté for 30 seconds until fragrant (don’t let it burn).
  3. Add the tomato passata. Let it simmer for 5 minutes until slightly thickened.
  4. Pour in cream and stir. The sauce will turn light pink. Simmer 2–3 minutes.
  5. Add pesto and stir until you get a creamy, smooth sauce. Taste and adjust seasoning.
  6. Toss drained pasta into the pan, adding a splash of pasta water if needed to loosen.
  7. Sprinkle Parmesan and black pepper before serving.

Variation idea: If you want it extra rich, add small cubes of mozzarella — they melt into the sauce and give you creamy bites throughout.

  • My Note

I’ve noticed that some people make this too heavy with too much cream. I like keeping it balanced — just enough cream to soften the tomatoes but not so much that it hides the pesto flavor.

Recipe 3. Fusilli with Sun-Dried Tomatoes and Pesto

This recipe is bold and tangy because of the sun-dried tomatoes. It’s slightly different from the fresh or roasted tomato versions, but still simple to prepare.

Ingredients

  • 250g fusilli
  • ½ cup pesto
  • ½ cup sun-dried tomatoes, chopped (packed in oil works best)
  • Olive oil (optional)
  • Parmesan to serve

Step-by-Step Method

  1. Cook fusilli until al dente, drain, and reserve some pasta water.
  2. Toss hot pasta with pesto until coated.
  3. Add chopped sun-dried tomatoes. If they feel too dry, drizzle a spoonful of their oil into the pasta — it adds richness.
  4. Serve with Parmesan.

Variation

If you want to bulk it up, you can add roasted vegetables (like zucchini or bell peppers) at this stage. The process is the same — just roast the veggies separately and mix them in.

Recipe 4. Baked Pesto Pasta with Tomatoes

If you like pasta with a golden top and melted cheese, this one’s for you. I usually make this when I want something that feels like comfort food, especially for family dinners.

Ingredients

  • 300g short pasta (penne or rigatoni)
  • 1 cup pesto
  • 2 cups cherry tomatoes (halved)
  • 1 cup mozzarella, shredded
  • ½ cup Parmesan
  • Olive oil, salt, pepper

Step-by-Step Method

  1. Cook pasta for 2 minutes less than package instructions. Drain.
  2. In a large bowl, toss pasta with pesto and cherry tomatoes.
  3. Transfer to a baking dish, sprinkle mozzarella and Parmesan on top.
  4. Bake at 180°C (350°F) for 20–25 minutes until bubbly and golden.

Tip: If you like a crispier top, broil for 2 minutes at the end.

I’m including a forum link here along with a YouTube video for your ease. The video will give you a clear visual guide, while the forum discussions can offer extra tips and experiences from others.

Recipe 5. Grilled Chicken Pesto Pasta with Tomatoes

Grilled Chicken Pesto Pasta with Tomatoes

Sometimes a protein makes the dish feel more complete. I often cook this when I have leftover grilled chicken, because it turns a simple pasta into a full meal.

Ingredients

  • 250g pasta of choice
  • 1 cup pesto
  • 1–2 cups cherry tomatoes (fresh or roasted)
  • 1–2 grilled chicken breasts, sliced
  • Olive oil, salt, pepper

Step-by-Step Method

  1. Cook pasta as usual, drain, and toss with pesto.
  2. Add tomatoes (your choice of fresh or roasted).
  3. Mix in the sliced grilled chicken.
  4. Serve warm with Parmesan on top.

Note: I prefer roasted tomatoes here, because they balance the savory chicken flavor.

Recipe 6. Shrimp Pesto Pasta with Tomatoes

This version feels a little fancy but is still easy. I like it for dinner parties because shrimp cooks fast and looks impressive.

Ingredients

  • 250g spaghetti or linguine
  • 1 cup pesto
  • 1–2 cups cherry tomatoes
  • 300g shrimp, peeled and deveined
  • 2 tbsp olive oil
  • Garlic, salt, pepper

Step-by-Step Method

  1. Cook pasta until al dente, reserve some water.
  2. In a skillet, heat olive oil, sauté garlic for 30 seconds, then add shrimp. Cook for 2–3 minutes until pink.
  3. Add cherry tomatoes and cook 2–3 minutes more.
  4. Toss in cooked pasta and pesto. Adjust with pasta water if needed.
  5. Serve immediately with lemon wedges on the side.

My Note: I sometimes squeeze extra lemon juice — it brightens the whole dish.

Recipe 7. Pesto Pasta Salad with Tomatoes

This is a cold pasta option, perfect for picnics or summer lunches. It’s refreshing and easy to prepare ahead of time.

Ingredients

  • 250g short pasta (fusilli or penne)
  • ½ cup pesto
  • 1–2 cups cherry tomatoes, halved
  • ½ cup fresh mozzarella balls
  • Fresh basil leaves

Step-by-Step Method

  1. Cook pasta, then rinse under cold water to stop cooking.
  2. Toss chilled pasta with pesto.
  3. Add tomatoes, mozzarella, and basil.
  4. Chill in the fridge for at least 30 minutes before serving.

Extra Cooking Tips and Notes

Now that you’ve gone through all the recipes, let me also share a few storage tips with you. These little tricks will help keep your pasta fresh for longer. That way, you can enjoy the same delicious taste even the next day without losing flavor or texture.

  • Shelf life and storage: Keep leftovers in the fridge for 2–3 days. Add water or stock or wine when reheating so it doesn’t dry out.
  • Traditionally added ingredients: In Ligurian recipes, potatoes and string beans are boiled in the same pot with pasta. I’ve tried it — and honestly, it adds great texture.
  • Different cooking styles: Italian pasta can be pasta al forno (baked), pasta in brodo (broth), or pasta asciutta (dry with sauce). Pesto and tomato shine best in asciutta style.
  • Pesto origins: Traditionally, pesto was made in a marble mortar with a circular motion using garlic, basil, nuts, and cheese. Though modern kitchens use blenders, I find that using even dried basil leaves can still give good results.

FAQs About Pasta Recipes With Pesto and Tomato

1. Can I use store-bought pesto?

Yes, but homemade tastes fresher.

2. Which pasta shapes are best?

Spaghetti, fusilli, and penne are my top choices. Fusilli holds the sauce especially well.

3. Can I make it vegan?

Absolutely—use vegan pesto and skip the cheese.

4. Do I need roasted tomatoes every time?

Not at all. Fresh tomatoes keep it light, roasted ones make it richer.

5. How to stop pesto from turning dark?

Store under olive oil and don’t overheat when mixing.

Final Thoughts

So, we’ve walked through several pasta recipes with pesto and tomato—from classic roasted tomato versions to creamy mozzarella twists, and even baked or chilled options. Each has its own personality, yet all share the same harmony of basil and tomato that makes this dish timeless.

Try one of these recipes tonight, and you’ll see why pesto and tomato pasta is a dish you’ll return to again and again.

Easy Homemade Pasta Salad with Italian Dressing

0
Easy Homemade Pasta Salad with Italian Dressing

If you’re searching for an Easy Homemade Pasta Salad with Italian Dressing, then you’re in the right place. This recipe is one of my favorites to prepare when I need something simple yet satisfying for family gatherings, potlucks, or even a quick weekday meal.

Why Italian dressing? Personally, I love how it balances tangy vinegar, smooth olive oil, and aromatic herbs like oregano and basil. It’s light yet flavorful, and it doesn’t overpower the pasta or fresh veggies. Every bite feels refreshing, which makes it perfect for both warm summer evenings and casual family dinners.

In this article, we’ll walk through everything step by step. First, the ingredients, then cooking the pasta, preparing the dressing, mixing it all together, and finally storage and variations. Along the way, I’ll also share little experiences — like how I sometimes tweak the recipe depending on who I’m serving — because pasta salad is one of those dishes you can truly make your own.

Ingredients Breakdown

Whenever I prepare pasta salad, I like to set all ingredients out on the counter before starting. It makes the process smooth and prevents that last-minute panic of realizing you forgot something.

Pasta Salad Ingredients

  • Pasta type – Rotini is my go-to because its spirals hold the dressing so well. Fusilli works the same way, and penne gives a slightly firmer bite. I once tried farfalle (bow-tie pasta), and though it looked cute, it didn’t hold the dressing as nicely.
  • Fresh vegetables – Cherry tomatoes, bell peppers, red onions, cucumbers, and black olives are must-haves for me. They bring both crunch and color. Sometimes, if I have them in the fridge, I’ll add roasted zucchini or even corn for a sweeter bite.
  • Cheese options – Mozzarella pearls are creamy and mild, while parmesan adds sharpness. Personally, I like to combine the two for balance.
  • Optional add-ins – My husband loves when I throw in sliced salami or pepperoni. I don’t always do it, but for parties, it makes the salad more filling. Pepperoncini is also a nice touch for those who like a little heat.

Italian Dressing Ingredients

Now, about the dressing — I’ve tried both bottled and homemade versions. Store-bought can save time, but honestly, homemade always feels fresher.

  • Olive oil – Use good quality; it really makes a difference.
  • Vinegar – I mostly use red wine vinegar, but white wine vinegar works too. Sometimes, I even add a splash of balsamic if I want a slightly sweeter finish.
  • Lemon juice – I never skip this. It brightens everything.
  • Herbs and spices – Oregano, basil, parsley, garlic powder, salt, and black pepper. I also add fresh basil if I have it.
  • Balancing flavors – A pinch of sugar helps if the dressing feels too sharp. Parmesan or Dijon mustard adds body and makes the dressing cling better to the pasta.

Step-by-Step Instructions

Let’s move to the cooking part. I’ll guide you through as if we’re in the kitchen together.

Cooking the Pasta

This step may seem basic, but trust me, the texture of the pasta can make or break your salad.

  1. Boil water generously – Use a large pot and add plenty of salt. I once made the mistake of skimping on salt, and the whole salad tasted flat. The pasta should be seasoned from the inside.
  2. Cook al dente – Follow the package, but I always stop one minute earlier. Pasta will continue to soften once it’s mixed with dressing.
  3. Drain and cool – Drain well and rinse lightly under cold water. Some people don’t rinse, but I’ve found that a quick rinse helps stop cooking and keeps the pasta from sticking.

Now, with the pasta ready, let’s prepare the star of the show — the dressing.

Making the Italian Dressing

Since this recipe is all about Easy Homemade Pasta Salad with Italian Dressing, the dressing deserves extra care.

  1. Mix the base – Whisk olive oil and vinegar in a bowl. I usually use a 3:1 ratio.
  2. Add seasonings – Stir in oregano, basil, garlic powder, salt, and pepper. If you love bold flavors like me, don’t be shy with the herbs.
  3. Brighten the flavor – Fresh lemon juice adds life. I sometimes add zest as well for extra freshness.
  4. Balance it out – Taste test. If it’s too acidic, add a pinch of sugar. Parmesan makes it richer and helps the dressing cling.

Once, I added too much vinegar and thought it was ruined. But adding a little parmesan and olive oil balanced everything perfectly. So don’t panic if your first try feels off — you can adjust.

Combining Everything

Now comes the part I enjoy the most — watching all the colors and textures come together.

  1. Coat the pasta first – Toss the pasta with half the dressing so it absorbs flavor.
  2. Add vegetables and cheese – Tomatoes, peppers, onions, olives, and mozzarella go in next.
  3. Optional proteins – On busy weeknights, I sometimes add leftover grilled chicken. It turns the salad into a full meal.
  4. Mix gently – Stir carefully so nothing breaks.
  5. Finish with dressing – Add the rest and give it one final toss.

At this point, it smells amazing, but don’t rush. The next step makes a big difference.

Chilling Before Serving

Good pasta salad isn’t just mixed; it’s rested.

  • Refrigerate for 30–60 minutes – This allows the flavors to blend and deepen.
  • Stir before serving – The dressing may settle at the bottom, so give it a quick toss before you serve.

I have already shared step-by-step instructions with my personal tips, but if you’d like to explore more variations of pasta salad, here’s a great Quora guide I found helpful.

Make-Ahead & Storage Tips

One of the best things about pasta salad is that it can be made ahead of time. Here’s how to manage it:

  • Make ahead – I often cook the pasta the night before and chop the veggies in the morning.
  • Store dressing separately – If I’m making it for a party, I keep dressing in a jar and pour it right before serving. This keeps everything fresh.
  • Fridge life – Pasta salad lasts 3–4 days if kept in an airtight container.
  • Refresh before serving – I always add a drizzle of olive oil or lemon juice when serving leftovers. It revives the flavors instantly.

Pro Tips for the Best Pasta Salad

Let’s pause and talk about some tricks that can turn a good pasta salad into a great one.

  • Don’t overcook pasta – Soft pasta makes the salad mushy.
  • Use fresh herbs and cheese – Fresh basil or parsley brings unmatched flavor.
  • Cut vegetables evenly – This way, every bite has a balance of pasta and veggies.
  • Chill thoroughly – A cold pasta salad is refreshing and flavorful.
  • Balance the dressing – Too much makes it soggy, too little makes it bland.

Variations & Customizations

Here’s where you can have fun and make this recipe your own.

  • Protein options – Grilled chicken, tuna, or shrimp make it a complete meal. I once tried adding grilled salmon, and surprisingly, it worked beautifully.
  • Vegetarian twists – Chickpeas, roasted zucchini, or sun-dried tomatoes are amazing additions.
  • Gluten-free swaps – Corn or quinoa pasta works well for those avoiding gluten.
  • Creamy version – Sometimes, I mix Italian dressing with Greek yogurt. It makes the salad tangier and creamier.
  • Seasonal veggies – Sweet corn in summer, roasted pumpkin in fall, cucumbers in spring — I like adjusting based on what’s fresh.

Sometimes we all like to learn from different perspectives. That’s why I’m sharing another useful resource where you can get extra discussion and ideas about pasta salads.

What to Serve With Pasta Salad

Pasta salad is versatile, which is why I keep coming back to it.

  • Grilled meats – Chicken, steak, or sausages pair perfectly.
  • BBQ dishes – I often serve it with burgers at family cookouts.
  • Garlic bread – A warm side makes the meal feel complete.
  • Light veggies – Roasted or steamed vegetables work well.
  • Picnic spreads – This is hands down one of my favorite picnic foods. It packs well and tastes even better cold.

Frequently Asked Questions (FAQs)

Q: Why does my pasta salad taste bland?

A: You may not be adding enough salt to the pasta water, or your dressing may need extra seasoning. Always taste and adjust.

Q: Should it be served cold or warm?

A: Pasta salad is best served cold or at least chilled. It gives time for the flavors to blend.

Q: Is salting pasta water necessary?

A: Yes! It seasons the pasta from within. Skipping this step often makes the salad taste flat.

Q: How do I keep pasta from sticking?

A: Stir during boiling and rinse briefly after draining. Tossing with a little dressing also prevents clumps.

Q: What pasta shape is best?

A: Rotini and fusilli are great because their twists hold dressing, but penne and farfalle also work well.

Conclusion / Final Thoughts

We’ve covered everything step by step, from cooking pasta to preparing the dressing and storing leftovers. Making an Easy Homemade Pasta Salad with Italian Dressing isn’t complicated, but it does benefit from a little care in each step.

Remember: don’t overcook your pasta, season your dressing well, and let the salad chill before serving. With these tips, you’ll have a dish that’s not only colorful and inviting but also bursting with flavor.

Now it’s your turn — grab the ingredients, follow these steps, and create a pasta salad that your family and friends will request again and again. And once you’ve mastered this classic version, don’t be afraid to experiment with your own variations. After all, pasta salad is all about flexibility and fun!

Plain Pasta With Oil and Spices: A Simple Italian Delight

0
Plain Pasta With Oil and Spices: A Simple Italian Delight

There’s something uniquely satisfying about a dish as simple as Plain Pasta With Oil and Spices. Minimal ingredients can deliver maximum flavor when done correctly. It’s quick, light, and shows how traditional Italian cuisine celebrates simplicity.

You might be wondering — can pasta be truly delicious without a heavy sauce or creamy cheese? The answer is yes — a perfectly cooked pasta tossed with high-quality olive oil and the right spices can be every bit as comforting as more complex dishes.

In this article, I will guide you step by step on how to make this dish, tips for getting the best texture, variations like spicy or herb-rich options, serving suggestions, and how to store leftovers. By the end, you’ll have mastered a classic plain pasta recipe that is both quick and satisfying.

Why This Dish Works & Its Origins

The origins of Plain Pasta With Oil and Spices trace back to traditional Italian dishes like Spaghetti Aglio e Olio. Italians have long mastered the art of minimalist pasta recipes, where every ingredient has a purpose and flavor is concentrated through careful technique.

The beauty of this dish lies in its simplicity. With just pasta with olive oil, garlic, and spices, you can focus on the texture of the noodles and the aromatics of the seasonings. Unlike heavy sauces, this method highlights the quality of your ingredients and the care in preparation.

You can expect a light yet flavorful dish that takes 10–20 minutes to make. It’s ideal for a quick dinner on busy nights, or as a refreshing and satisfying meal without feeling heavy. From my experience, when I first tried this dish, I was surprised at how vibrant the flavors were despite using just a handful of ingredients.

We’ve talked about why this dish is flavorful despite being simple. Next, we’ll discuss the exact ingredients and quantities you’ll need for your portion sizes.

What You’ll Need: Ingredients & Quantities (for 1–4 People)

What You’ll Need: Ingredients & Quantities

Making easy Italian pasta doesn’t mean compromising on quality. Here’s what you’ll need:

Ingredients for 1 Person:

  • 75–100 g pasta (spaghetti, linguine, or fettuccine)
  • 1–1½ tbsp extra virgin olive oil
  • 1–2 cloves garlic, thinly sliced or minced
  • ¼ tsp crushed red pepper
  • 1 tbsp fresh parsley, chopped
  • Salt and black pepper to taste

Ingredients for 2–4 People: Multiply quantities proportionally:

  • 2 people: 150–200 g pasta, 2–3 tbsp olive oil, 2–4 cloves garlic, ½ tsp crushed red pepper, 2 tbsp parsley
  • 4 people: 300–400 g pasta, 4–6 tbsp olive oil, 4–8 cloves garlic, 1 tsp crushed red pepper, 4 tbsp parsley

Optional Additions:

  • Butter (adds richness)
  • Breadcrumbs for crunchy topping
  • Shaved Parmesan or Pecorino (for more traditional flavor)

Quality Tip: Fresh garlic and high-quality olive oil pasta sauce make a huge difference. From personal experience, I always notice a significant flavor improvement when I use freshly grated cheese and good olive oil instead of supermarket basics. It’s subtle, but your palate will thank you.

We’ve covered all ingredients and portion sizes. Next, we’ll dive into the step-by-step cooking process so you can follow along and get perfect results every time.

Step-by-Step Recipe: Plain Pasta With Oil & Spices

Step-by-Step Recipe: Plain Pasta With Oil & Spices

Now let’s make this classic Italian cuisine come alive. Follow carefully:

Step 1: Cook the Pasta

Bring salted water to a boil. Add pasta and cook until al dente. Reserve about ¼ cup (60 ml) of pasta water before draining. The reserved water helps coat the noodles and adds creamy texture without cream.

Step 2: Prepare the Garlic Oil

While pasta cooks, heat olive oil in a skillet over medium-low heat. Add sliced or minced garlic and sauté gently until golden. Avoid burning — burnt garlic gives a bitter flavor. Add crushed red pepper for a spicy pasta idea.

Step 3: Combine Pasta and Oil

Add the drained pasta to the skillet. Toss thoroughly with the garlic oil. Splash in reserved pasta water to help create a silky finish and enhance gooeyness and texture.

Step 4: Season & Garnish

Add salt, black pepper, Italian seasoning, and fresh parsley. Toss well. From my personal experience, adding parsley at the end keeps the herbed pasta recipe bright and fresh.

Step 5: Optional Finishing Touch

Drizzle extra olive oil, sprinkle breadcrumbs or cheese if desired. Serve immediately while warm.

Tips & Do’s and Don’ts:

  • Don’t overcook garlic
  • Don’t use cold oil
  • Toss immediately after combining pasta and oil
  • Don’t skip the reserved pasta water

From my kitchen: Reserving pasta water has always been a game-changer. It lifts the noodles and ensures every strand is coated with flavorful olive oil pasta sauce.

Variations & Flavour Add-Ons

Variations & Flavour Add-Ons

Once you’ve mastered the base, you can experiment with several easy Italian pasta variations:

Spicy Version

  • Increase crushed red pepper or chili flakes
  • Add smoked paprika for depth

Herb Version

  • Fresh basil, oregano, thyme, or lemon zest
  • Enhances plain pasta seasoning

Vegetarian/Vegan Add-Ons

  • Cherry tomatoes, roasted peppers, zucchini ribbons
  • Keeps dish light and healthy

Protein Add-Ons

  • Grilled chicken, shrimp, or crispy pancetta
  • Perfect for pasta casseroles or main courses

Budget / No Cheese Version

  • Skip cheese, just olive oil and spices plus parsley
  • Great minimalist pasta recipes

From my experience: Adding thin zucchini ribbons and lemon zest made a dinner party version of this fast Italian meal feel gourmet without extra effort.

Serving Suggestions — What to Eat It With?

As a Main Dish (Single Serving)

  • Serve with a light salad: arugula with lemon vinaigrette or cherry tomatoes.
  • Add roasted cherry tomatoes for a touch of sweetness and depth.
  • Balances the bold garlic and oil flavors perfectly.

For 2–4 People

  • Pair with garlic bread or herb focaccia for crunch.
  • Add roasted vegetables like zucchini, bell peppers, or asparagus for color and flavor.
  • Turns a simple dish into a restaurant-style Italian meal.

As a Side Dish

  • Complements proteins: grilled steak, roasted chicken, or pan-seared fish.
  • Simple oil and spice coating enhances flavors without overpowering.
  • Pairing with lemon-herb chicken adds a fresh and herby balance.

Presentation Tips

  • Sprinkle fresh parsley for color and freshness.
  • Drizzle extra virgin olive oil before serving.
  • Finish with a pinch of flaky salt for texture.

Why This Matters: The simplicity of this plain spaghetti recipe allows accompanying dishes to shine, without overpowering flavors.

Storage & Reheating Tips

Storage:

  • Store leftovers in an airtight container in the fridge for up to 2 days.

Reheating:

  • Stir-fry briefly in skillet with a splash of olive oil or reserved pasta water
  • Microwave in short intervals
  • Re-toast breadcrumbs topping under the grill for crispness

Personal Note: I often make a double batch for weekday lunches — it reheats better than creamy sauces and maintains creamy texture without milk.

Common Mistakes & How to Fix Them

1. Burnt Garlic

  • Problem: Garlic becomes bitter if cooked too fast or on high heat.
  • Fix: Cook garlic on low heat, remove slices as soon as they turn light golden, or use garlic powder if you’re short on time.

2. Pasta Too Dry or Clumpy

  • Problem: Pasta sticks together or feels dry after tossing.
  • Fix: Add a little reserved pasta water or an extra drizzle of olive oil. Toss vigorously to coat noodles evenly.
  • I always save a small cup of pasta water — it creates a silky texture even in minimalist pasta dishes.

3. Weak Oil Flavor

  • Problem: Pasta tastes bland or lacks depth from the oil.
  • Fix: Use high-quality extra virgin olive oil and warm it slightly before adding pasta. This releases flavor and aroma.
  • My tip: Warmed oil helps the spices and garlic infuse better, giving the pasta a richer taste.

4. Overcooked Pasta

  • Problem: Pasta becomes mushy, losing bite and texture.
  • Fix: Cook pasta to al dente, then finish tossing in the skillet for 30–60 seconds with oil and spices.

We’ve already covered the base recipe and variations — these fixes help if anything goes off, ensuring a consistently delicious quick pasta meal.

FAQs About Plain Pasta With Oil and Spices

1. Can I make plain pasta with oil and spices gluten-free?

Yes, simply use gluten-free pasta. Cook according to package instructions and toss with olive oil and spices as usual. The flavor and texture remain just as delicious.

2. Which pasta shapes work best for garlic oil pasta?

Long noodles like spaghetti or linguine hold the oil and garlic sauce well, while short pasta like penne or fusilli trap herbs and spices in their ridges, giving flavorful bites every time.

3. Can I store and reheat plain pasta without it getting dry?

Yes, store in an airtight container in the fridge for up to 2 days. Reheat in a skillet with a splash of olive oil or reserved pasta water to keep it moist and silky.

4. What herbs and spices can I use besides traditional Italian ones?

You can try basil, oregano, thyme, rosemary, red pepper flakes, smoked paprika, or even a hint of lemon zest. These add bold flavor twists to your simple pasta.

5. Is plain pasta with oil and spices a healthy meal option?

Absolutely. Using olive oil provides healthy fats, garlic and herbs give antioxidants, and the dish can be paired with vegetables or lean proteins for a balanced, lighter pasta meal.

Conclusion: Plain Pasta With Oil and Spices

Plain Pasta With Oil and Spices proves that simple ingredients can deliver a rich and delicious experience. Whether cooking for 1 or 4 people, this dish exemplifies fast Italian meals, homemade pasta dishes, and classic Italian cuisine.

Final Tip: Keep quality olive oil, fresh garlic, and your favorite spices on hand. Reserve pasta water to ensure noodles stay coated and silky. With these small steps, you’ll have a satisfying garlic oil pasta dish ready any day of the week.

Meat Based Sauce Served with Pasta – Step-by-Step Guide

0

A Meat Based Sauce Served with Pasta is the kind of meal that fills the kitchen with aroma and fills the table with smiles. Whether it’s a family dinner or a weekend comfort meal, a good meat sauce is comforting, rich, and satisfying.

So, you can make a restaurant-quality meat based sauce served with pasta at home. This guide gives you everything: exact ingredient lists, full step-by-step cooking instructions, timing, little tricks I’ve learned from experience, and variations (including Ragù, Bolognese, and other entries from the list of meat-based sauces). Follow the steps exactly and you will not miss a thing.

Now let’s begin by understanding what we mean by a meat sauce, the common types of meats used, and the tools and prep that set you up for success.

What is a meat based sauce served with pasta?

A meat based sauce served with pasta is any pasta sauce in which the primary ingredient is meat: ground or chopped beef, pork, lamb, sausage, veal, or a mix. These sauces are usually prepared using aromatics (onion, carrot, celery), garlic, tomatoes or cream, wine or stock, and herbs. They are robust, filling, and often used not only with pasta but also as sandwich fillings or baked into casseroles.

Below is a quick bold list of the classic list of meat-based sauces to give context before we cook:

  • Ragù
  • Bolognese
  • Caruso sauce
  • Carbonara (pancetta/guanciale based)
  • Cincinnati chili
  • Saltsa kima

Each of these has a different balance of meat, tomato, dairy, and spices — and I’ll reference them where relevant.

Tools, prep and mise en place (don’t skip this)

Before you cook, gather and prepare everything. Doing this avoids mistakes.

Tools

  • Large heavy skillet (12-inch/30 cm) or Dutch oven (4–6 qt)
  • Large pot for pasta (6–8 qt)
  • Wooden spoon and spatula
  • Fine grater (for cheese)
  • Chef’s knife and board
  • Colander and measuring cups/spoons
  • Small bowl for reserved pasta water

Mise en place (do these first)

  1. Chop: 1 onion, 2 carrots, 2 celery stalks into small dice (~1/4 inch). Mince 3–4 garlic cloves.
  2. Measure: 1 can crushed tomatoes, 2 tbsp tomato paste, 1 cup red wine (optional), 2 cups stock.
  3. Weigh meat: 1 lb (450 g) ground beef or a mix — see types of meats below.
  4. Grate cheese, ready herbs.
  5. Bring pasta water to boil near the end of the sauce simmering.

I always prepare everything first; it makes the cooking calm and precise. Trust me — it helps.

Ingredients overview — choosing the right types of meats

Common types of meats for these sauces:

  • Ground beef (80/20 works well for flavor and fat)
  • Ground pork (adds sweetness and tenderness)
  • Ground lamb (strong flavor; good in Mediterranean versions like Saltsa kima)
  • Italian sausage (adds spice/herb notes)
  • Ground veal (used in classic Bolognese blends)
  • Mixes: beef + pork, or beef + sausage (recommended for depth)

My tip: For most home cooks, a 50/50 mix of beef and pork gives excellent texture and flavor for a Ragù/Bolognese style sauce.

Recipe 1 — Classic Tomato-Meat Sauce (Ragù / Bolognese style)

This is the foundational meat based sauce served with pasta recipes. Read the full steps before you start.

Ingredients (4–6 servings)

  • 1 lb (450 g) ground beef (or 50% beef + 50% pork)
  • 2 tbsp olive oil
  • 1 medium onion, finely diced (about 1 cup)
  • 2 carrots, finely diced (½ cup)
  • 2 celery stalks, finely diced (½ cup)
  • 3 garlic cloves, minced
  • 2 tbsp tomato paste
  • 1 cup (240 ml) dry red wine (optional)
  • 1 can (28 oz / 800 g) crushed tomatoes
  • 1 cup low-sodium beef or chicken stock
  • 1 tsp dried oregano, 1 bay leaf
  • Salt & pepper to taste
  • 2 tbsp unsalted butter or splash of heavy cream (optional, to finish)
  • Fresh parsley and grated Parmesan to serve

Step-by-step method (ultra detailed)

1. Heat pan & start meat browning (10–12 min)

  • Use a large heavy skillet or Dutch oven over medium-high heat. Add 2 tbsp olive oil — it should shimmer but not smoke.
  • Add half the ground meat in one flat layer. Let it sit 2 minutes untouched to form color, then break up with a spoon and stir. Continue browning for 6–8 minutes, turning pieces so they develop deep brown bits. Do not rush; brown = flavor.
  • If you use fatty meat, you may have excess fat. Spoon out and discard all but about 1–2 tbsp (leave some fat for flavor). Do not rinse the pan.

Why this matters: Proper browning (Maillard reaction) creates the flavor foundation your sauce needs.

2. Add aromatics (soffritto) (6–8 min)

  • Reduce heat to medium. Add diced onion, carrot, and celery. Stir to coat in fat.
  • Sauté until vegetables soften and onions become translucent — about 6–8 minutes. Stir often so carrots gently soften and sugar begins to develop.
  • Add minced garlic and cook for 30–60 seconds until fragrant. Don’t let garlic brown.

3. Tomato paste browning (1–2 min)

  • Push mixture aside and add 2 tbsp tomato paste. Let it cook for 60–90 seconds, stirring, until it darkens slightly — this caramelizes the paste and intensifies umami.

4. Deglaze with wine (2–3 min)

  • Pour in 1 cup red wine, scraping brown bits from the pan with a wooden spoon. Raise heat to medium-high for a minute to let alcohol cook off and flavors concentrate.
  • Let the wine reduce by about half — about 2–3 minutes.

5. Add tomatoes/stock & herbs (2 min)

  • Stir in crushed tomatoes and 1 cup stock. Add oregano, bay leaf, and a good pinch of salt & black pepper.
  • Bring to a gentle simmer.

6. Low simmer & reduce (45–90+ min)

  • Reduce heat to low so the sauce barely bubbles. Simmer uncovered for 45 minutes minimum. Stir every 10–15 minutes, scrape bottom and check consistency.
  • Longer simmering (1–2 hours) deepens flavor. If the sauce becomes too thick, add small amounts of stock or reserved pasta water.
  • Taste and adjust salt/pepper after 30–45 minutes — flavors concentrate during simmering.

7. Finish & emulsify (1–2 min)

  • Remove bay leaves. Off heat, stir in 1–2 tbsp butter or a splash of cream for silkiness. Check seasoning.
  • If the sauce tastes very acidic, stir in a pinch of sugar (1/4–1/2 tsp) to balance.

8. Cook pasta & combine

  • While sauce simmers near the end, bring a large pot of water to a vigorous boil. Add 1 tbsp salt (it should taste like the sea). Cook pasta according to the package until al dente (one minute less than package if unsure). Reserve ½–1 cup pasta water, drain.
  • Add pasta to a sauce pan or toss sauce with pasta in a large bowl. Use reserved pasta water (1–3 tbsp at a time) to loosen and help the sauce cling.

Serving: Plate, top with grated Parmesan and chopped parsley. Serve hot.

Personal experience note: I learned to brown the meat in two batches for even coloring — it changed my sauce from “okay” to “deep and rich.” Overcrowding the pan is a common home cook mistake.

Recipe 2 — Creamy Meat Sauce (Meat + Cream / Cheese)

A richer version, lovely with penne or rigatoni.

Ingredients (4 servings)

  • 1 lb ground Italian sausage (mild or spicy) or 50/50 sausage + beef
  • 2 tbsp olive oil
  • 1 small onion, finely chopped
  • 2 garlic cloves, minced
  • 1/2 cup dry white wine (optional)
  • 1 cup heavy cream
  • 1/2 cup grated Parmesan (fresh)
  • 1 tsp fresh thyme or 1/2 tsp dried
  • Salt & pepper

Detailed steps

1. Brown meat (8–10 min)

  • Heat 2 tbsp oil over medium-high. Add meat, break into small pieces, and brown thoroughly. If using sausage, remove casings first.

2. Sauté aromatics (3–4 min)

  • Add onion and cook until translucent. Add garlic last 30–45 sec.

3. Deglaze (1–2 min)

  • Add white wine, scraping bottom. Reduce by half.

4. Add cream & reduce (4–6 min)

  • Lower heat to medium-low. Stir in heavy cream and simmer gently until it slightly thickens — 4–6 minutes.

5. Add cheese & herbs (1–2 min)

  • Add Parmesan in small spoonfuls, stirring to melt. Season with thyme, salt, and lots of black pepper.

6. Combine with pasta

  • Toss with cooked rigatoni or penne; add pasta water if needed.

Tip: If the sauce is too thin, simmer longer, or add a tablespoon of cornstarch slurry (1 tbsp cornstarch + 2 tbsp cold water) and simmer for 1–2 minutes.

Personal note: I sometimes add a handful of sautéed mushrooms for earthiness; it balances the cream.

What pasta shapes are best? (pairing logic)

Choose shapes that match sauce weight:

  • Thick, meaty Ragù / Bolognesepappardelle, rigatoni, penne (wide or ridged pieces collect sauce)
  • Chunky/meaty tomato → fusilli, rigatoni, orecchiette
  • Creamy meat sauces → penne, rigatoni (tube shapes help hold the sauce)

Rule: Heavier sauce = sturdier pasta.

Serving & presentation (step-by-step plating)

  1. Place hot pasta in a warmed shallow bowl.
  2. Spoon 2–3 ladles of sauce over the center.
  3. Toss lightly or serve sauce on top for a rustic look.
  4. Finish with a drizzle of good olive oil, grated Parmesan, and chopped parsley.
  5. Optional: Add a small basil leaf for color.

Serve with crusty bread, and a green salad dressed simply with lemon and olive oil.

Make-ahead, storage & reheating (exact instructions)

Refrigeration: Cool sauce to room temp (<2 hours), then store in an airtight container. Tomato-based: 3–4 days. Creamy: 2–3 days.

Freezing: Tomato-based sauces freeze well for up to 3 months. Cool fully, place in freezer containers leaving headspace. Creamy sauces can separate—freeze only if necessary.

Thaw & reheat: Thaw overnight in the fridge. Reheat gently in a pan on low heat with a splash of water or stock; stir to recombine. For creamy sauces, whisk in a splash of milk or cream while reheating.

Reheating pasta: Toss reheated sauce with freshly boiled pasta or reheat pasta briefly in boiling water for 30 seconds and drain.

Expert tips & troubleshooting (quick reference)

  • If sauce tastes thin/watery: Simmer uncovered longer; reduce liquid.
  • If sauce too thick: Add stock or reserved pasta water a little at a time.
  • If too acidic: Add a pinch of sugar or a small knob of butter.
  • If greasy: Chill, skim fat, then reheat; or add a splash of stock to emulsify.
  • If cheese clumps: Lower heat and add a tablespoon of hot liquid slowly while whisking.

Reserve pasta water: ½–1 cup per recipe. This starchy liquid is the secret to silky emulsification.

Nutritional estimates (per serving, approximate)

Dish (per serving)CaloriesProteinCarbsFatNotes
Tomato Ragù with Pasta (1 plate)600–750 kcal28–35 g60–80 g18–35 gFat depends on meat fat %
Creamy Meat Sauce with Pasta (1 plate)700–900 kcal25–35 g55–75 g30–50 gHigher fat due to cream & cheese

Use lean meat or decrease cream to lower calories.

Variations & global styles (use these ideas)

  • Cincinnati chili: Spiced meat sauce served over spaghetti — add cinnamon, cumin, chocolate.
  • Carbonara: Not a tomato sauce, but a meat based sauce served with pasta (pancetta/guanciale + eggs + cheese).
  • Caruso sauce: Cream + ham + mushrooms — a South American twist.
  • Saltsa kima: Greek ground meat sauce with cinnamon and allspice.
  • Swap meats: turkey or chicken for lighter versions, lamb for stronger flavor, sausage for instant seasoning.

FAQs About Meat Based Sauce Served with Pasta

Q Can I use only one meat?

Yes. Mixing meats adds depth, but single-meat sauces are common and delicious.

Q Do I always need wine?

No, but wine adds acidity and complexity. Use stock if you prefer.

Q How long should I simmer?

Minimum 45 minutes; 1–2 hours is best for deep flavor.

Q Does cream ruin tomato sauces?

No: a splash of cream at the end softens acidity and adds silkiness. Balance is key.

Final thoughts

A true meat based sauce served with pasta is simple in ingredients but rich in technique. Browning, deglazing, slow simmering, and finishing with butter or cheese are the small steps that add up to big flavor. 

Try the classic ragù and the creamy version to see which you prefer — and remember the little things I shared (reserve pasta water, don’t overcrowd the pan, simmer low and slow). From my kitchen to yours: take your time, taste as you go, and enjoy that comforting, meaty sauce over your favorite pasta.

Satisfying Two Ways Fusilloni Pasta Recipes Step by Step

0
Satisfying Two Ways Fusilloni Pasta Recipes Step by Step

If you’re a pasta lover searching for something rich, comforting, and versatile, you’re in the right place. Today, we’ll dive into Satisfying Two Ways Fusilloni Pasta, where you’ll learn how to make this unique pasta in two delicious versions: one creamy and cheesy, the other fresh and tomato-based.

In this article, I’ll guide you step by step through two recipes, share expert tips from my personal kitchen experience, and also give you serving ideas, storage solutions, and nutritional insights. By the end, you’ll know exactly how to master Fusilloni pasta at home.

What is Fusilloni Pasta?

Before cooking, let’s first understand what makes Fusilloni pasta so special.

Fusilloni is like the “big brother” of fusilli. While fusilli has small tight spirals, Fusilloni comes in much larger, bolder spirals. The advantage? The grooves catch and hold onto sauces—whether thick creamy cheese or light tomato-based ones.

Unlike penne or spaghetti, Fusilloni feels hearty and satisfying, perfect for baked dishes, cheesy casseroles, or flavorful salads. I’ve often found that when I serve Fusilloni, my guests are impressed because it feels a little more “gourmet” than everyday pasta.

Tools & pantry items you’ll need 

Before cooking, gather:

  • Large pot (6–8 quart) for boiling pasta
  • Large heavy skillet or sauté pan (at least 12 in / 30 cm)
  • Wooden spoon and silicone spatula
  • Fine grater (for fresh Parmesan)
  • Chef’s knife and cutting board
  • Colander or spider strainer
  • Measuring cups & spoons
  • Small bowl or jar to whisk dressing (for small additions)
  • Kitchen thermometer (optional)
  • Tongs for tossing

Having these ready prevents interruptions and keeps timing accurate.

Ingredients (exact amounts for 4 servings)

Recipe A — Creamy Garlic Parmesan Fusilloni

  • Fusilloni pasta — 400 g (about 14 oz)
  • Water for boiling — about 4–5 L (enough to boil freely)
  • Kosher salt — 1 tablespoon for the pot (roughly 17 g)
  • Extra-virgin olive oil — 1 tbsp
  • Unsalted butter — 2 tbsp (30 g)
  • Garlic — 3 large cloves, minced (about 1.5 tbsp)
  • Heavy cream — 1 cup (240 ml)
  • Freshly grated Parmesan — 1¼ cup (about 100–120 g)
  • Freshly cracked black pepper — to taste (start with ½ tsp)
  • Fresh parsley, chopped — 2 tbsp for garnish
  • Optional: lemon zest — ½ tsp (brightens richness)

Recipe B — Tomato Basil Fusilloni with Mozzarella

  • Fusilloni pasta — 400 g (14 oz)
  • Kosher salt — 1 tbsp for pot
  • Extra-virgin olive oil — 3 tbsp (for sauce + finishing)
  • Garlic — 3 cloves, minced
  • Yellow onion — ½ medium, finely chopped
  • Cherry tomatoes — 400 g (about 3 cups), halved (or 2 large tomatoes diced)
  • Fresh basil — 1 cup loosely packed, torn
  • Fresh mozzarella pearls — 1–1¼ cups (mini bocconcini), drained
  • Red pepper flakes — optional ¼ tsp
  • Salt & pepper — to taste
  • Optional: Balsamic glaze or a splash of good balsamic — 1 tsp for depth

Before you cook — mise en place (do this first)

Do these prep steps. They save time and prevent mistakes:

  1. Measure all ingredients into small bowls. Grate the cheese, chop garlic, onion, and parsley, halve tomatoes, and tear basil.
  2. Bring your large pot of water to a vigorous boil. Add salt only when water is boiling—it dissolves better and seasons the pasta properly.
  3. Preheat your largest skillet on medium so it’s ready when pasta is done (especially important for the creamy sauce).

I always do mise en place. Once I started prepping everything first, my pasta timing went from “close” to “perfect” — no overcooked noodles and no frantic chasing for utensils.

Step-by-Step: Recipe A — Creamy Garlic Parmesan Fusilloni

This section explains every single action. Read fully before starting and follow in sequence.

1. Start water for pasta

  • Fill the pot with 4–5 L cold water. Place on high heat and bring to a rolling boil.
  • When water is boiling, add 1 tablespoon kosher salt. The water should taste like the sea — this is your only chance to season the pasta from inside.

2. Cook pasta to al dente

  • Add 400 g fusilloni. Stir immediately to prevent sticking (use a long-handled spoon).
  • Cook according to the package minus 1 minute — fusilloni often 11–13 minutes, so test at minute 10. Use the “bite test”: pasta should be tender with slight resistance in the center (not chalky).
  • Reserve ½ cup (120 ml) of pasta cooking water before draining. Why? Starchy water helps emulsify and loosen sauces later. I never skip this.

3. Drain & set aside

  • Drain quickly in a colander. Don’t rinse for the creamy version — rinsing removes surface starch that helps sauce cling.
  • Return the drained pasta to the pot off the heat while you finish the sauce, keeping it warm.

4. Make the sauce (while pasta cooks or right after)

  • Place the skillet on medium heat. Add 1 tbsp olive oil + 2 tbsp butter. Let butter melt completely but don’t brown.
  • Add minced garlic and sauté 30–45 seconds until fragrant — never let garlic darken (it tastes bitter).
  • Pour in 1 cup heavy cream and lower heat to medium-low. Let it come to a gentle simmer (small bubbles at edges). Simmer 3–4 minutes to slightly reduce and thicken. Stir frequently.
  • Lower heat to low. Gradually add 1¼ cup grated Parmesan in small handfuls, stirring constantly until melted and silky. If cheese clumps, reduce heat and stir; do not boil.
  • Taste and season with salt & freshly cracked black pepper. Add a tiny pinch of nutmeg if you like warmer notes (optional).

5. Emulsify sauce with pasta water

  • If the sauce feels too thick, add 1–2 tbsp reserved pasta water, whisking to loosen. Keep adding 1 tbsp at a time until you reach a coat-the-pasta consistency. Aim for a glossy, clingy sauce — not watery.

6. Combine pasta & sauce

  • Add cooked fusilloni to the skillet and toss gently with tongs or a spatula until each spiral is coated. Work quickly but gently to avoid crushing pasta.
  • If sauce thickens while tossing, add another splash of pasta water. The starch helps the cream and cheese bind to the pasta.

7. Final touches & plating

  • Remove from heat. Add a light zest of lemon (optional) and fold in half the chopped parsley.
  • Plate immediately and garnish with the remaining parsley and extra Parmesan. Serve hot.

Troubleshooting: If sauce breaks (oil separates) — take the pan off heat, whisk in a tablespoon of cold water and a small spoon of grated cheese slowly to bring it back together.

Personal note: I learned to add lemon zest after a friend’s suggestion — it cuts richness and brightens the dish. Try it and see if you like the lift.

Step-by-Step: Recipe B — Tomato Basil Fusilloni with Mozzarella

Again, do these steps in order for the best texture and flavor.

1. Boil pasta (same as Recipe A)

  • Bring 4–5 L water to boil, salt it, add fusilloni, and cook to al dente. Reserve ½ cup pasta water. Drain and set aside in the pot.

2. Make tomato-basil sauce

  • Heat a large skillet over medium. Add 2–3 tbsp olive oil.
  • Add chopped onion; sauté 3–4 minutes until translucent, stirring occasionally.
  • Add minced garlic and sauté 30–45 seconds (do not brown).
  • Add halved cherry tomatoes (or diced ripe tomatoes). Cook on medium-high until they start to break down (6–8 minutes). Stir and press with spatula to release juices.
  • If tomatoes are very acidic, add a small pinch of sugar (¼ tsp) to balance. Optional: add 1 tsp balsamic for depth.
  • Add torn basil leaves and stir. Season with salt and pepper, and red pepper flakes if using.

3. Finish sauce and combine

  • Turn heat to low. Add reserved pasta water a splash at a time until sauce has loosened enough to coat pasta (you want a saucy, not soupy, finish).
  • Add drained fusilloni to pan and toss gently until blooms of sauce are packed into the spirals.

4. Add mozzarella

  • Remove the pan from heat. Immediately fold in mozzarella pearls. The residual heat will soften them without making the dish greasy.
  • If you prefer melted mozzarella, pop the whole pan under a hot broiler for 1–2 minutes—watch closely—or plate and let cheese melt naturally.

5. Serve

  • Garnish with extra basil and a drizzle of good olive oil. A light grind of black pepper on top finishes it nicely.

Personal note: I sometimes roast half the tomatoes for 20 minutes at 200°C (400°F) with olive oil and salt first — that adds a smoky sweetness which I love. It’s a little extra time but worth it when you want depth.

For further guidance, you can also watch this cooking video: Fusilloni Pasta Recipe Video.

Fusilli Pasta | Quick Fusilli Pasta Recipe

Expert techniques & fine points (don’t skip these)

These are small actions that make a big difference:

  1. Salt the water properly. Use roughly 1 tbsp kosher salt per 4–5 L water. This seasons the pasta internally.
  2. Test early for al dente. Bite into one piece; you should feel a tiny white center. Pasta continues to soften after draining.
  3. Reserve pasta water. Always save at least ½ cup. It contains starch that builds the sauce body and helps emulsify oils/cheese into a silky coating.
  4. Low & slow for cheese. Heat low when adding cheese to avoid grainy texture. Freshly grated cheese melts better than pre-shredded.
  5. Avoid overheating cream. If cream boils rapidly it can separate — keep to gentle simmer.
  6. Finish off-heat for mozzarella. Add fresh cheese off the heat so it softens but doesn’t become oily.
  7. Use good olive oil. For finishing and in sauces — it shows.
  8. Don’t over-dress. Sauce should coat — not drown — the pasta.

What does Fusilloni go with? (pairings & serving ideas)

Fusilloni is flexible. Pairings I recommend:

  • Proteins: grilled chicken, lemon-garlic shrimp, pan-seared salmon, Italian sausage.
  • Sides: crusty garlic bread, simple arugula salad with lemon vinaigrette, roasted seasonal vegetables.
  • Drinks: creamy version pairs well with a fuller white (Chardonnay) or light red (Pinot Noir); tomato basil with Sauvignon Blanc or light red.

When hosting, offer both recipes side-by-side. Guests love the contrast.

Make-ahead, storage & reheat — exact steps

Make-ahead:

  • Prepare components in advance: cook pasta, cool, and toss very lightly with a tsp olive oil to prevent sticking. Store in an airtight container in the fridge for up to 24 hours. Make sauce fresh the day you serve for the best texture.

Storage:

  • Creamy Fusilloni: refrigerate in an airtight container for up to 3 days.
  • Tomato Basil Fusilloni: keeps 3–4 days refrigerated; better for freezing.

Freezing:

  • Tomato version: cool completely, place in freezer-safe containers, freeze up to 2 months.
  • Creamy version: not recommended for freezing (cream may separate).

Reheating — stovetop method (best):

  1. Place leftovers in a skillet on low heat.
  2. Add 2–3 tbsp water, milk, or additional cream (for creamy) and heat, stirring gently until loosened and warmed through (about 5–7 minutes).
  3. For tomato, add a splash of olive oil while reheating.

Microwave method (faster):

  • Place pasta in a microwave-safe bowl, add a splash of water/olive oil, cover loosely, heat 60–90 seconds, stir, then continue in 30-second bursts until warm.

Nutritional facts (approximate per serving)

Estimates per serving (1 of 4) — values vary by exact brands and amounts:

RecipeCaloriesCarbsProteinFatSodiumVitamins
Creamy Garlic Parmesan Fusilloni~540 kcal~60 g~18 g~24 gModerate–High (depends on salt/cheese)
Tomato Basil Fusilloni w/ Mozzarella~430 kcal~58 g~16 g~12–15 gModerateVitamin C (tomatoes), Vitamin K (basil)

These are general estimates; use a nutrition calculator with your exact ingredients for precision.

Variations & customizations (ideas to try)

  • Add protein: Stir in shredded rotisserie chicken into the creamy sauce at the end.
  • Roasted veg version: Roast eggplant, zucchini, and peppers; fold into tomato pasta.
  • Spicy fusilloni: Sauté chili oil with garlic for a spicy base.
  • Vegan swap: Use full-fat coconut or cashew cream and nutritional yeast instead of parmesan; use vegan mozzarella.
  • Baked fusilloni: Transfer combined pasta to a baking dish, top with extra cheese and breadcrumbs, bake 12–15 minutes at 200°C (400°F).

FAQs About Satisfying Two Ways Fusilloni Pasta

Q: Can I use regular fusilli or penne?

A: Yes — fusilli captures sauce similarly. Penne works but gives a slightly different bite.

Q: How long does fusilloni take to cook?

A: Typically 11–14 minutes; always check package instructions and do a bite test.

Q: Why did my creamy sauce get grainy?

A: Usually because cheese was added at too-high heat or pre-shredded cheese with anti-caking agents was used. Reduce heat and add cheese slowly.

Q: Can I make the sauce dairy-free?

A: Yes — use cashew cream or full-fat coconut cream and a vegan cheese alternative.

Q: Best way to serve when hosting?

A: Keep pans on warm stovetop or chafing dishes for buffet style; garnish fresh basil/parsley just before serving to keep herbs bright.

Conclusion 

We’ve explored Satisfying Two Ways Fusilloni Pasta—one creamy garlic parmesan, and one tomato basil with mozzarella. Both bring out the best of Fusilloni’s spiral shape and sauce-holding texture.

Whether you want something indulgent and rich or fresh and light, Fusilloni pasta delivers a satisfying meal every time. Try both versions, customize them to your taste, and don’t forget to experiment with your own twists.

Best Zesty Garden Pasta Salad Recipe | Fresh, Tangy & Easy to Make

0


When you hear the words Best Zesty Garden Pasta Salad, you probably imagine something colorful, fresh, and full of flavor. And that’s exactly what this recipe delivers. This pasta salad is not just any ordinary side dish; it combines crisp garden vegetables, perfectly cooked pasta, and a bold homemade Italian dressing that ties everything together.

Pasta salads are loved everywhere, but this one stands out because of three things: the zesty kick from the dressing, the garden-fresh vegetables, and the fact that you’re making the Italian dressing completely at home. No bottled stuff, no shortcuts—just fresh, flavorful ingredients.

In this article, I’ll walk you through everything: the ingredients, step-by-step preparation, tips to avoid mistakes, variations, and even how to store it. You’ll also get some of my personal notes—what I usually do when making this salad, and how you can make it your own.

So, let’s begin by looking closely at the building blocks: the ingredients.

Ingredients & Why They Matter

Before we start cooking, it’s important to know why we’re using certain ingredients. A pasta salad might look simple, but every choice—from pasta shape to type of vinegar—can affect the flavor and texture.

Garden Salad Ingredients

The “garden” part of this salad means vegetables are the star. Here’s what I usually include:

  • Pasta choice: Rotini, fusilli, or penne. Spiral-shaped pastas are perfect because their curves trap the dressing. Personally, I prefer rotini since it holds the dressing in every twist. Some people like penne for a cleaner bite—try both and see which you prefer.
  • Cucumber: Adds a fresh crunch. I often peel mine for a softer texture, but leaving the skin gives extra color.
  • Cherry tomatoes: Sweet and juicy. Halved tomatoes spread evenly through the salad.
  • Bell peppers: Red, yellow, or orange peppers add sweetness and vibrant color.
  • Red onion: Sharp flavor that balances the creaminess of cheese and pasta. If onions feel too strong for you, soak them in cold water for 10 minutes first.
  • Spinach or fresh greens: These bring in a fresh, earthy note. I like adding baby spinach at the end for extra nutrition.
  • Extras: Sun-dried tomatoes, mozzarella balls, fresh basil or parsley. These are optional, but they take the salad to another level.

Optional enhancements: olives for saltiness, corn for sweetness, beans for protein, or even grilled zucchini for smoky flavor.

Homemade Italian Dressing Ingredients

The heart of this dish is the zesty homemade Italian dressing. Bottled dressings often taste flat, but when you make it at home, you control the flavor.

  • Olive oil: The base. Use extra virgin for the best flavor.
  • Vinegar: Red wine vinegar is classic, but white wine vinegar works too. Sometimes I even mix both.
  • Lemon juice: Adds brightness and freshness.
  • Dijon mustard: Helps emulsify the dressing so it blends smoothly.
  • Garlic: Freshly minced garlic gives a sharp punch.
  • Herbs: Oregano, basil, parsley—use fresh if you can, but dried herbs also work.
  • Salt & pepper: To taste. Always adjust at the end.
  • Balance: A pinch of sugar or honey softens the acidity, and grated Parmesan adds savory depth.

Tip: The better your olive oil and herbs, the better your dressing will taste. I once tried a low-quality oil, and the salad felt heavy. Switching to a fresh, fruity olive oil completely changed the experience.

Step-by-Step Preparation

Now that we’ve covered the ingredients, let’s move on to how to bring everything together.

Cooking the Pasta

Cooking pasta for a salad is slightly different from cooking it for hot dishes. Here’s why:

  1. Boiling water with salt – Always salt your water. This is the only chance to season pasta itself.
  2. Cooking to al dente – Overcooked pasta turns mushy in salads. Al dente pasta holds its shape even after mixing with dressing.
  3. Draining and rinsing – Some people rinse to cool the pasta faster. I usually rinse lightly, but not too much, because starch helps the dressing stick.
  4. Cooling pasta – Let pasta sit for a few minutes so it doesn’t steam the veggies when mixed.

I once made the mistake of mixing hot pasta directly with vegetables—it wilted my spinach and turned the cheese soft. Lesson learned: cool it first!

Making the Zesty Italian Dressing

The dressing is simple but powerful.

  1. Combine olive oil, vinegar, lemon juice, and Dijon mustard in a bowl.
  2. Whisk until the mixture begins to emulsify.
  3. Add garlic, herbs, salt, and pepper.
  4. Taste and adjust: if it’s too sharp, add a drop of honey; if too flat, add more vinegar.

Here’s my tip: let the dressing sit for 5–10 minutes before using it. This allows the flavors to meld together beautifully. Sometimes I even make it the night before and keep it in the fridge; the taste becomes richer that way.

Assembling the Salad

Now comes the fun part—putting everything together.

  1. Toss the pasta with half the dressing first. This coats it evenly.
  2. Add vegetables, mozzarella, and any extras.
  3. Mix gently so nothing gets crushed.
  4. Pour the rest of the dressing and mix again.
  5. Garnish with basil, parsley, or cracked pepper.

I like to save a handful of cherry tomatoes and basil leaves to place on top—it makes the dish look as good as it tastes.

Chilling & Serving

Pasta salad tastes better after resting. Refrigerate it for at least 30 minutes to let the flavors blend. Stir before serving to redistribute the dressing.

I personally prefer serving it cold, especially during summer BBQs. But if you enjoy it closer to room temperature, that works too.

4. Make-Ahead & Storage

One of the reasons I love pasta salads is their convenience.

  • Make-ahead: You can prepare it a day before. Just keep the dressing separate until you’re ready to serve.
  • Storage: Use airtight containers—glass jars keep flavors best.
  • Shelf life: Lasts 3–5 days in the refrigerator.
  • Refreshing leftovers: If it feels dry, add a splash of olive oil or lemon juice before serving.

Pro Tips & Common Mistakes

Here are some lessons I’ve learned after making pasta salad many times:

  • Don’t overcook pasta — mushy pasta ruins the texture.
  • Use crisp, fresh vegetables for crunch.
  • Chop evenly so each bite has a mix of flavors.
  • Don’t drown it in dressing — start with less, then add more if needed.
  • Always chill before serving to let flavors meld.

One mistake I made early on was adding too much onion. A little goes a long way, so keep it balanced.

I’ve shared step-by-step instructions and my own tips above; if you’d like extra ideas from home cooks and live discussion, check this thread where people swap pasta-salad tips and variations.

Variations & Custom Versions

The beauty of this salad is how easily you can adapt it. Some great variations include:

  • Protein additions: grilled chicken, shrimp, tuna, or even boiled eggs.
  • Vegetarian/vegan options: chickpeas, tofu, or beans instead of cheese/meat.
  • Gluten-free pasta if needed.
  • Creamy twist: add a spoon of Greek yogurt or mayo to the dressing.
  • Seasonal swaps: zucchini in summer, roasted squash in autumn.
  • Spicy kick: sprinkle in red pepper flakes or sliced jalapeños.

I personally love adding grilled zucchini or corn when it’s in season — it makes the salad even more colorful and flavorful.

Pairing & Serving Suggestions

Wondering what to serve with your Best Zesty Garden Pasta Salad? Here are some perfect matches:

  • Grilled meats like chicken, steak, or sausages.
  • Burgers at a BBQ.
  • Garlic bread, focaccia, or breadsticks.
  • Light vegetable sides.
  • As a standalone lunch on hot summer days.

When serving at a party, I usually garnish it with extra basil and serve it in a glass bowl so all the colors show through.

If you prefer a visual walkthrough, I’m also adding a short YouTube tutorial that demonstrates making an Italian-dressing pasta salad step-by-step.

The Only Pasta Salad I Bring to Cookouts (Everyone Wants It)

Nutritional Facts (per serving, approx.)

NutrientAmount
Calories280–320 kcal
Carbohydrates32–36 g
Protein8–10 g
Fat14–16 g
– Saturated Fat3–4 g
– Unsaturated Fat10–11 g
Fiber3–4 g
Sugar4–6 g
Sodium280–350 mg
Cholesterol10–15 mg
Vitamin C20–25% DV
Vitamin A15–18% DV
Calcium10–12% DV
Iron8–10% DV

Frequently Asked Questions (FAQ)

Q: Why is my salad bland?

Usually because of underseasoned dressing. Add salt, lemon, or Parmesan to boost flavor.

Q: Should it be served cold or room temperature?

Both work, but chilling brings out the best flavor.

Q: Should I rinse pasta or not?

A light rinse helps cool it quickly. Just don’t over-rinse or it loses starch.

Q: How to prevent sogginess?

Don’t overcook pasta, and avoid too much dressing.

Q: What pasta shape is best?

Rotini or fusilli—spirals hold the dressing perfectly.

Q: Can I double the recipe?

Yes, just double all ingredients. It’s perfect for large gatherings.

Q: What if I don’t have certain vegetables?

Swap with what’s in season—this salad is very flexible.

Personal Notes / Experience & Encouragement

Every time I make this salad, I notice one thing: it’s always gone fast. My family loves the freshness, and friends at BBQs often ask for the recipe.

Personally, I like making the dressing a little extra tangy with more lemon juice. Some people prefer it sweeter, and that’s fine—just adjust to your taste. That’s the beauty of homemade: you’re in control.

Don’t be afraid to experiment. Try adding your favorite veggies or proteins. This isn’t just about following steps—it’s about creating something that suits your style.

Conclusion / Final Thoughts

We’ve gone through everything—ingredients, steps, tips, variations, and storage. By now, you should feel confident to make the Best Zesty Garden Pasta Salad – Homemade Italian Dressing right at home.

The combination of fresh garden vegetables, perfectly cooked pasta, and a tangy homemade dressing creates a salad that’s not only delicious but also versatile. It works for family dinners, potlucks, or even as a light lunch.

So why not try it today? Make it your own, share it with loved ones, and enjoy the freshness of a true garden pasta salad.

Low Carb Pasta for Diabetics: Best Options & Tips

Low Carb Pasta for Diabetics

If you have diabetes, you already know how tricky pasta can be. ( Low Carb Pasta )It’s comforting, filling, and delicious—but it can also cause your blood sugar to jump if you’re not careful. The good news? You don’t have to say goodbye to pasta completely. You just need to make smarter swaps.

So, can diabetics eat pasta?
Yes, they can — especially when it’s low carb pasta for diabetics made from high-fiber ingredients and balanced properly in a meal.

In this article, I’ll walk you through everything you need to know — from what low carb pasta actually means, to the best low carb pasta for diabetics, how to cook it the right way. We’ll also compare nutrition, explore keto-friendly options, and share FAQs at the end so you can confidently include pasta in your diabetic meal plan.

What Is Low Carb Pasta and Why It Matters for Diabetics

Before diving into products and recipes, let’s first understand what makes pasta “low carb” and why that’s such a big deal for anyone managing blood sugar.

Low Carb Pasta: The Basics

Low carb pasta isn’t just “less pasta.” It’s made with alternative ingredients that naturally have fewer carbohydrates and more fiber or protein — like lentils, chickpeas, almond flour, or konjac (used in shirataki noodles). These ingredients digest more slowly, meaning your blood sugar rises gently instead of spiking.

Why It Matters for Diabetics

For diabetics, stable blood sugar is everything. High-carb foods—especially refined ones—can lead to quick glucose spikes and energy crashes. But when you switch to low carb pasta for diabetics, you’re choosing pasta that supports steady energy, better insulin response, and easier portion control.

From my experience, when I first switched from regular pasta to chickpea pasta, I noticed I felt full longer, and my post-meal energy was much more stable. It wasn’t just about cutting carbs—it was about finding balance.

Now that we understand why low carb pasta matters, let’s look at some top choices that fit perfectly into a diabetic-friendly kitchen.

Top Low Carb Pasta Brands for Diabetics (Chickpea, Shirataki, Almond Flour)

Top Low Carb Pasta Brands for Diabetics

Finding the best low carb pasta for diabetics can feel overwhelming with so many products on shelves. To make it easy, I’ve tested and shortlisted a few that stand out both in taste and nutrition.

1. Chickpea Pasta

Made entirely from chickpea flour, this pasta offers high protein and fiber, helping slow down glucose absorption. It’s firm, slightly nutty, and pairs well with tomato or olive oil-based sauces.

Nutrition per serving (56 g dry):

  • Net carbs: ~30 g
  • Protein: 13–14 g
  • Fiber: 8 g

Popular brands: Banza, Barilla Protein+, Explore Cuisine.
If you enjoy a hearty bite, chickpea pasta won’t disappoint.

2. Shirataki Noodles (Konjac-Based)

These translucent noodles are a miracle for anyone counting carbs. Made from glucomannan, a fiber from konjac yam, shirataki noodles are virtually zero-carb and calorie-free.

Nutrition per serving (100 g):

  • Net carbs: <1 g
  • Calories: 10–15
  • Fiber: 4 g

However, they do have a slightly slippery texture. The trick? Rinse them well and dry-fry in a pan before adding sauce — it improves the texture dramatically.
In my kitchen, I often pair shirataki noodles with grilled shrimp and a light lemon-garlic sauce — delicious and extremely light.

3. Almond Flour Pasta

A newer option in the market, almond flour pasta brings healthy fats and fiber to the table. It’s a bit richer in flavor and works beautifully for creamy, low-carb recipes.

Nutrition per serving (56 g dry):

  • Net carbs: ~25 g
  • Protein: 10 g
  • Fiber: 6 g

Brands like Blue Moose, Capello’s, or Kaizen offer good almond-based choices.

4. Edamame or Soybean Pasta

These green-hued noodles are made from soybeans or edamame, offering a unique taste and very low glycemic response.

Nutrition per serving:

  • Net carbs: 18–20 g
  • Protein: 24 g
  • Fiber: 10 g

These are ideal for diabetics who also want a plant-based protein boost.

So far, we’ve covered which pasta types are ideal. Now, let’s move on to how you should actually cook low carb pasta to keep your blood sugar steady.

How to Cook Low Carb Pasta for Stable Blood Sugar

How to Cook Low Carb Pasta for Stable Blood Sugar

Cooking technique makes a huge difference. Even the healthiest pasta can raise blood sugar if overcooked. Let’s go step by step.

Step 1 — Measure Carefully

For a meal serving 4 people, use 350 g dry pasta (about 12 oz). This yields roughly 4 cups cooked — a perfect balance for portion control.
Measure your pasta dry — I use a digital scale to stay accurate.

Step 2 — Use Plenty of Water

Boil your pasta in a large pot with plenty of water and a pinch of salt. Using more water prevents stickiness and improves texture, especially for lentil or chickpea pasta.

Step 3 — Cook Al Dente

Cook 1–2 minutes less than the package says. “Al dente” pasta keeps its structure and digests slower, lowering the glycemic impact.

When I tested this, I noticed my glucose readings were lower when I stopped cooking chickpea pasta just before it became soft. That small difference really matters.

Step 4 — Rinse or Cool (Optional Trick)

If you’re meal prepping, rinse cooked pasta under cold water and refrigerate it. Cooling creates resistant starch, which behaves like fiber and reduces the overall glycemic load.
(You can check my earlier post on diabetic-friendly pasta where I explained this cooling method in more detail.)

Step 5 — Pair Wisely

Serve pasta with:

  • Protein (20–30 g/person): chicken, tofu, or fish.
  • Vegetables: spinach, broccoli, bell peppers.
  • Healthy fats: olive oil, nuts, or avocado.

Step 6 — Smart Sauces

Avoid sugary or creamy sauces. Use tomato, pesto, or olive oil-based sauces with herbs and garlic. They taste great and won’t spike blood sugar.

Now that we’ve mastered the cooking part, let’s move toward something more personal — the meal I actually cook most often when I crave pasta but want to stay on track.

My Favorite Low Carb Pasta Meal (Experience-Based Tips)

Here’s a simple yet flavorful meal I often make for my family — perfect for 4 people.

Creamy Chickpea Pasta with Spinach & Mushrooms (Low Carb & Diabetic-Friendly)

Ingredients (serves 4):

  • 350 g chickpea pasta
  • 2 tbsp olive oil
  • 1 cup mushrooms (sliced)
  • 2 cups baby spinach
  • 1 medium onion (finely chopped)
  • 2 cloves garlic (minced)
  • ¾ cup unsweetened almond milk
  • 1 tsp cornstarch (optional for thickness)
  • Salt, black pepper, chili flakes (to taste)
  • Fresh lemon juice (1 tbsp)

Instructions:

  1. Cook chickpea pasta al dente, reserve ½ cup pasta water.
  2. In a large pan, heat olive oil and sauté onion until translucent.
  3. Add garlic and mushrooms, cook until browned.
  4. Stir in spinach, let it wilt.
  5. Add almond milk + a little reserved pasta water to create a light sauce.
  6. Mix in cooked pasta and season well.
  7. Finish with lemon juice and a sprinkle of herbs.

Serve warm. Each serving (approx. 1 cup pasta + veggies) balances carbs, fiber, and fat perfectly.
From experience, this dish feels indulgent but keeps my blood sugar completely steady for hours.

Balancing Carbs with Protein and Fiber

Even with the best low carb pasta, balance is key.
Pasta on its own is carbohydrate-heavy — adding protein and fiber ensures glucose rises slowly.

Why Protein Helps

Protein slows digestion and improves insulin response. Add lean chicken, fish, eggs, tofu, or legumes alongside your pasta.

Why Fiber Helps

Fiber reduces net carbs and increases fullness. Aim for 25–30 g fiber per day from pasta, veggies, nuts, and seeds.

Quick Balance Formula (Per Person):

  • 1 cup cooked low carb pasta
  • 1 cup non-starchy veggies
  • 20–30 g protein
  • 1 tsp olive oil or healthy fat

Follow this and you’ll create a meal that fits right into your diabetic plan without overloading carbs.

Nutrition Comparison: Regular vs Low Carb Pasta

TypeNet Carbs (g)Fiber (g)Protein (g)GI Range
Regular White Pasta40–422760–70
Whole Wheat Pasta35–386850–55
Chickpea Pasta30–3281340–45
Shirataki Noodles<140~0
Almond Flour Pasta2561035–40

As you can see, low carb pasta for diabetics offers lower net carbs and higher fiber — perfect for steady energy and glucose control.

FAQs on Low Carb Pasta for Diabetes

Can diabetics eat low carb pasta daily?

It’s best to have it 2–3 times a week as part of a balanced meal plan.

Is keto pasta for diabetics a good choice?

Yes, keto pasta options like shirataki or almond flour noodles can help reduce carb intake drastically.

How many carbs should a diabetic have in pasta?

Roughly 30–45 g total carbs per meal, depending on your personal plan. One serving (1 cup cooked) fits perfectly.

What are the best low carb pasta brands?

Banza, Explore Cuisine, Tolerant, and Kaizen are reliable picks.

Are low carb noodles for diabetes the same as gluten-free?

Not necessarily — some gluten-free pastas (like rice-based) are high GI, so always check the fiber and protein on the label.

Conclusion

Low carb pasta for diabetics isn’t about giving up what you love — it’s about making better choices that support your health. From chickpea to shirataki to almond flour pasta, you have plenty of satisfying options that won’t spike your blood sugar.

Cook al dente, control portions, and balance your meal with protein, veggies, and good fats. That’s the secret to enjoying pasta again without guilt.

I’ve tried it myself — and trust me, it’s possible to have both comfort and control on one plate. If you want more insight on pasta options and portion tricks, check out my earlier post on diabetic-friendly pasta for extra meal ideas and nutrition comparisons.

Pasta Seasoning Guide: Best Ways to Add Flavor to Pasta

0

If there is one ingredient that makes pasta truly shine, it’s not always the sauce—it’s the Pasta Seasoning. You might have the freshest noodles and the richest sauce, but without the right seasonings, your dish can feel flat. On the other hand, even the simplest olive oil and garlic pasta can taste heavenly when the seasoning is just right.

I’ve spent years experimenting with flavors in my own kitchen, testing everything from traditional Italian herbs to creative fusions. Over time, I realized that seasoning pasta is like building layers of flavor. Each ingredient you add—whether it’s basil, garlic, or a splash of lemon juice—plays its role in balancing the dish.

In this article, we’ll walk through the essentials of pasta seasoning step by step. First, we’ll talk about what pasta seasoning really means. Then, we’ll look at the different types of seasonings, how to combine them, and finally how to create your own blends. Along the way, I’ll share practical tips, mistakes to avoid, and even personal experiences that might help you cook with more confidence.

So, let’s begin with the basics.

What Does Pasta Seasoning Actually Mean?

When people hear the term “pasta seasoning,” they often think of one single spice mix. But in reality, pasta seasoning refers to a collection of herbs, spices, salts, and even acidic or spicy ingredients that come together to bring life to pasta dishes.

Think of plain boiled pasta—it doesn’t taste like much on its own. But the moment you toss it with olive oil, garlic, basil, and black pepper, it suddenly becomes fragrant, vibrant, and satisfying. That’s the power of seasoning.

The art lies in choosing which seasonings work best for the type of pasta you’re making. A creamy Alfredo calls for nutmeg and thyme, while a spicy arrabbiata needs red pepper flakes. Understanding these pairings is the first step to mastering pasta.

Now that we’ve understood the meaning, let’s move on to the different types of seasonings that can elevate your pasta.

Types of Pasta Seasonings and How They Work

To keep things simple, I like dividing pasta seasonings into groups. This way, it’s easier to know when and how to use them.

1. Fresh and Dried Herbs

Herbs are the backbone of pasta flavor. They bring freshness, aroma, and sometimes even sweetness.

  • Basil: The most iconic pasta herb. Fresh basil is perfect for pesto or to sprinkle at the end of cooking. Dried basil, on the other hand, blends well into sauces during simmering.
  • Oregano: Strong, earthy, and slightly bitter, oregano is excellent for tomato-based sauces. If I’m making marinara, oregano is non-negotiable.
  • Parsley: Light and fresh, parsley works as both a garnish and a flavor enhancer. It balances out rich, creamy sauces.
  • Thyme: Earthy and warm. I often use thyme in baked pasta or when making Alfredo—it holds up well during long cooking.
  • Rosemary & Sage: These herbs are stronger, so a little goes a long way. Rosemary pairs well with roasted vegetables, while sage shines in butter-based sauces.

Pro Tip: Fresh herbs are best added at the end, while dried herbs should go in earlier so they can release their full aroma.

2. Essential Spices

Spices bring warmth, depth, and sometimes a little heat.

  • Garlic: An absolute classic. Fresh garlic sautéed in olive oil forms the base of countless pasta sauces. Roasted garlic adds sweetness, while garlic powder is useful for quick blends.
  • Black Pepper: Freshly cracked black pepper sharpens the flavor of almost any pasta. It’s especially key in simple dishes like Cacio e Pepe.
  • Red Pepper Flakes: Just a pinch can take your pasta from mild to exciting. I love sprinkling them into aglio e olio for that perfect spicy kick.
  • Nutmeg: This one surprises many people, but a tiny pinch in creamy sauces makes them taste richer and more comforting.
  • Paprika: Sweet or smoked paprika can add color and a subtle depth. Smoked paprika, in particular, is amazing if you want a slightly smoky twist.

3. Salt and Salty Additions

Salt isn’t just a seasoning—it’s a flavor enhancer.

  • Salt in pasta water: Always add enough salt to your boiling pasta water. Pasta should absorb flavor from the start.
  • Anchovies: When cooked into sauce, they melt away, leaving behind a deep umami richness.
  • Capers and Olives: Great for Mediterranean-style pastas, adding bursts of briny flavor.
  • Cheese (Parmesan, Pecorino): Not only adds saltiness but also creaminess. A final sprinkle of cheese at the table always takes pasta up a notch.

4. Acidic Seasonings

Acid cuts through richness and balances heavy flavors.

  • Lemon Juice/Zest: Brightens seafood and vegetable pastas. Personally, I always keep a lemon nearby while cooking pasta—it saves dishes from tasting flat.
  • Vinegar: A splash of balsamic can add sweetness and tang to tomato sauces.
  • Tomatoes: Whether fresh or canned, they naturally bring acidity into the dish.

5. Heat and Spicy Flavors

If you enjoy a little adventure, heat is your friend.

  • Cayenne Pepper: Adds gentle heat without overpowering.
  • Hot Sauce: A few drops can make creamy pastas more exciting.
  • Fresh Chilies: When sautéed in oil, they release a sharp, fresh spiciness.

6. Creative Condiments

Sometimes unexpected ingredients make pasta unforgettable.

  • Mustard: A spoon of Dijon mustard in creamy sauces adds tang and depth.
  • Ketchup: While controversial, some people use it for quick tomato-based pasta.
  • Pesto: Not just a sauce—it can also be mixed into mayo, oil, or butter as a seasoning base.

If you’d like to explore more ideas, I’m linking a Quora discussion: What seasonings and spices can go on pasta?. It’s a useful resource packed with tips and suggestions to make your pasta dishes more flavorful and exciting.

Making Your Own Pasta Seasoning Blend

Now that we’ve gone through all the categories, let’s talk about making your own blend. A homemade pasta seasoning mix is handy when you want quick flavor without measuring every herb individually.

I’ll give you 4 easy-to-make pasta seasoning mixes, and for each, I’ll also mention which type of pasta dish they go best with. All blends will use simple ingredients you can easily store.

1. Classic Italian Pasta Seasoning

This one works beautifully with marinara, arrabbiata, or any tomato-based pasta dish. The balance of oregano and basil enhances tomato flavors naturally.

Ingredients:

  • 1 tbsp dried oregano
  • 1 tbsp dried basil
  • 1 tsp garlic powder
  • 1 tsp onion powder
  • ½ tsp crushed red chili flakes
  • ½ tsp black pepper

Steps:

  1. Mix all ingredients in a small bowl.
  2. Store in an airtight jar.
  3. Use 1–2 tsp per serving of tomato pasta sauce for that authentic Italian kick.

2. Garlic Lover’s Pasta Seasoning (Best for Creamy & Alfredo Pasta)

If you enjoy white sauces, Alfredo, or cheesy creamy pasta, this blend adds depth with garlic and parsley.

Ingredients:

  • 1 tbsp garlic powder
  • 1 tbsp dried parsley
  • 1 tsp onion powder
  • 1 tsp dried thyme
  • ½ tsp ground black pepper
  • ½ tsp nutmeg (optional, but amazing in creamy sauces)

Steps:

  1. Mix all spices in a jar.
  2. Store in a cool, dry place.
  3. Add 1 tsp while cooking cream sauces or sprinkle on top before serving.

3. Spicy Kick Pasta Seasoning (Best for Penne Arrabbiata or Spicy Lovers)

Perfect for those who love pasta with a fiery touch. Works best with penne, spaghetti, or even baked pasta.

Ingredients:

  • 1 tbsp dried chili flakes
  • 1 tbsp smoked paprika
  • 1 tsp dried oregano
  • 1 tsp dried basil
  • ½ tsp black pepper
  • ½ tsp garlic powder

Steps:

  1. Mix and store in a glass jar.
  2. Add ½ tsp for mild spice or 1 tsp+ for extra hot flavor.
  3. Works best when sautéed in olive oil before adding pasta or sauce.

4. Mediterranean Herb Pasta Seasoning (Best for Olive Oil & Light Pastas)

This blend is lighter and fragrant, perfect for Aglio e Olio, pesto pasta, or lemon-butter pasta.

Ingredients:

  • 1 tbsp dried thyme
  • 1 tbsp dried rosemary (crushed)
  • 1 tsp dried parsley
  • 1 tsp lemon zest (dried if storing)
  • ½ tsp oregano
  • Pinch of sea salt

Steps:

  1. Mix herbs and zest together.
  2. Store in an airtight container.
  3. Toss cooked pasta with olive oil and 1 tsp of this seasoning for a fresh Mediterranean taste.

Pro Tip from my own cooking experience:
Make small jars of each blend, label them (Classic, Creamy, Spicy, Mediterranean), and keep them near your stove. Trust me, when you’re in a rush, just tossing a teaspoon into your sauce saves time and makes it taste like you worked much longer than you actually did.

For more guidance, check out this Reddit thread: Spices for Plain Pasta. Along with a YouTube video, it highlights different spice combinations that can make even the simplest pasta taste amazing.

Pizza Seasoning Recipe | Italian Seasoning Recipe – Dominos Style Seasoning

How and When to Add Seasonings

We’ve discussed what seasonings to use, but the real trick is knowing when to add them.

  1. At the start: Build your flavor base. Heat olive oil, then add garlic, onions, or chili flakes. This step sets the tone for your dish.
  2. During cooking: Add dried herbs and spices while simmering sauces so their flavors develop fully.
  3. At the end: Finish with fresh herbs, lemon zest, or cheese to brighten the dish.
  4. At the table: Leave salt, pepper, and chili flakes for customization—every guest can adjust according to taste.

Adjusting Pasta Seasonings for Different Dishes

Every pasta dish has its own personality, and the seasoning should match it.

  • Marinara: Go heavy on oregano, garlic, and red pepper flakes for boldness.
  • Pesto Pasta: Balance with extra lemon juice or Parmesan to keep it fresh.
  • Alfredo: A pinch of nutmeg brings warmth and richness.
  • Arrabbiata: Double the chili flakes for an authentic fiery kick.
  • Pasta Primavera: Mix and match fresh herbs with seasonal vegetables.

My Personal Experience with Seasonings

When I first started cooking pasta, I made the mistake of throwing everything in at once—garlic, herbs, spices, lemon juice—all dumped together. The result was often messy and overwhelming.

Over time, I learned that pasta seasoning is about balance and patience. Sauté garlic slowly, let dried herbs simmer, and always taste before adding more salt or chili. Sometimes the simplest combinations, like olive oil, garlic, and parsley, taste better than complicated blends.

Another lesson I’ve learned is that experimenting can lead to amazing discoveries. For example, once I added smoked paprika to a creamy mushroom pasta, and it became one of my favorite comfort dishes.

Common Mistakes to Avoid

  1. Not salting pasta water: Pasta without salted water will always taste flat.
  2. Burning garlic: Garlic burns quickly—cook it on low heat.
  3. Over-seasoning: Too many herbs can clash. Start light and build up.
  4. Ignoring freshness: Old dried herbs lose flavor. Replace them every few months.
  5. Adding fresh herbs too early: They lose aroma if cooked for too long.

FAQs About Pasta Seasoning

1. What are the top seasonings for pasta?

 Basil, oregano, garlic, black pepper, and red pepper flakes.

2. Can I make pasta without herbs?

Yes, garlic, pepper, lemon, and cheese can still create rich flavors.

3. Is fresh seasoning always better than dried?

Fresh herbs are brighter, but dried herbs are more concentrated. A mix of both works best.

4. Can I use infused oils?

Definitely. Garlic or chili-infused olive oil instantly upgrades pasta.

5. How do I make pasta taste restaurant-quality?

Use high-quality olive oil, fresh herbs, and always layer flavors step by step.

Conclusion

At the end of the day, Pasta Seasoning is what makes pasta exciting. Whether it’s basil for freshness, chili flakes for heat, or nutmeg for creaminess, each seasoning plays a role in creating balance.

We started by discussing what pasta seasoning really means, then explored herbs, spices, acids, and condiments. From there, we went into homemade blends, timing, personal experiences, and mistakes to avoid. Hopefully, you now feel confident enough to season pasta like a pro.

So next time you cook pasta, don’t just rely on the sauce—focus on the seasoning. A sprinkle of the right spice, a handful of herbs, or a squeeze of lemon might just turn your pasta into the best meal of your week.